> For the complete documentation index, see [llms.txt](https://help.listly.io/llms.txt). Markdown versions of documentation pages are available by appending `.md` to page URLs; this page is available as [Markdown](https://help.listly.io/getting-started/databoard-features/settings-auto-login.md).
# Settings - Auto Login (Beta)
## What is Auto Login?
An experimental beta feature using advanced encryption to automatically save login credentials. When configured, it stores your login info for any website, letting you extract data requiring authentication without manual login steps.
***
## How to Use
{% stepper %}
{% step %}
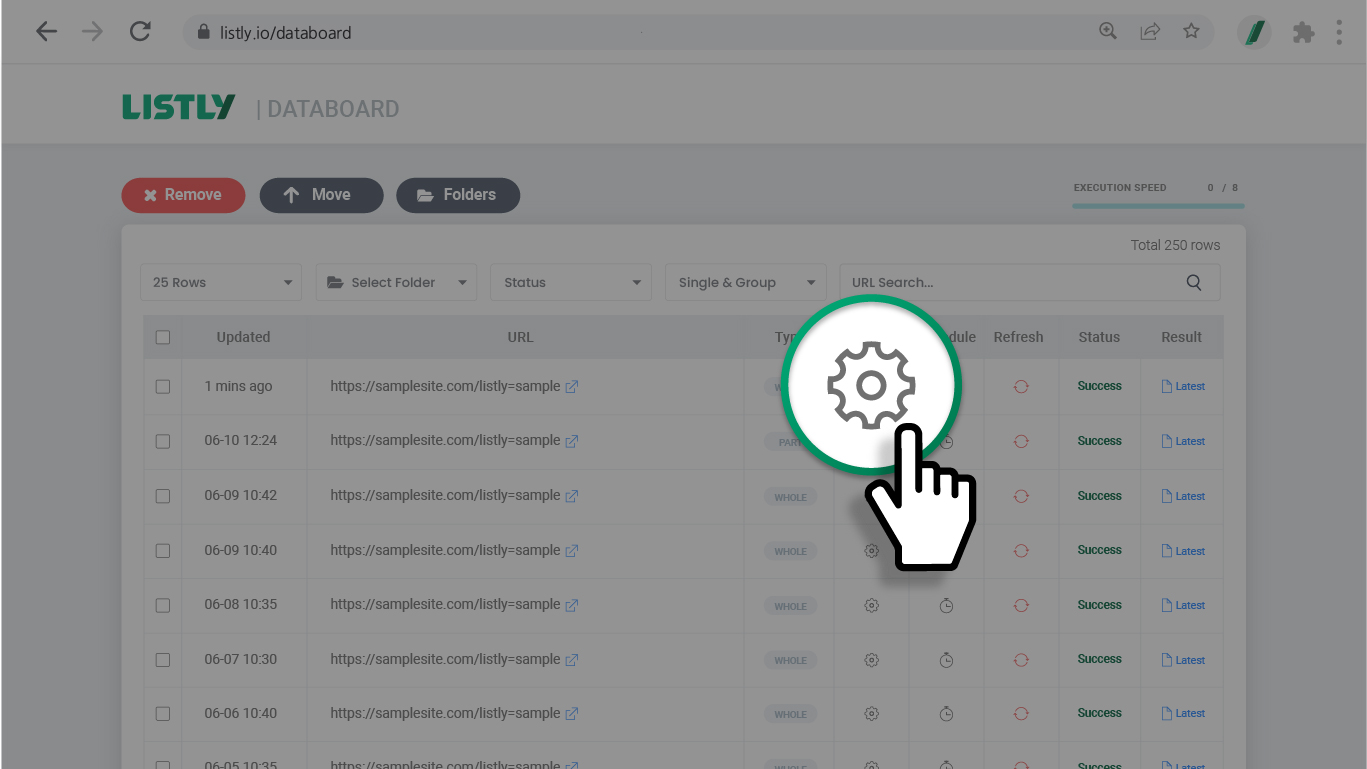
#### Click the **settings icon** in Databoard
In Databoard, click the gear icon for the task you want to configure auto-login for and head to the settings page.
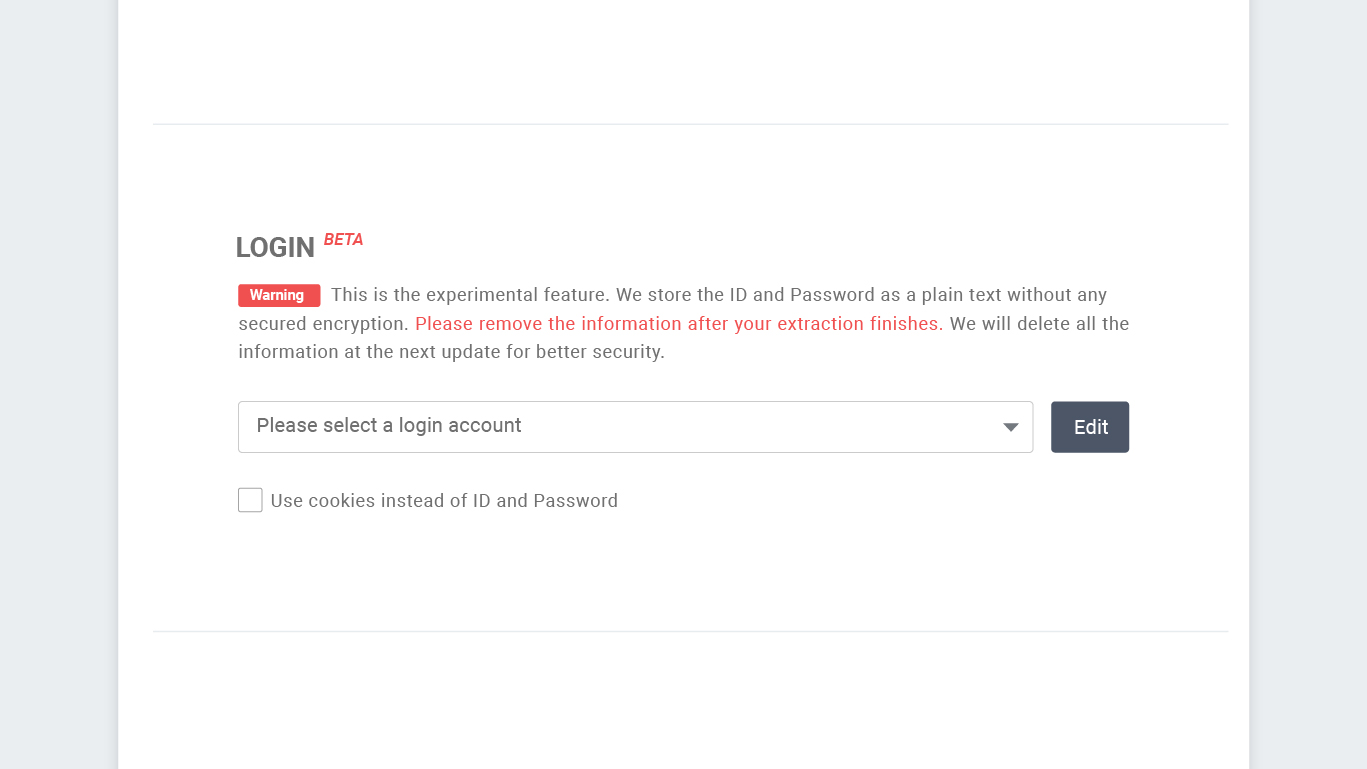
The auto login input fields are located in the middle of the settings page.
{% endstep %}
{% step %}
#### **Enter** your auto login information
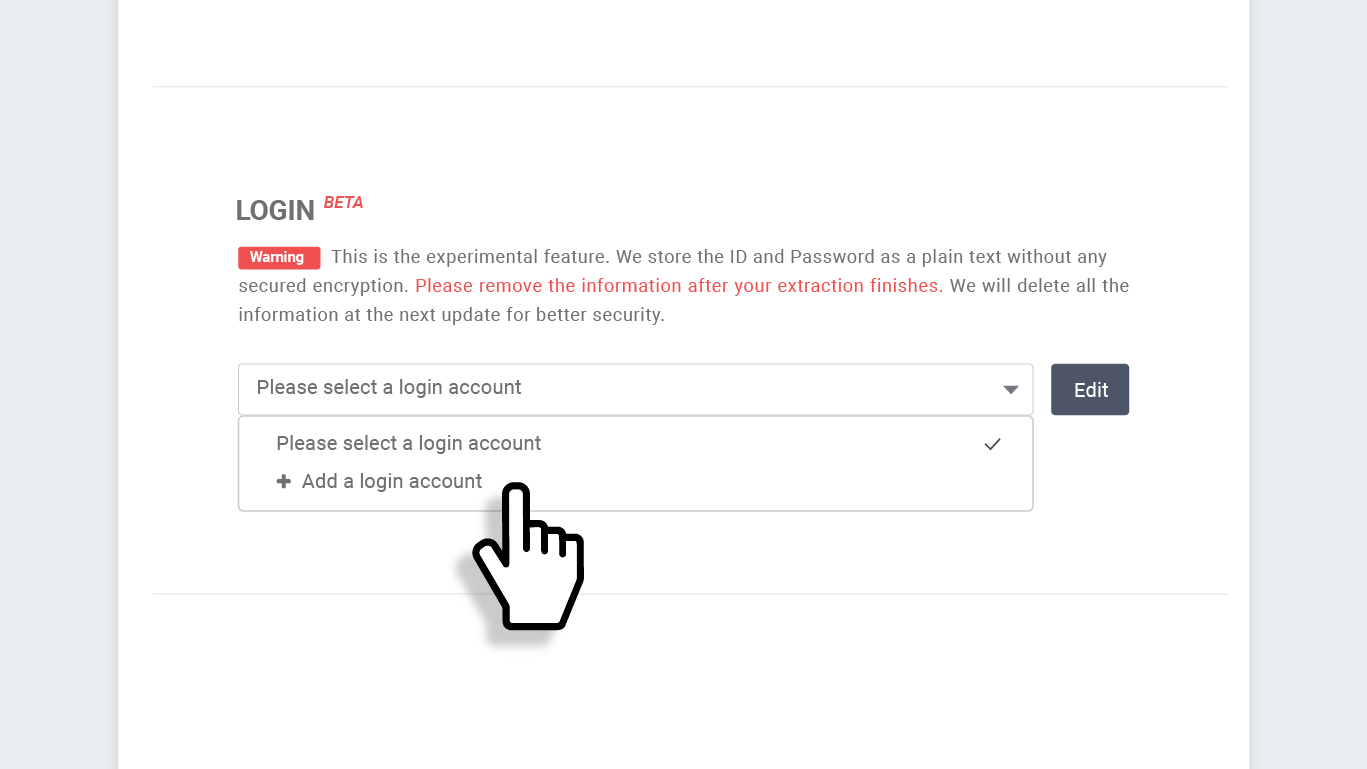
Click the dropdown menu, then select **+ Add a login account**.
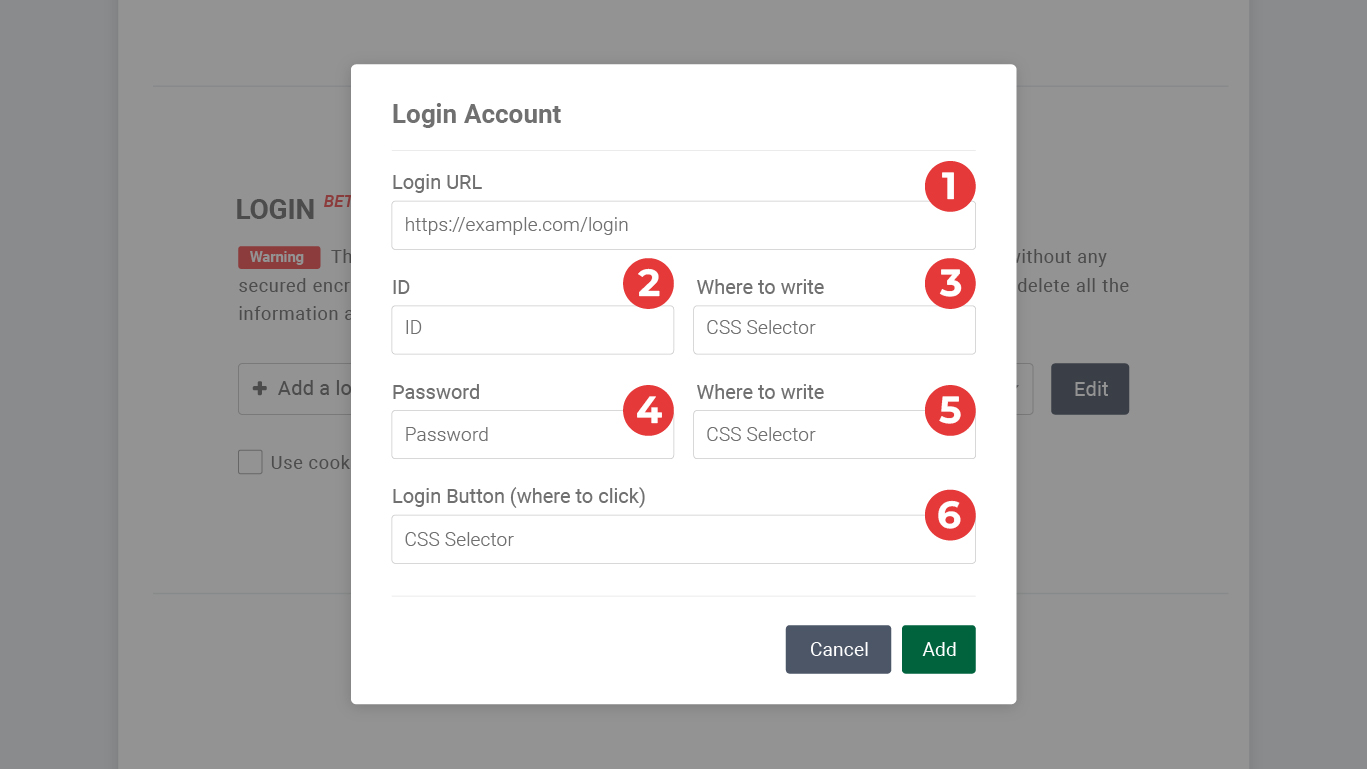
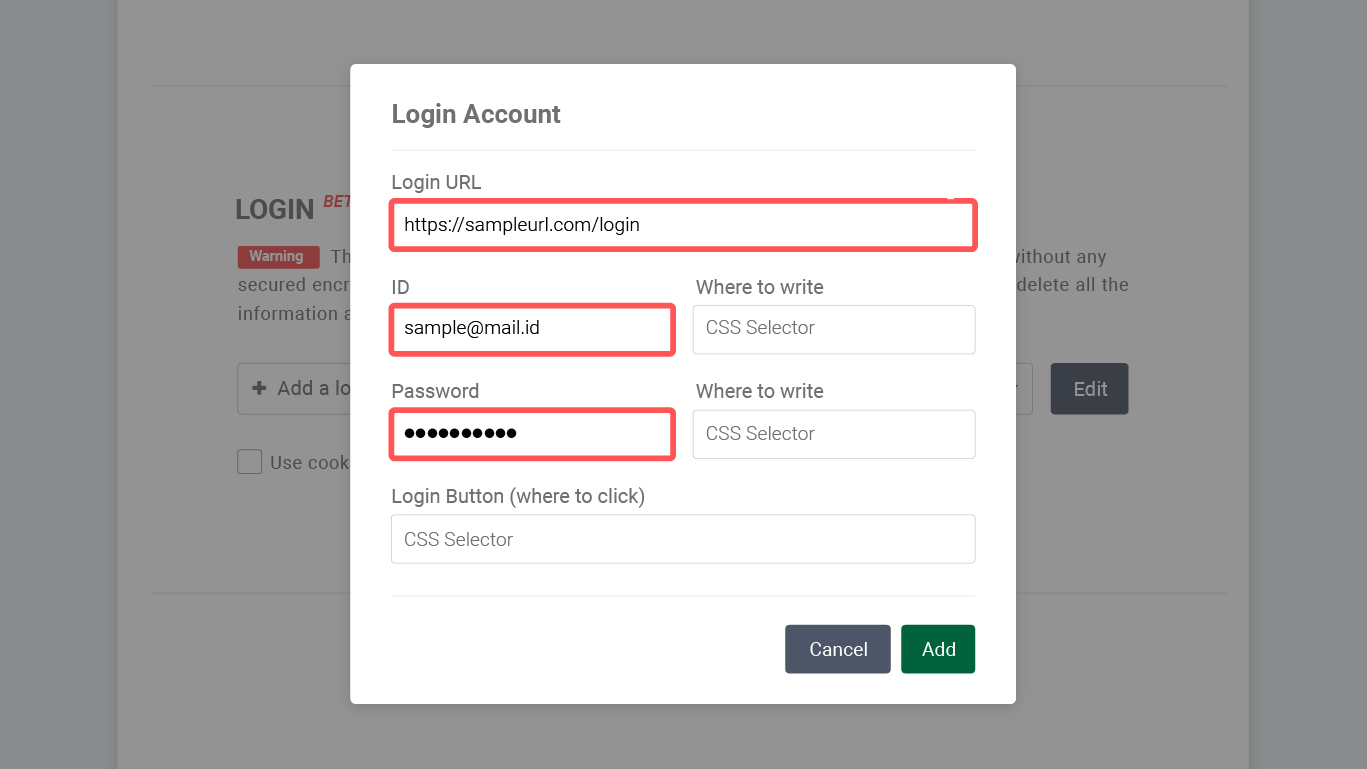
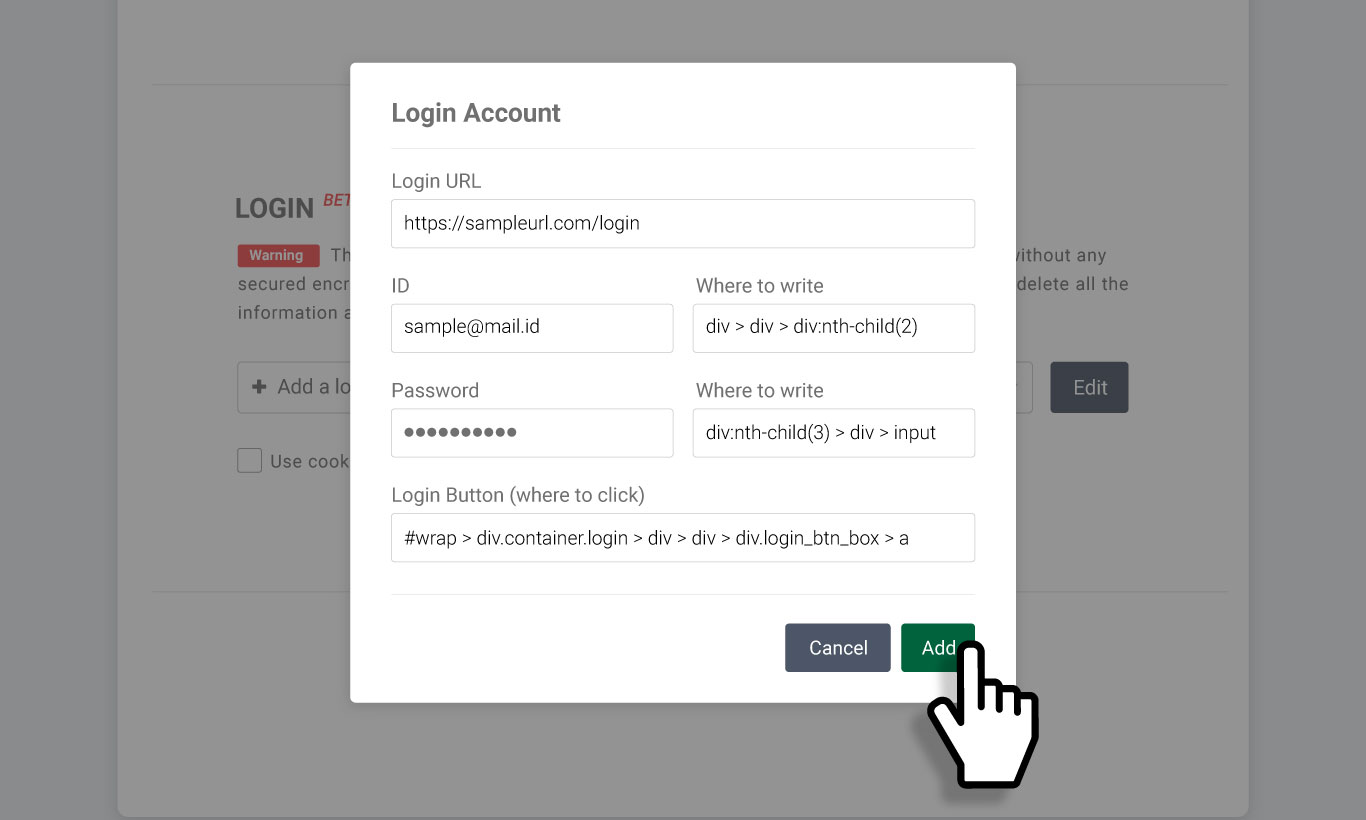
Here's what to enter in the popup:
① URL of the login page\
② Your site ID\
③ Selector value for the ID input field\
④ Your site password\
⑤ Selector value for the password input field\
⑥ Selector value for the login (submit) button
{% hint style="success" %}
Reference: [CSS Selector](/getting-started/extension-features/css-selector.md)
{% endhint %}
{% endstep %}
{% step %}
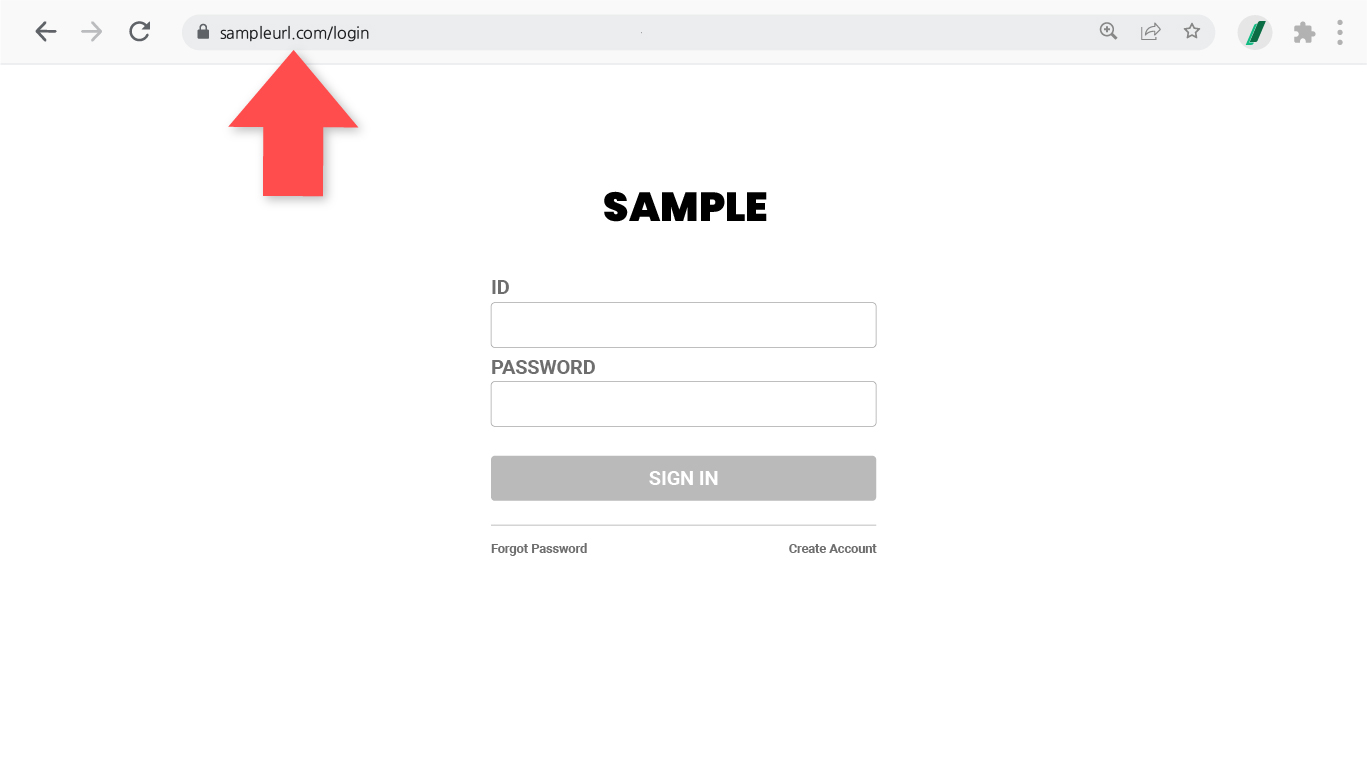
#### Copy and paste the login page URL
First, copy the URL from the website's login screen.
Paste the copied URL in the first field, then enter your login credentials in the ID and Password fields.
{% endstep %}
{% step %}
#### How to copy and paste CSS selectors
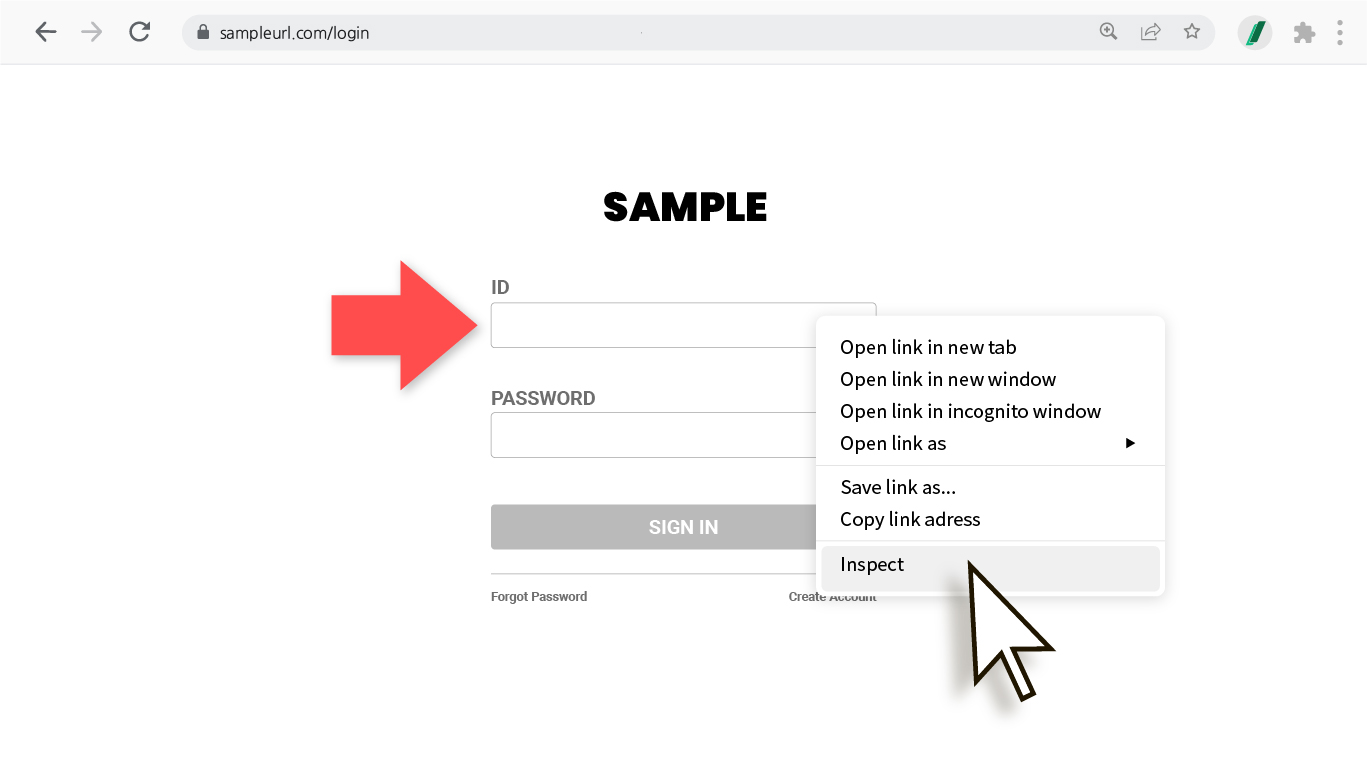
Right-click on the ID input field and select **Inspect**.
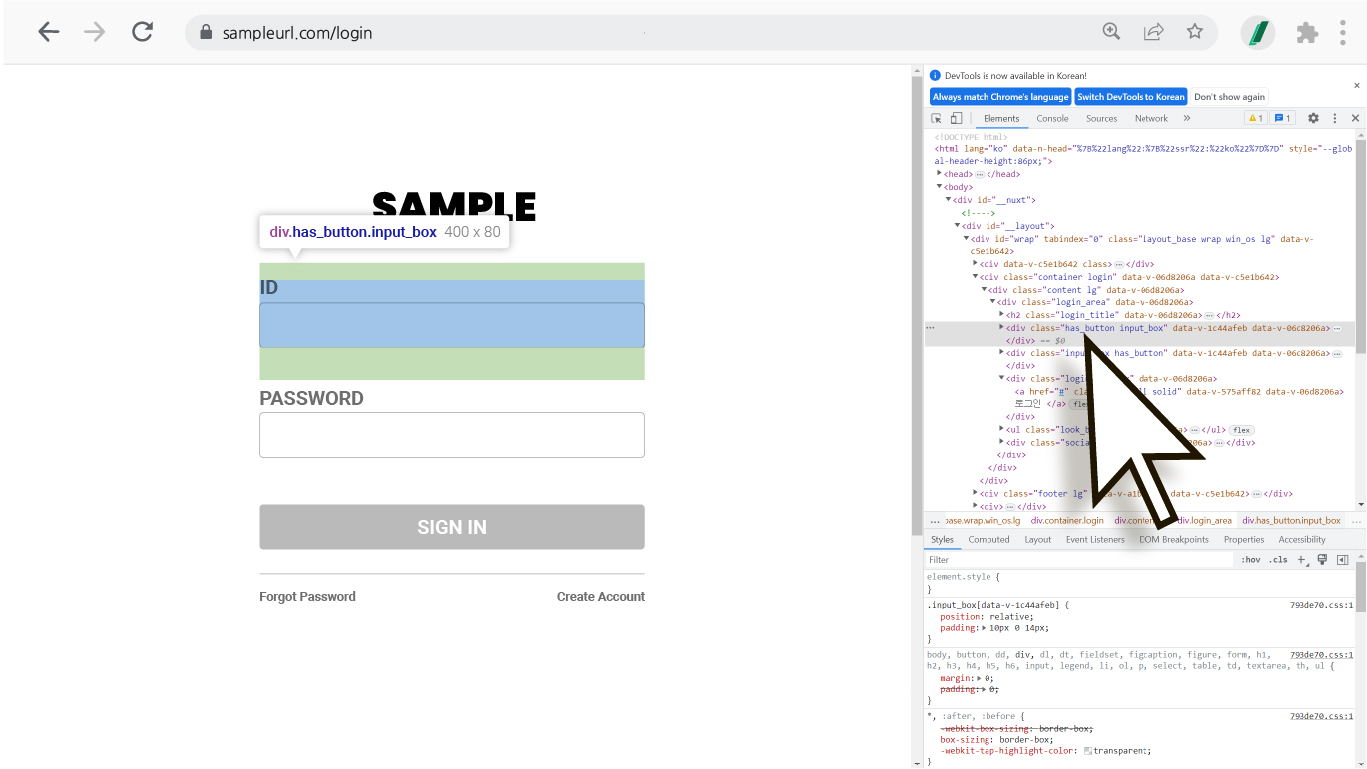
**A window full of code will appear on the right or bottom of the screen—don't worry! :)** The code for the field you just selected is highlighted in gray, and hovering over it will highlight the corresponding location on the page.
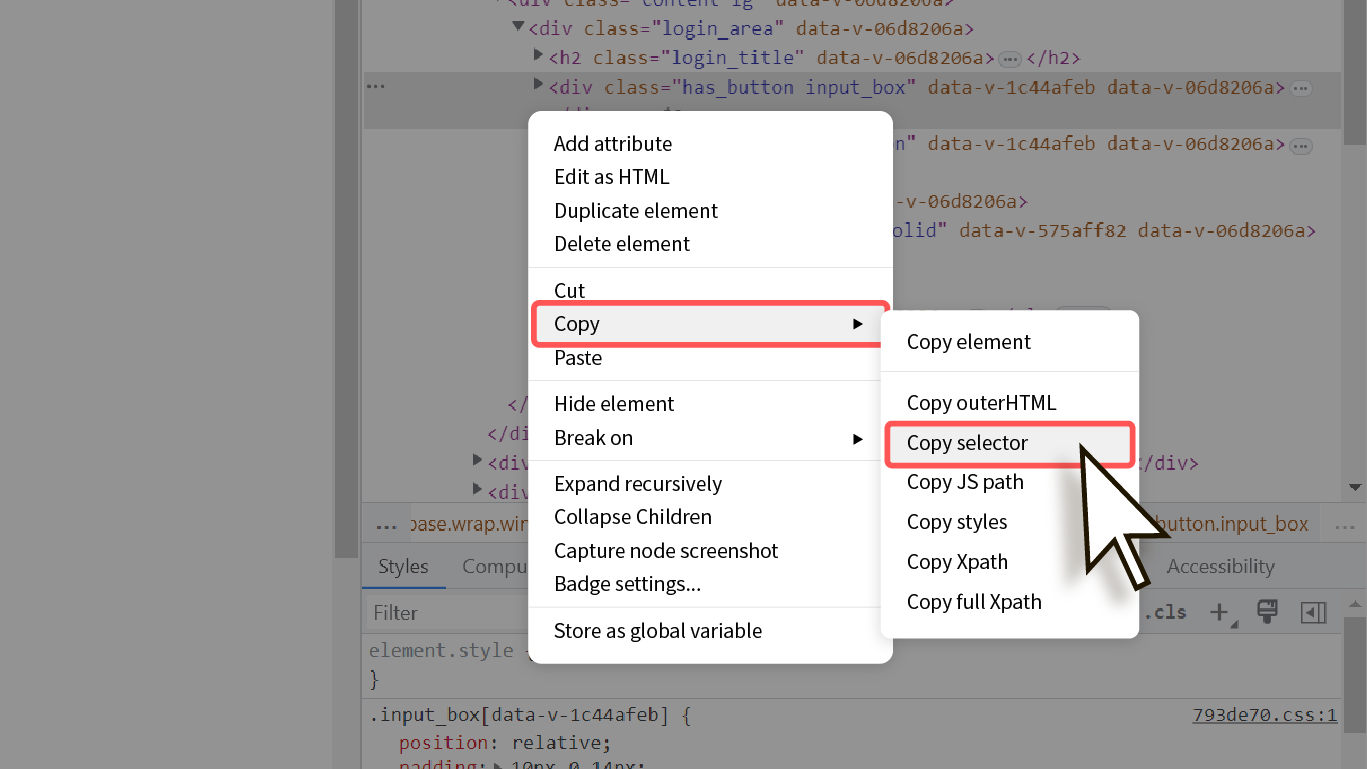
Right-click on the gray-highlighted code and select Copy -> Copy selector to automatically copy that selector's value.
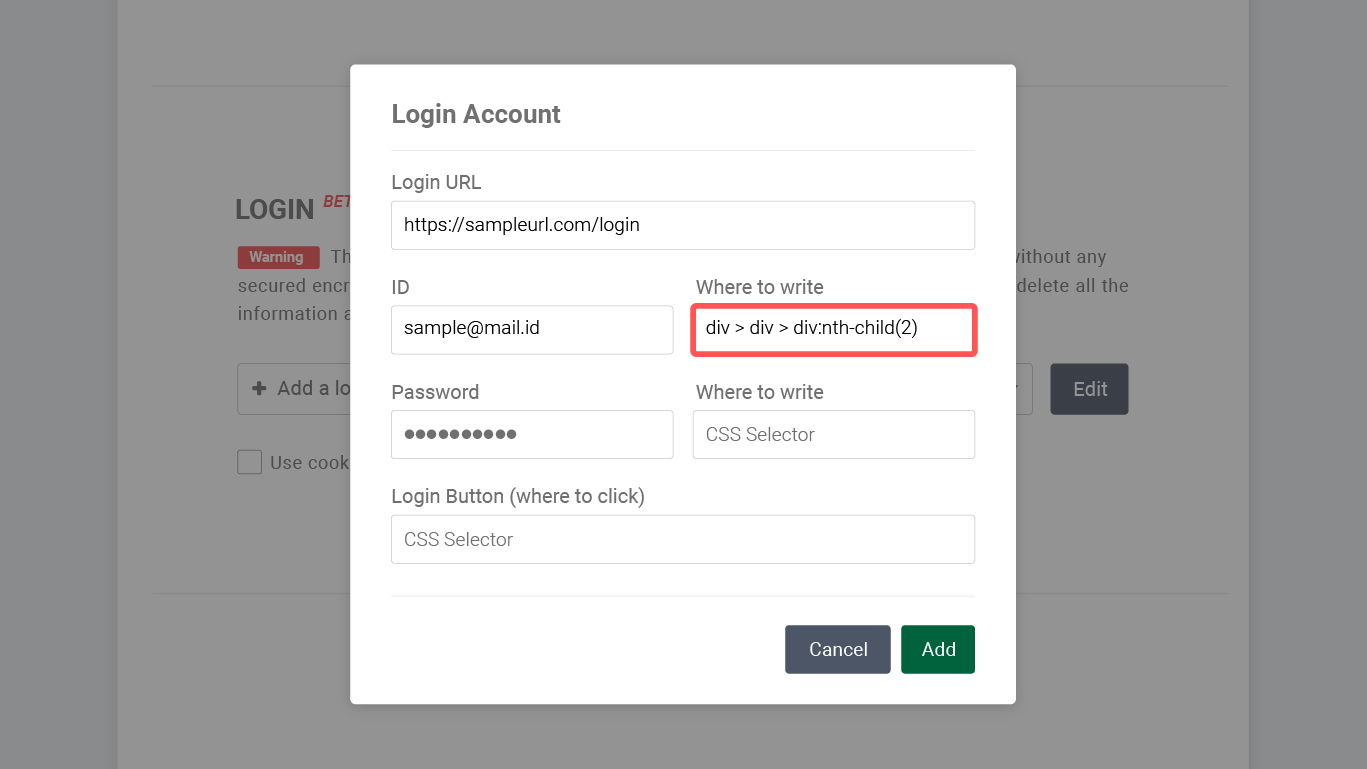
Return to the login info input window, place your cursor in the appropriate field, and press Ctrl + V to paste.
{% endstep %}
{% step %}
#### Fill in the remaining info (repeat step 3's selector paste process)
Once all information is entered, click the **Add** button, then click the **Save** button at the bottom of the settings page to save your login configuration.
{% hint style="success" %}
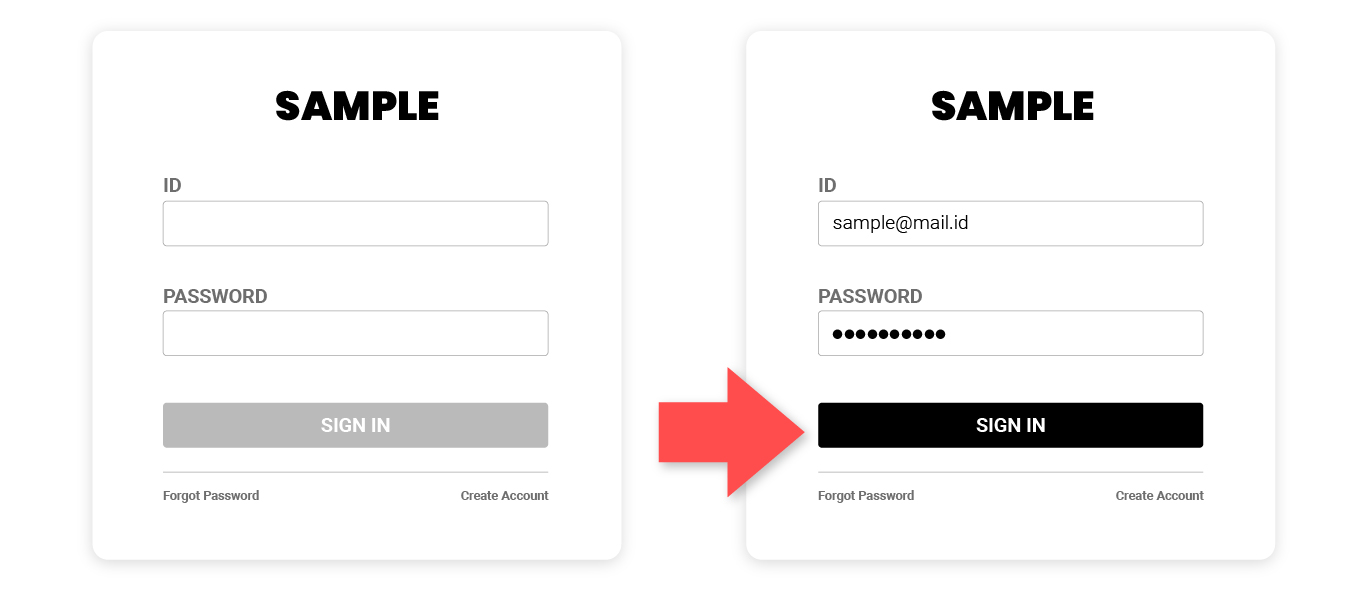
**TIP** Some websites only activate the login button after you enter credentials. When copying the selector value for the **\[Login button]**, make sure the button is **activated** (as shown below) before right-clicking → Inspect to get a more stable selector value.
{% endhint %}
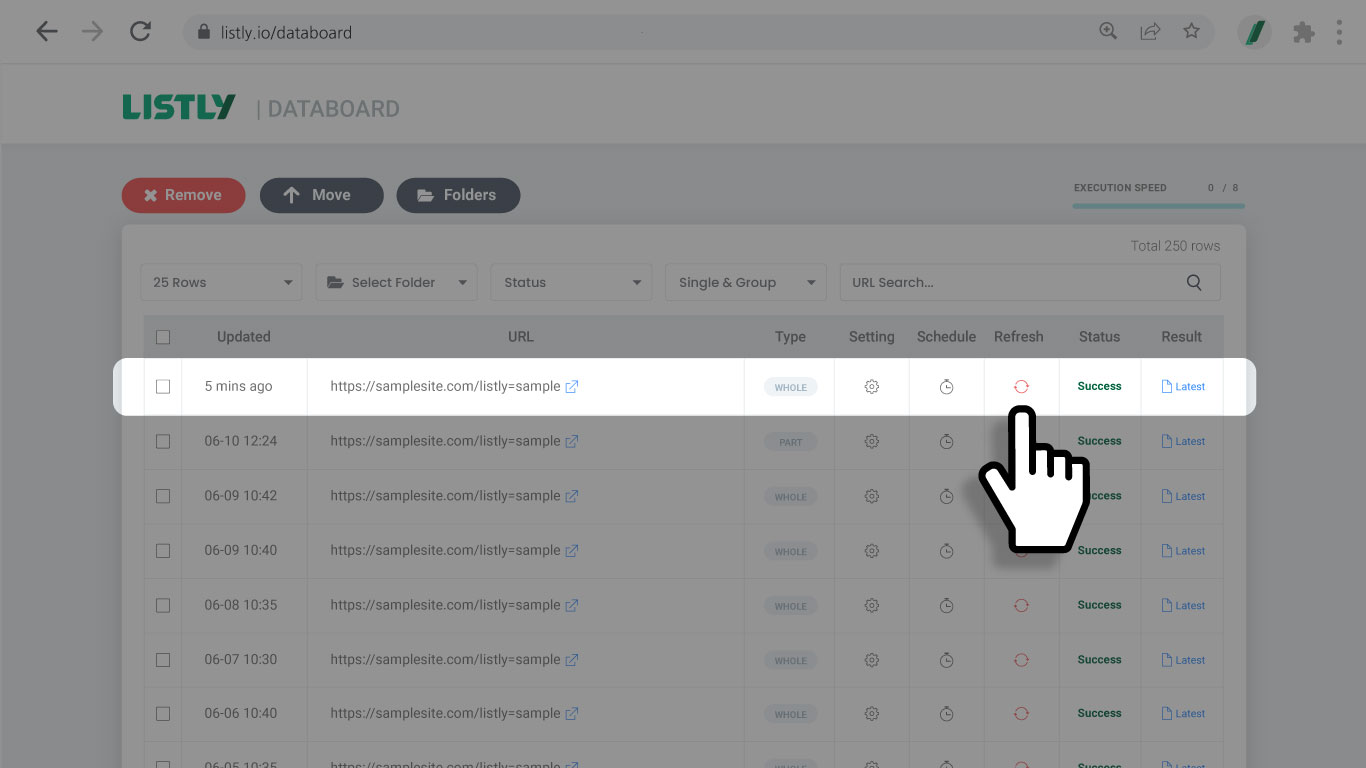
Return to Databoard and click the **Refresh (re-extract)** icon to verify that the task with login info works correctly.
{% endstep %}
{% endstepper %}
{% hint style="warning" %}
**Important notes when using auto login**
Auto login is a beta service. **Configuration and application may not be possible depending on each site's security policies and login screen structure.** In these situations, use the **'Folder Download'** feature to extract your desired data or contact [the Listly team](https://www.listly.io/contact):
1. *Websites with strong security (e.g., device authentication only, 2FA required, blocking overseas access—most email services included)*
2. *Sites where ID, password fields, and login button aren't all on one page*
3. *Websites with modal popup login pages (URL verification impossible)*
4. *Login pages with random strings (mixed letters+numbers+special characters) in the URL*
{% endhint %}
---
# Agent Instructions
This documentation is published with GitBook. GitBook is the documentation platform designed so that both humans and AI agents can read, navigate, and reason over technical content effectively. Learn more at gitbook.com.
## Querying This Documentation
If you need additional information that is not directly available in this page, you can query the documentation dynamically by asking a question.
Perform an HTTP GET request on the current page URL with the `ask` query parameter, and the optional `goal` query parameter:
```
GET https://help.listly.io/getting-started/databoard-features/settings-auto-login.md?ask=&goal=
```
`ask` is the immediate question: it should be specific, self-contained, and written in natural language.
`goal` is optional and describes the broader end goal you are ultimately trying to accomplish on behalf of the user. GitBook uses it to tailor the answer towards what is most useful for that goal.
The response will contain a direct answer to the question and relevant excerpts and sources from the documentation.
Use this mechanism when the answer is not explicitly present in the current page, you need clarification or additional context, or you want to retrieve related documentation sections.