# Listly Help

<h2 align="center">How can we help you?</h2>

<p align="center">Use the search bar to find something in Listly.<br>Common troubleshooting topics: <a href="/pages/510e942c4a5d4f70d63ae44253f511f6f2bfae4a">proxy</a>, <a href="/pages/5ce35a1ff28a8ab4a24ef31c27539c4f19dafefe">tabs</a>, <a href="/pages/317d6dbbb0159c33391540c10abdca430a563e54">pagination templates</a></p>

<p align="center"><a href="https://www.listly.io/contact" class="button primary">Contact Us</a> <a href="https://www.listly.io/contact?about=enterprise" class="button secondary">Talk to Sales</a></p>

<table data-view="cards"><thead><tr><th></th><th></th><th></th><th data-hidden data-card-cover data-type="image">Cover image</th><th data-hidden data-card-target data-type="content-ref"></th></tr></thead><tbody><tr><td><i class="fa-leaf">:leaf:</i></td><td><strong>Beginner's guide</strong></td><td>New to Listly? Get started quickly with our beginner's guide.</td><td><a href="/files/4aa286742766b806bfc6b83c25a71d9cb2078386">/files/4aa286742766b806bfc6b83c25a71d9cb2078386</a></td><td><a href="https://help.listly.io/#get-started-with-listly-in-just-1-minute">https://help.listly.io/#get-started-with-listly-in-just-1-minute</a></td></tr><tr><td><i class="fa-comments-question-check">:comments-question-check:</i></td><td><strong>FAQ</strong></td><td>Find answers to common questions about sign-up, billing, refunds, and more.</td><td><a href="/files/6d42fe68fb64f877d1d586fbd30fc93c4dfb2268">/files/6d42fe68fb64f877d1d586fbd30fc93c4dfb2268</a></td><td><a href="/pages/qUuEUuDvuOZfo2xYRxnS">/pages/qUuEUuDvuOZfo2xYRxnS</a></td></tr><tr><td><i class="fa-message-exclamation">:message-exclamation:</i></td><td><strong>Troubleshooting guide</strong></td><td>Learn how to troublesohot errors using auto-generated error screenshots.</td><td><a href="/files/99653a6ec847e0c571889f55ba6a287c52a73ab3">/files/99653a6ec847e0c571889f55ba6a287c52a73ab3</a></td><td><a href="/pages/UCIqIwB8Fx5MgJvl45ha">/pages/UCIqIwB8Fx5MgJvl45ha</a></td></tr></tbody></table>

***

## Get Started with Listly in Just 1 Minute!

*For step-by-step guidance, check out our* [*Quick Start Guide*](/getting-started/quick-start-guide/how-to-use-basic-extraction)*.*

{% stepper %}
{% step %}
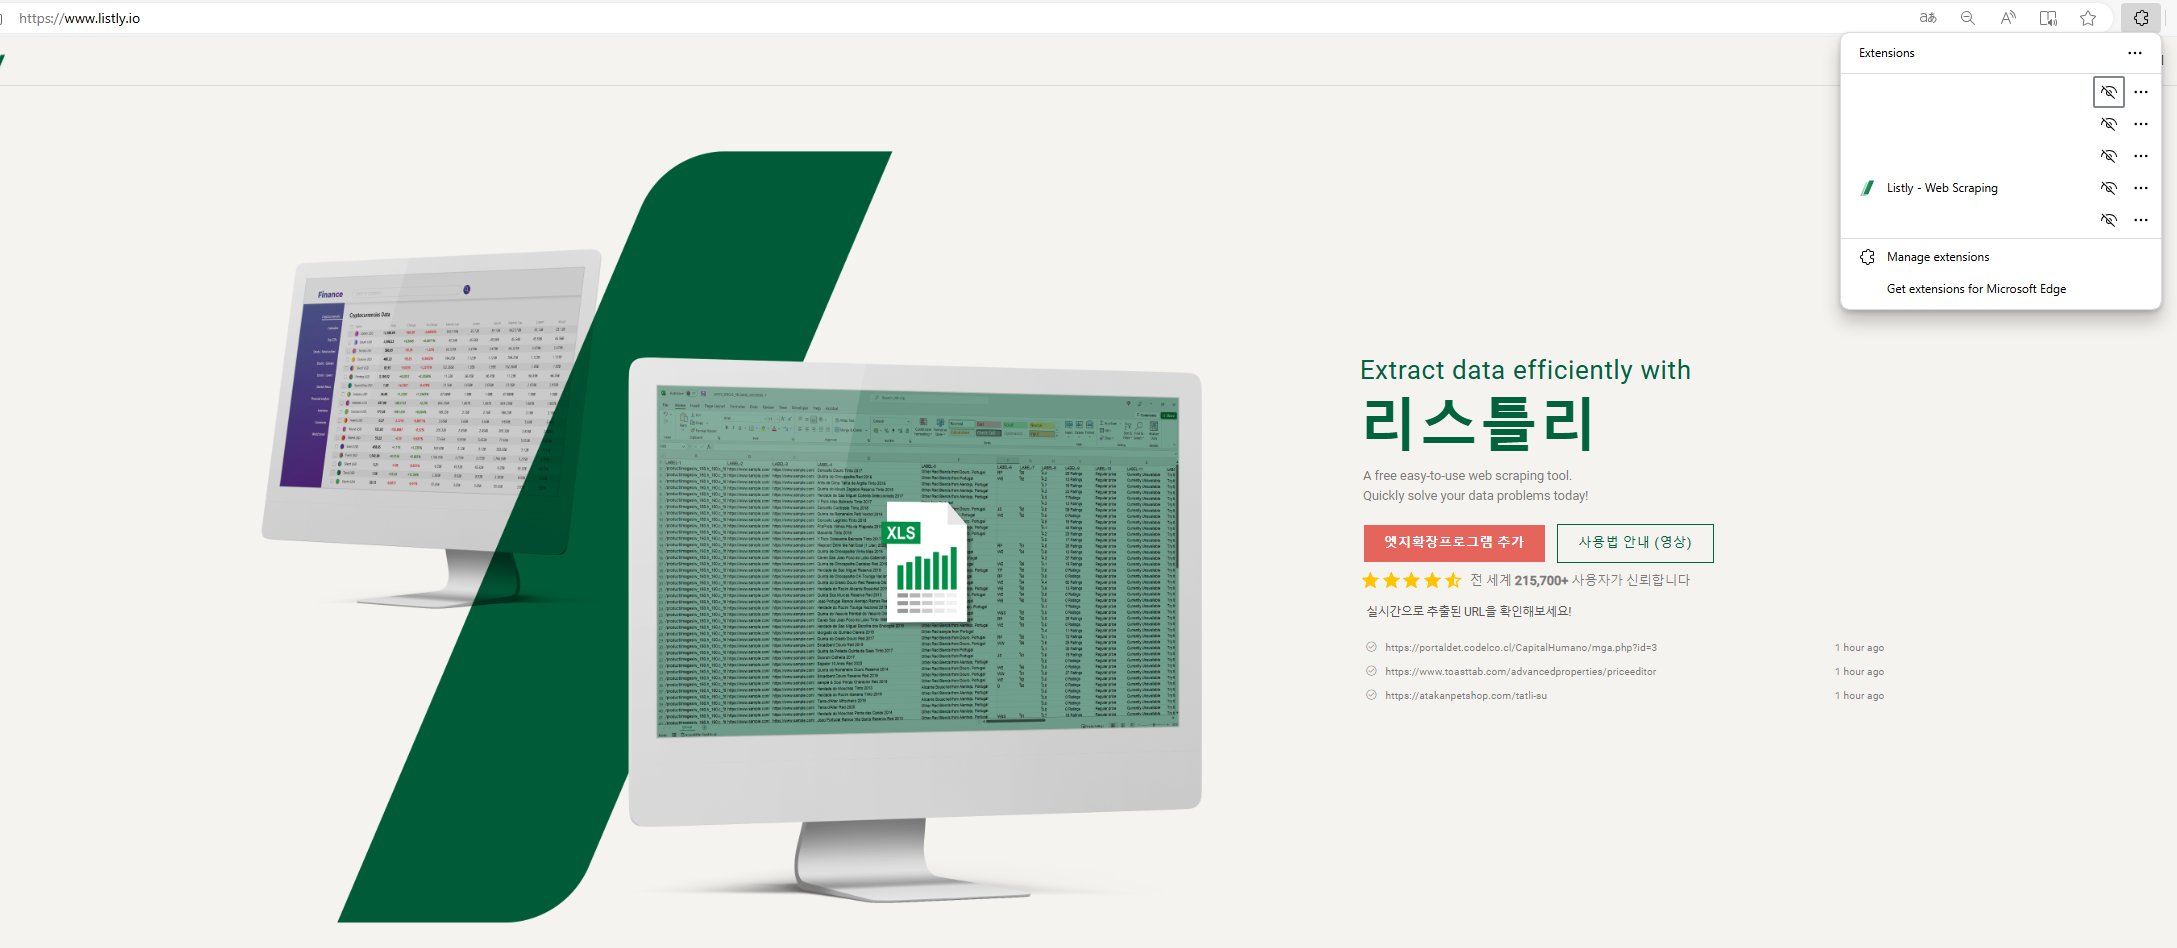
**Install** [**Listly's Chrome Extension**](https://chrome.google.com/webstore/detail/listly-data-scraper/ihljmnfgkkmoikgkdkjejbkpdpbmcgeh?utm_source=homepage)

Extension works on [Google Chrome](https://chrome.google.com/webstore/detail/listly-data-scraper/ihljmnfgkkmoikgkdkjejbkpdpbmcgeh), [Naver Whale](https://store.whale.naver.com/detail/jncnopbobhhjeeomceandjdllninkcfa), and [Microsoft Edge](https://microsoftedge.microsoft.com/addons/detail/listly-data-scraper/hfocokadknpfdlnoepicoagndjhdoeno)
{% endstep %}

{% step %}
**Click Listly at the top of the page yo want to scrape**

Choose WHOLE (entire page) / PARTS (specific sections)
{% endstep %}

{% step %}
**Download your data**

Select your preferred data tab and download the file
{% endstep %}
{% endstepper %}

## Collect Data in Just One Click 👆

Listly is **a web scraping tool for everyone**—from beginner marketers to senior developers. It converts any web page into a single spreadsheet in seconds with just one click. People mainly use it for directory collection, price monitoring, product listings, marketing, research, and more.

## Use Cases

{% columns %}
{% column width="50%" %}

* **Commerce** - gather product info, monitor competitors&#x20;
* **Marketing** - aggregate online reviews, find affiliate prospects
* **PR** - clip news, track press releases
* **Internal use** - scrape data from logged-in pages
* **Entertainment** - analyze real-time charts
  {% endcolumn %}

{% column width="50%" %}

* **Sales** - compile directory data
* **R\&D** - collect research datasets
* **Real estate** - monitor listings
* **Finance** - track investment metrics
* **SEO** - monitor search rankings&#x20;
* **Analysis** - analyze daily logs
  {% endcolumn %}
  {% endcolumns %}


# How to Install Listly

Listly is a browser extension that can be easily installed on Chrome/Edge/Whale browsers without requiring any separate program installation.

* [Chrome Web Store - Listly](https://chromewebstore.google.com/detail/listly-web-scraping/ihljmnfgkkmoikgkdkjejbkpdpbmcgeh?utm_source=homepage)
* [Edge MS Store - Listly](https://microsoftedge.microsoft.com/addons/detail/listly-%EB%A6%AC%EC%8A%A4%ED%8B%80%EB%A6%AC-%EC%9B%B9-%EC%8A%A4%ED%81%AC%EB%9E%98%ED%95%91/hfocokadknpfdlnoepicoagndjhdoeno)
* [Whale Store - Listly](https://store.whale.naver.com/detail/jncnopbobhhjeeomceandjdllninkcfa)

{% hint style="info" %}
The installation process is the same for all browsers.
{% endhint %}

{% stepper %}
{% step %}

### Click the links above or search for 'Listly' in your browser's extension store, then click the \[Add to Chrome] button.

![Install step 1](/files/300e7524afe150fee974cfdb6eb9ea00c7c2c7bc)
{% endstep %}

{% step %}

### When the confirmation dialog appears, click the \[Add extension] button.

![Install step 2](/files/e9aca0d56be9c9b843248e8b91dc0469f095bd4f)
{% endstep %}

{% step %}

### Once installed, click the puzzle icon at the top right corner of your browser, then click the pin icon next to Listly to pin it to your toolbar.

![Install step 3](/files/1dc0721cbb3496e98a753d067aca376c3caa7b3d)
{% endstep %}

{% step %}

### Click the Listly icon on your target website to start collecting data.

![Install step 4](/files/df8cbb3a501a9032b45d0c3754078b4891059794)
{% endstep %}
{% endstepper %}


# How to Use Basic Extraction

{% hint style="info" %}
**Quick Start**

➡️ Install Listly Chrome extension ➡️ Click Listly icon on your desired page ➡️ Choose WHOLE / PARTS ➡️ Download your data
{% endhint %}

***

## How to Use

{% stepper %}
{% step %}

### Click the Listly extension icon on the page you want to extract data from.

![click listly icon](/files/WFr4adnDo4HPiSR2LDl4)
{% endstep %}

{% step %}

### Click the `WHOLE` button.

![click listly button](/files/LspIi2rO4zInuzsMxTYl)
{% endstep %}

{% step %}

### Click the **`Excel`** or **`Google Sheets`** button to download your file.

![export data into excel or google sheets](/files/jC9qriVIpwpEzIwn4B5R)

{% endstep %}
{% endstepper %}


# Extension Features

Extension Popup

This popup lets you choose your data extraction area. It's the first screen you'll see when you launch the Listly extension, and it's where all your data extraction begins.

<figure><img src="/files/QiDQkU7m7vULMNHsAeYd" alt=""><figcaption></figcaption></figure>

{% tabs %}
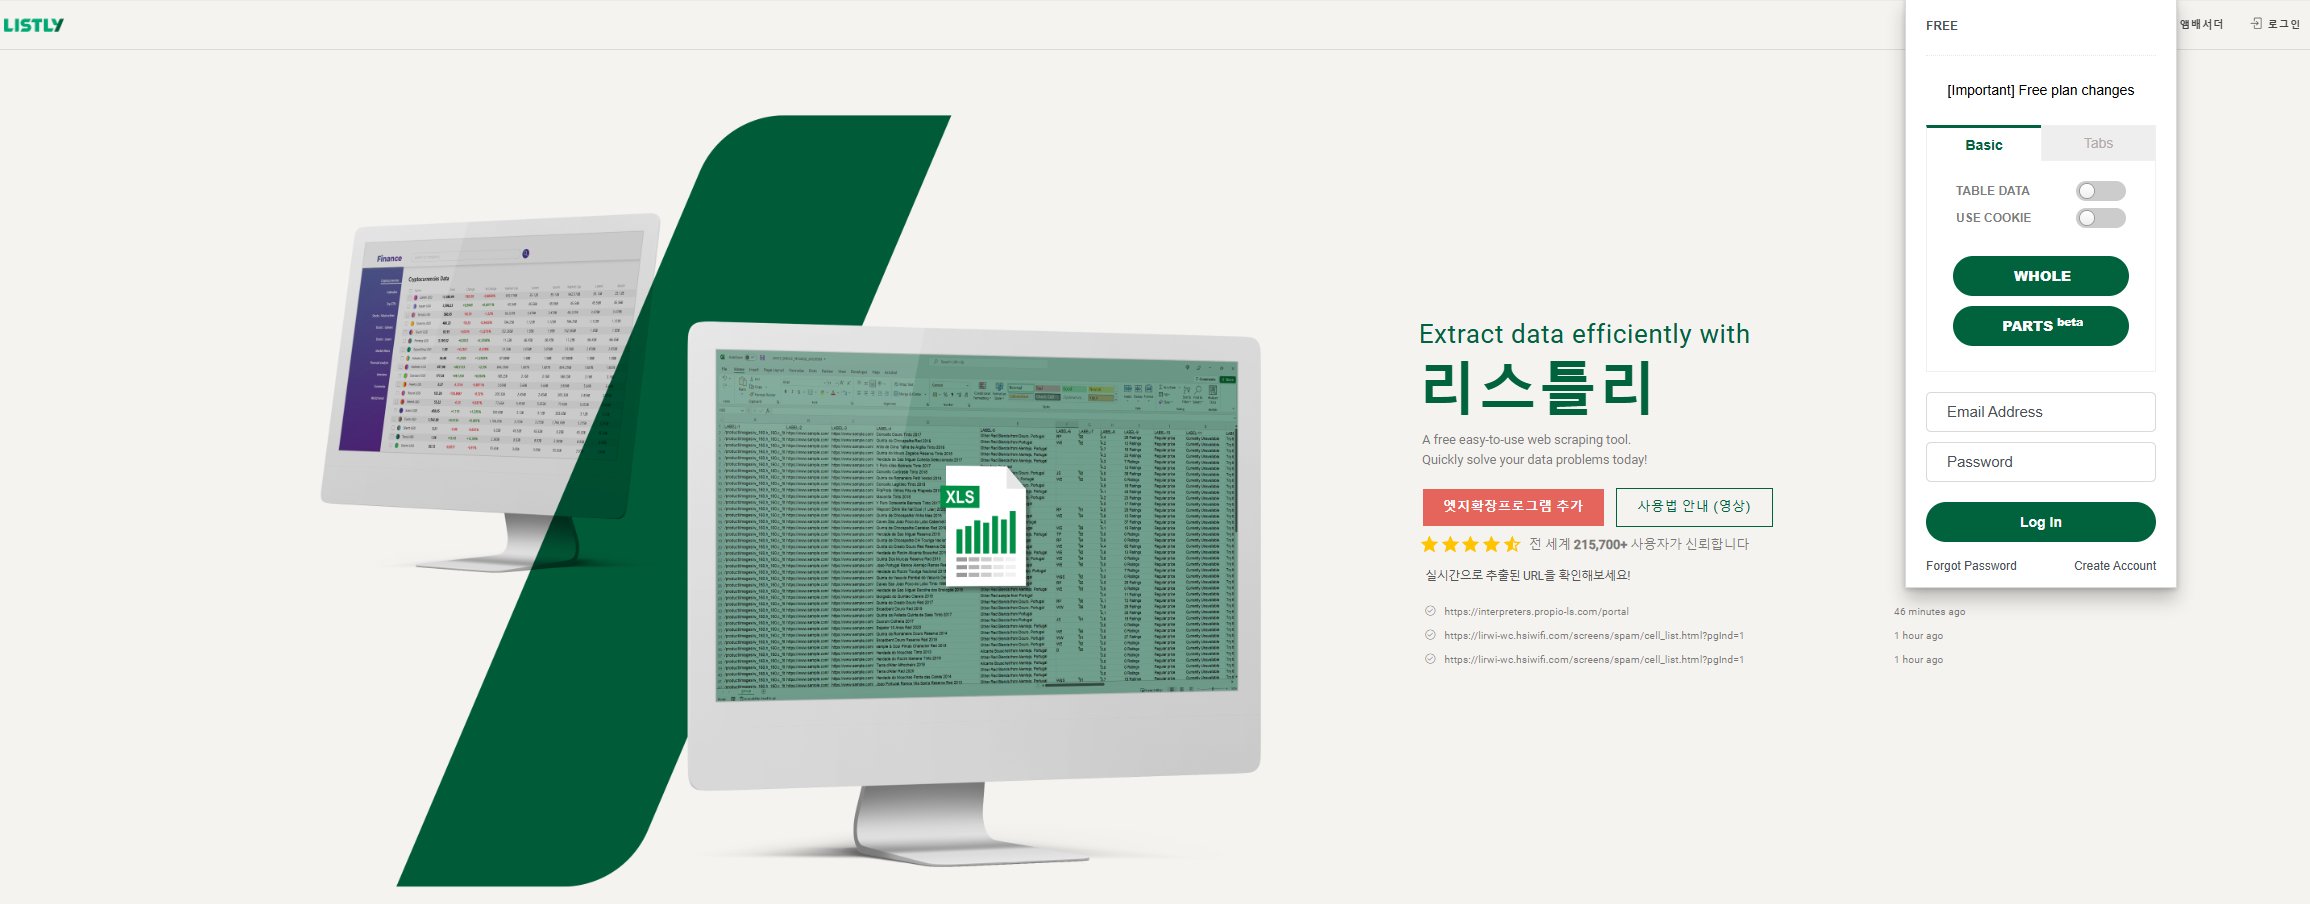
{% tab title="Basic" %} <mark style="color:red;">**➊**</mark> [**WHOLE**](/getting-started/extension-features/whole) : Extract all visible data from a webpage in one go. Listly automatically detects repeating data patterns based on what's displayed on your screen. Click it, and you'll jump straight to the results page once extraction is complete.

<mark style="color:red;">**➋**</mark> [**PARTS**](/getting-started/extension-features/parts) : Select specific areas to extract exactly what you need. This gives you more control over data arrangement and improves extraction accuracy. Click to open the selection options panel.

<mark style="color:red;">**➌**</mark>**&#x20;TABLE DATA** : Use this feature for data that looks like a table. We recommend keeping it OFF by default. If you're not happy about the results, try switching it ON and running the extraction again.

<mark style="color:red;">**➍**</mark>**&#x20;USE COOKIE** : Save your login session when accessing websites that require authentication. Once you log in, Listly temporarily stores your cookie so you can extract data without logging in again. It's handy for pages locked behind a login wall. Note that cokie duration varies by website.
{% endtab %}

{% tab title="Tabs" %}
Tabs lets you extract matching sections from all open browser tabs at once. For details, check out the [Tabs-Parts](/getting-started/extension-features/tabs-parts) guide.

<mark style="color:red;">**➎**</mark>**&#x20;OPEN TABS** : Opens multiple links in new tabs using click-and-drag selection. Set your activation key in the popup that appears.

<mark style="color:red;">**➏**</mark>**&#x20;TABS-PARTS** : Works like the PARTS button, but extracts the same selection from all tabs open in your browser.
{% endtab %}

{% tab title="Common" %} <mark style="color:red;">**❼**</mark>**&#x20;DATABOARD** : Jump to your Listly account's Databoard.
{% endtab %}
{% endtabs %}


# Whole

## What is Whole Extraction?

It's a feature that allows you to extract all the information visible on the screen with one click. Listly automatically analyzes the web page and recommends the optimal data pattern. Use whole extraction when you want to extract data **simply and quickly**.

{% hint style="success" %}
**Quick Start**

➡️ Click Listly icon on your target page ➡️ Select WHOLE ➡️ Select tab to extract in results \
➡️ Download your data
{% endhint %}

***

## How to Use

{% stepper %}
{% step %}

### Click the Listly icon on your target page

Open the web page you want to extract data from in your [Listly-installed](/getting-started/quick-start-guide/how-to-install-listly) browser, then click the Listly icon → **Select the \[Whole] button**.

<figure><img src="/files/9b346436ec29ee1ef9aac9f29e0c764c86a48507" alt=""><figcaption></figcaption></figure>
{% endstep %}

{% step %}

### Select WHOLE

Once click on the button, it will take you to the results page after about 1-3 seconds without any additional settings. After checking the data to extract in the bottom preview tabs, click the \[**Excel**] or \[**Google Sheets**] button to export the data.

<figure><img src="/files/5bb987c52743caf5889c8c527e364b3867fe95b7" alt=""><figcaption></figcaption></figure>

→ [Learn More About Data Download Options](/getting-started/result-page-features/data-download-options)
{% endstep %}

{% step %}

### Select \[Tab to Extract]&#x20;

Select the tab containing the data you want from the results page.
{% endstep %}

{% step %}

### Download your data to Excel&#x20;

Your extracted data will be saved to Excel as shown below.

<figure><img src="/files/e5806e2daca094f5bacd0072ff244b6d72b96a1f" alt=""><figcaption></figcaption></figure>
{% endstep %}
{% endstepper %}


# Parts

## What is Parts Extraction?

**Extract data by selecting only specific areas you want.** Use this feature when you want to improve the arrangement and accuracy of extracted data.

{% hint style="success" %}
**Quick Start**

➡️ Click Listly icon on desired page ➡️ Select Parts ➡️ Select data extraction areas ➡️ Choose extraction options in panel (optional) ➡️ Click RUN LISTLY ➡️ Select tab for data to extract in results ➡️ Download your data
{% endhint %}

***

## How to Use

{% stepper %}
{% step %}

### Click the Listly Icon on your target website&#x20;

Navigate to the web page you want to extract data from in your [Listly-installed](/getting-started/quick-start-guide/how-to-install-listly) browser and click the Listly icon.
{% endstep %}

{% step %}

### Select PARTS

Select the **\[PARTS]** button in the Listly extension.

<figure><img src="/files/da4efb428c1adc40ef7bc7180500d2b97c4eedf9" alt=""><figcaption></figcaption></figure>
{% endstep %}

{% step %}

### Select the areas you want to scrape

Click to specify the areas you want to extract.

<figure><img src="/files/3cbe3231c2e1e7d9a3ddef70ba2f58922a266457" alt=""><figcaption></figcaption></figure>

{% hint style="info" %}
Reference: [Parts Extraction Area Selection](/getting-started/extension-features/parts-selection)
{% endhint %}
{% endstep %}

{% step %}

### Select extraction options in panel (optional)

If needed, select extraction options in the PARTS panel.

<figure><img src="/files/1ff72a2a12bb4b7b992573d6199c5d43fc7db6c4" alt=""><figcaption></figcaption></figure>

{% hint style="info" %}
Reference: [Learn About Parts Extraction Options](/getting-started/extension-features/parts-options)
{% endhint %}
{% endstep %}

{% step %}

### Click RUN LISTLY

Once you've finished selecting extraction areas, click the **RUN LISTLY** button.

<figure><img src="/files/4f6945e1209cfdb4a5a4f8583414ffe150a9e749" alt=""><figcaption></figcaption></figure>
{% endstep %}

{% step %}

### Select Tab to extract in results

After reviewing the extracted data in the results page, click the **\[Excel]** or **\[Google Sheets]** button to export.

<figure><img src="/files/5a1a9f978c437d21916154afee44639400578240" alt=""><figcaption></figcaption></figure>

{% hint style="info" %}
Reference: [Learn More About Data Download Options](/getting-started/result-page-features/data-download-options)
{% endhint %}
{% endstep %}

{% step %}

### Download your data

Check your downloaded file.

<figure><img src="/files/8bc13bef3cb6b03f2049e9f0be8f2079d78dbcb0" alt=""><figcaption></figcaption></figure>
{% endstep %}
{% endstepper %}

***

## Parts Extraction Related FAQs

<details>

<summary>PART vs PARTS - what's changed?</summary>

<figure><img src="/files/7e90eca4d690d715ad7e94e8ad35a6268e450772" alt=""><figcaption></figcaption></figure>

Function buttons that were displayed directly above a single selection area (Before) have moved to a side panel (After) as shown below. Refer to the image for the new locations of each function button changed from the previous UI.

<figure><img src="/files/a31bb811b6a2f32016c50650b0ae980cf2e450cc" alt=""><figcaption></figcaption></figure>

{% hint style="success" %}
**If you want to extract data using the same process as the previous parts selection,** refer to the changed button locations, select only a single area, then click the Run Listly button to proceed with extraction.
{% endhint %}

</details>

<details>

<summary>The number of items to extract varies by page. Is group extraction still possible?</summary>

<figure><img src="/files/d07fa5f8824648b2966270ba9e30b4d73b022ae4" alt=""><figcaption></figcaption></figure>

**Yes, it's possible.** For example, as shown in the image above, let's say the first item area on page 1 is replaced by a different element like an advertisement on page 2. (<mark style="color:$success;">Areas with information you want to extract are marked with green boxes</mark>)

**Listly's Parts automatically detects data locations with the same structure.**

If you extract data on page 1 using the '**automatically select repeating elements (auto-select repeating elements)**' method to specify desired areas, then perform group extraction based on that page, data extraction will succeed without failures even if the number of selected areas differs on other web pages.

</details>

<details>

<summary>I want to extract a specific page using the 'individually select desired areas' method, then perform group extraction. However, some pages don't have the element I 'individually selected'. What happens in this case?</summary>

<figure><img src="/files/6da5ab00b93e63a9e60eb45dc178c68deb412a61" alt=""><figcaption></figcaption></figure>

**As shown in the image above, missing information will be extracted as blank cells.**

Let's assume you selected image, title, and description areas separately using Parts on page A, extracted the data, then performed group extraction with pages having the same structure.

If page C has an empty description area that you selected on page A, the data in that cell will be extracted as blank, as shown in the image above.

{% hint style="danger" %} <mark style="color:red;">**However, like with previous group extraction, if you try to extract web pages with completely different structures from the source page, or if there are no matching areas with page A, it will be processed as a collection failure.**</mark>
{% endhint %}

</details>

<details>

<summary>When selecting repeating areas, unnecessary areas are also selected. How can I solve this?</summary>

We plan to add a feature that allows you to remove unnecessary areas by clicking for more precise data area selection. Currently, you can resolve this by **manually editing the CSS Selector value** of that area.

</details>


# Parts Selection

{% hint style="success" %}
[**What is Parts Extraction?**](/getting-started/extension-features/parts)

**Extract data by selecting only specific areas you want.** Use this when you want to improve the arrangement and accuracy of extracted data.
{% endhint %}

## How to Use

{% stepper %}
{% step %}

### Individually select desired areas

In Parts extraction, you can select multiple data extraction areas and extract them all at once.

As shown in the example below, click on the necessary sections individually such as product name, reviews, price, model number. Each selected area will be registered separately in the panel. After clicking the **\[Run Listly]** button, you can extract all selected areas simultaneously.

<figure><img src="/files/79a60a7363ed8750182255c060d483bb5989a86e" alt=""><figcaption></figcaption></figure>

When you select and extract as shown in the example image, you can see the information from individually selected areas extracted as shown below.

<figure><img src="/files/b216e8461e5f40488942f320a80119b365acce38" alt=""><figcaption></figcaption></figure>
{% endstep %}

{% step %}

### Select repeating areas simultaneously (auto-select repeating elements)

**You can automatically select repeating areas with a single click.**

As shown in the example below, when you click a specific element on a web page and then click another element that repeats with the first one, all data with the same hierarchical structure on that page will be automatically selected.

<figure><img src="/files/0d2b4dc664af0969362d5f2a5ae48fc9801c15a5" alt=""><figcaption></figcaption></figure>

**As shown below, the same hierarchical structure is recognized as one area and recorded in the side panel.** <mark style="color:$info;">(Colors in the image are displayed differently for clarity.)</mark>

<figure><img src="/files/c5075f5c56b88e131849aacf2fd37c1ed396c84a" alt=""><figcaption></figcaption></figure>

After selecting desired areas using the 'select repeating areas simultaneously' method and clicking the extract button, you can extract data as shown below. You can also easily collect repeating images and brand names on a single page.

<figure><img src="/files/9bcd25035feb2b63901e2429f16f44facdef4baa" alt=""><figcaption></figcaption></figure>
{% endstep %}

{% step %}

### Auto-select repeating elements (item box unit selection)

You can also automatically select repeating elements by item box unit. When you select the first box and then the consecutive second box, you can select all items with the same structure at once. **However, in this case, the accuracy of extraction results may be relatively lower, so we recommend selecting by 'maximum item unit'.**

<figure><img src="/files/aaaf01be70d61dd4c3ea55df9b8998984593bd33" alt=""><figcaption></figcaption></figure>

After selecting detailed elements (text, images, etc.) within a specific item box, keep clicking the **⬆︎ up arrow** to gradually expand the selection area until it extends to an entire box larger than the item box.

<figure><img src="/files/1def3178b640f9de3476b26f5d804880b07c2f2b" alt=""><figcaption></figcaption></figure>

In this state, clicking the ⬇︎ down arrow once allows you to specify the 'maximum item box unit'.

When you specify the 'maximum item unit' in the same way on other items, you can automatically select all items with the same structure on the web page.
{% endstep %}
{% endstepper %}


# Parts Options

{% hint style="success" %}
[**What is Parts Extraction?**](/getting-started/extension-features/parts)

**Extract data by selecting only specific areas you want.** Use this when you want to improve the arrangement and accuracy of extracted data.
{% endhint %}

> During Parts extraction, you can use extraction options in the Parts panel to specify exactly what data to extract from the selected area.

<figure><img src="/files/c635fb7ef3aea0678dbc38d18e5df7b21d49b8e1" alt=""><figcaption></figcaption></figure>

#### Extraction Options

➊ Default: Extracts provided information as-is, including text, image URLs, hyperlinks, etc. The default option is sufficient for most cases.

➋ Plain Text: Extracts text only, excluding links or image URLs.

{% hint style="info" %}
e.g. No extraction value when selecting images
{% endhint %}

➌ HTML Attribute: Extracts values from element attributes. Useful when image paths or product information are stored in attributes. Requires basic development knowledge to use effectively.

{% hint style="info" %}
e.g. class="style-1", data-id="id-1"
{% endhint %}

➍ HTML Source: Extracts the selected element's HTML code as-is. Used when developers need to process the source later.

➎ Hyperlink: Extracts only hyperlinks attached to text or images.

➏ Image Link: Extracts only image URLs.

❼ Numeric: Extracts only numbers from the selected area.

{% hint style="info" %}
e.g. <mark style="color:$success;">Special discount price 5,000 KRW</mark> → <mark style="color:$success;">5,000</mark>
{% endhint %}

❽ Element Count: Returns the number of selected elements as a number.

{% hint style="info" %}
e.g. 36 items selected → <mark style="color:$success;">36</mark>
{% endhint %}


# Tabs-Parts

## What is Tabs Extraction?

Tabs is **a feature that lets you extract matching sections from all open tabs in your browser at once**. It has less risk of blocking when extracting multiple pages simultaneously, and the workflow is simpler.

{% hint style="warning" %}
**Important Notes for Tabs Extraction**

Depending on your PC and browser environment, if you open too many tabs at once, the website may recognize this as abnormal activity, causing the web pages to load very slowly or not open properly. When extracting data, we recommend controlling the number of tabs to around 30 per session.
{% endhint %}

{% hint style="info" %}
**Quick Start**

➡️ Open multiple tabs in browser ➡️ Click Listly icon ➡️ Go to Tabs tab ➡️ Select Parts ➡️ Select extraction areas ➡️ Select data tab to extract in results ➡️ Download file
{% endhint %}

***

## How to Use

{% stepper %}
{% step %}

### Open Multiple Tabs in Your Web Browser

Open the pages you want to extract as individual tabs in your browser. At this time, you can use the **\[Open Multiple Tabs]** button to conveniently open many tabs in one window.

<figure><img src="/files/88c7343c44fdf63380af507f2fe2c385e7f03388" alt=""><figcaption></figcaption></figure>

{% hint style="info" %}
Reference: [Tabs - Open Multiple Tabs (Open Tabs)](/getting-started/extension-features/tabs-open-tabs)
{% endhint %}
{% endstep %}

{% step %}

### Click the Listly Icon

On one page among the multiple tabs, click **Listly extension icon** → **Tabs** → **Parts** button.

<figure><img src="/files/477762472eadefa1c741e2759ea6a0ce379a3538" alt=""><figcaption></figcaption></figure>
{% endstep %}

{% step %}

### Select Extraction Areas

Select the areas you want to extract data from.

{% hint style="info" %}
The extraction area selection method is the same as LISTLY PARTS.
{% endhint %}

<figure><img src="/files/309f7f5139a07462930f29fc9afb4e4a8b62580b" alt=""><figcaption></figcaption></figure>

When you click the **\[Run Listly]** button, you'll be taken to the results page. You can see that tabs with the same data pattern as your selected section are automatically organized into one folder.

<figure><img src="/files/0f2bdac3ad1637dbcc375c06cc9319b0fd9ab866" alt=""><figcaption></figcaption></figure>
{% endstep %}

{% step %}

### Select Tab for Data to Extract

In the results page, select the tab containing the information you want to extract, then click the **\[Excel]** or **\[Google Sheets]** button to export the data.

<figure><img src="/files/d7b31e3b1e42bfc146865bbabb615db6ce0e873c" alt=""><figcaption></figcaption></figure>
{% endstep %}

{% step %}

### Download Extracted Data

Open the downloaded Excel or Google Sheets file to see information from multiple tabs neatly organized in a single file.

<figure><img src="/files/798b22b0ce902a372de0708e1a98324de60da701" alt=""><figcaption></figcaption></figure>
{% endstep %}
{% endstepper %}

***

## Tutorial Video

{% embed url="<https://youtu.be/BIkuBnwSIsQ?si=GFegoYZkRx-egCwp>" %}

***

## Tabs Extraction FAQ

<details>

<summary>I need to do Tabs extraction, but new tabs aren't appearing on the website. Is it blocked?</summary>

First, **to perform Tabs extraction, you need to open new tabs in your browser first**. Basically, you can open individual detail pages you want to extract one by one using right-click from the list page, but this is cumbersome, and

<figure><img src="/files/3c0919690414c9817160775d9baf79c17fd34560" alt=""><figcaption></figcaption></figure>

<figure><img src="/files/593f496f96a56bc71c0873fe798849f84dacf1ee" alt=""><figcaption></figcaption></figure>

Error messages like BLANK#BLOCKED shown in the image below may appear.

<div><figure><img src="/files/d829217619d90cc7cb1b6f54b2763682e534e812" alt=""><figcaption><p><strong>Properly opened detail page</strong> example in new tab</p></figcaption></figure> <figure><img src="/files/df0db4b3feed5acfd0e16edd4788a8f19e0db029" alt=""><figcaption><p><strong>Detail page that didn't open properly</strong> in new tab example</p></figcaption></figure></div>

When opening detail pages in new tabs using right-click, errors like the above often occur if you don't click precisely on the area containing the detail page link.

You can prevent this by using Listly's [\[Open Multiple Tabs (Open Tabs)\]](/getting-started/extension-features/tabs-open-tabs) feature or other extensions that open URLs all at once.

</details>

<details>

<summary>Listly Data Extraction Units: Basic URLs vs Advanced URLs</summary>

URLs are Listly's unit of data extraction. We classify them into '**Basic URLs**' and '**Advanced URLs**' based on usage and deduction method, and the differences are as follows:

#### Basic URLs (URLs for Basic features)

* Usage: Used for single-page extraction through the Basic tab of the extension.
* Deduction method: 1 Basic URL is deducted each time a page is extracted.
* Usage conditions: Available unlimitedly when subscribing to upper-tier plans like Light Plan and Business Plan. Free Plan users get 10 URLs recharged after 30 days once they've used all 10. Basic URLs cannot be purchased separately.

#### Advanced URLs (URLs for Advanced features)

* Usage: Used when utilizing Listly's advanced features such as Tabs, group extraction, auto-click, auto-scroll, schedule settings, action templates, etc.
* Deduction method: 1 Advanced URL is deducted for processing one page worth of data through advanced features. Not deducted if extraction fails.
* Usage conditions: Renewed monthly after the first payment of the subscribed plan. Consumed Advanced URLs cannot be additionally purchased from the pricing page. If you want to purchase more, you must first subscribe to a higher-tier plan.

</details>

<details>

<summary>If I want to receive the Excel file in the order tabs are opened, what should I do?</summary>

<figure><img src="/files/eabb1d94715d9ddf0cdb157ca2eedb2c3e9f89a1" alt=""><figcaption></figcaption></figure>

The first method is to click the **extract button** on the first tab among the open browser tabs. Then the first tab is automatically set as the 'tab source', and the results page also opens based on that 'tab source'.

<figure><img src="/files/8756fd3cfe90cf23fd371e4d83414f0611370a23" alt=""><figcaption></figcaption></figure>

If you've already clicked the extract button on a tab other than the first browser tab, you can **change the reference task in the results page**. ① Click the first URL in the folder list. ② Select the tab containing the data you want to extract from the information card below.

After this process, click the **Excel** or **Google Sheets** button to download the results.

<figure><img src="/files/7ee8cc59b9c8bd6955c0507457b89348712f2e4a" alt=""><figcaption></figcaption></figure>

By making the first browser tab the 'reference point', you can extract data sorted in the order the tabs were opened as shown above.

</details>


# Tabs-Open Tabs

## What is the Open Multiple Tabs Feature?

A feature that lets you open multiple pages for extraction as individual tabs at once with simple button and keyboard controls. Using the \[Open Multiple Tabs] feature, you can open all links within a dragged area as separate tabs simultaneously.

{% stepper %}
{% step %}

#### Click the OPEN TABS Button

On the **parent list page** (e.g., shopping mall thumbnail view) of the pages you want to extract, click **LISTLY extension** → **Tabs** → **OPEN TABS** button.

<figure><img src="/files/79d834fa0a2aeaac0d78d30fe147d81e0acf5d81" alt=""><figcaption></figcaption></figure>
{% endstep %}

{% step %}

#### Select Shortcut Key (Activation Key) and Delay Time in the Popup Settings, Then Save

* **Activation key**: The \[Open Multiple Tabs] feature is activated while holding down the configured shortcut key.
* **Delay time**: The interval at which each tab opens. If too many tabs open in a short time, some pages may not load properly, so adjust the time appropriately.

<figure><img src="/files/c36f983fe03e3241e685ff06818205fb728e6110" alt=""><figcaption></figcaption></figure>
{% endstep %}

{% step %}

#### Open Multiple Tabs

While holding down the **shortcut key** you set earlier, drag over the area containing the links you want to open. When the popup window appears, click the **\[Open]** button and the links within the dragged area will open as separate new tabs.

<figure><img src="/files/9bbac2f97fc54ebcebae876fd335ca04496b7fd9" alt=""><figcaption></figcaption></figure>
{% endstep %}
{% endstepper %}

## Tabs - Open Multiple Tabs FAQ

<details>

<summary>What methods are available for opening desired pages in multiple tabs?</summary>

**A1. Use Listly's \[Open Multiple Tabs] Feature**

Click the **\[Open Multiple Tabs]** button at the bottom of the Tabs tab in the Listly extension to activate the feature, then drag over the area containing links while holding down the configured keyboard shortcut.

{% hint style="info" %}
Reference: [Tabs - Open Multiple Tabs (Open Tabs)](/getting-started/extension-features/tabs-open-tabs)
{% endhint %}

</details>

<details>

<summary>How can I open pages one by one easily using the keyboard?</summary>

**A2. Use the 'Ctrl' Key**

**Hold down the Ctrl key on your keyboard while clicking links on a web page.** Ctrl is a shortcut that opens clicked links in a new tab. You can easily open pages one by one.

<figure><img src="/files/c71d1e857b1fb74f49aede4e061927b82e4dbc12" alt=""><figcaption></figcaption></figure>

</details>

<details>

<summary>Are there other extensions I can use to open multiple URLs at once?</summary>

**A3. \[Extension Option-1] Open Multiple URLs**

[▶ Open Multiple URLs Extension Download Link](https://chrome.google.com/webstore/detail/open-multiple-urls/oifijhaokejakekmnjmphonojcfkpbbh?hl=ko)

<figure><img src="/files/3de44a4ca9a19408e9f6f157a3ed0a12ee024a4b" alt=""><figcaption></figcaption></figure>

Open Multiple URLs is an extension that opens all entered URLs in new tabs. You can use it by extracting list pages with 'hyperlinks included' using Listly, then copying and pasting those links.

* If you enter too many URLs at once, pages may not load properly.
* Open Multiple URLs is not a service provided by Listly.

</details>


# CSS Selector

## What is CSS Selector?

To use features like auto-click, auto-login, and pagination templates, you need Selector values that specify which elements to click. This guide explains how to get those Selector values.

{% hint style="success" %}
**CSS Selector refers to elements where style attributes are applied**. Simply put, websites are fundamentally made up of countless tags, and CSS Selectors are specific values assigned to each element on the web page to apply design on top of the code. When you see CSS Selector mentioned in Listly help documentation, understand it as **the code value a specific element (e.g., button, input field) has**.
{% endhint %}

***

## How to use it

### A1. Getting selector values

{% stepper %}
{% step %}

#### Getting CSS selector values with PARTS

Using Listly PARTS lets you get CSS Selector values quickly and easily.

{% hint style="success" %}
**Click Listly icon** → **Select \[Parts+]** → Click desired element
{% endhint %}

Through this process, you can immediately check the desired element's Selector value in the side panel. Click the **\[Copy icon]** in the CSS Selector field to easily copy that value.

<figure><img src="/files/affd505408ff378fe3d66de99a5d5997c8147d19" alt=""><figcaption></figcaption></figure>

After copying the value, paste it using Ctrl+V into settings fields that need Selector values.

<figure><img src="/files/584aec6ae11f6410fce92fed6eec7ab48cd97a4a" alt=""><figcaption></figcaption></figure>
{% endstep %}

{% step %}

#### Getting CSS selector values with developer tools (Legacy)

(1) Right-click on an element like a button or input field and select **\[Inspect]**.

<figure><img src="/files/a7e65481c6f6e39429def2f5c12138988efa4d4c" alt=""><figcaption></figcaption></figure>

(2) A code window appears on the right or bottom of the screen. The code corresponding to the element you just selected is highlighted in gray, and hovering over the code highlights the corresponding area on screen in color.

<figure><img src="/files/46cf2c8cd5da1ea0c406b2964888c99433972f45" alt=""><figcaption></figcaption></figure>

(3) Right-click on the gray-highlighted code and select Copy -> Copy selector to copy that selector's value.

<figure><img src="/files/53f5829eab6a87bbea96c3b514923c5451639b2c" alt=""><figcaption></figcaption></figure>

(4) Go to the settings window and paste the copied value by pressing Ctrl+V or right-clicking and selecting 'paste' where the selector value needs to be entered, then save.

<figure><img src="/files/86c48dffc4965d15c9d0925b2592f845ca86e852" alt=""><figcaption></figcaption></figure>
{% endstep %}
{% endstepper %}

### A2. When Selector doesn't work properly after entering it

For most websites, entering the Selector value from step 1 works normally. However, if entering the Selector value doesn't give desired results, check these methods:

{% stepper %}
{% step %}

#### Design modification program interference

* <mark style="background-color:$success;">**Problem**</mark>: **Unnecessary CSS code may have been copied along** due to cursor design, browser theme changes, design correction extensions, etc. Since CSS is code that affects web page design, if related programs are running, turn off settings and copy the Selector value again.
  {% endstep %}

{% step %}

#### When necessary info is in parent/adjacent tags

* <mark style="background-color:$success;">**Problem**</mark>: Key information may be contained in parent tags (parent elements) rather than the initially selected element.
* <mark style="background-color:$success;">**Solution-1 (Using Parts)**</mark>: Click the **up arrow (↑)** from the initially selected element to adjust the selection area. Expand to **the largest box that doesn't exceed the button area** and use that value.

<figure><img src="/files/0e6f8b4a76ce2ae2d8a6c6c7e21da481a47c6acf" alt=""><figcaption></figcaption></figure>

* <mark style="background-color:$success;">**Solution-2 (Using developer tools)**</mark>: In developer tools, hovering over code highlights the corresponding element area. Select **the largest box that doesn't exceed the button area** and copy its CSS Selector value.

<figure><img src="/files/841899c7441001121c73fa157a755619599b4b6d" alt=""><figcaption></figcaption></figure>
{% endstep %}
{% endstepper %}


# Table Data

## What is Table Data?

A feature you can usefully use when extracting data that 'looks like a table'.

{% columns %}
{% column width="58.333333333333336%" %}

<figure><img src="/files/2b25eea09551f439d867fdf1e45d13af4504fb74" alt=""><figcaption></figcaption></figure>
{% endcolumn %}

{% column width="41.666666666666664%" %}

{% endcolumn %}
{% endcolumns %}

{% hint style="info" %}
**Quick Start**&#x20;

➡️ Extract with TABLE DATA off ➡️ If 'it looks like a table' but data doesn't extract properly, re-extract with TABLE DATA toggle on
{% endhint %}

***

Left is OFF, right is ON. Use the default OFF state, and **when you think 'it looks like a table but data doesn't extract well'**, try extracting with it **ON**.

Useful for extracting data from web pages that look like tables (tables), like this site:

<figure><img src="/files/d6359594604108bf12da4f7c11d6a8d49b0ee53e" alt=""><figcaption></figcaption></figure>

<https://www.kpc.or.kr/education/CourseYear.asp?UMEduType=49049012\\&UMEduTheme=49050037>

Check the extraction difference between option off and on in the How to use it section below.

***

## How to Use

{% stepper %}
{% step %}

### TABLE DATA - OFF

When extracting data, the <mark style="color:red;">**red underlined**</mark> area shows whether TABLE-LIKE is applied.

<figure><img src="/files/8d09ccce110b22a89a2b0706c2277cce914fc6a6" alt=""><figcaption></figcaption></figure>

When this option is off (OFF), downloading the Excel file looks like this:

<figure><img src="/files/7e1158ce9974b34adadc60d7fe70e78dc8fbf601" alt=""><figcaption></figcaption></figure>

**Original page vs. extracted data comparison**

Let's compare the original page with part of the extracted data.

But the values look a bit off. Some strings were partially duplicated in extraction (31, 31Cheonan, 21, 21Cheongju, etc.) and the number of blank spaces between columns differs. Comparing the original page's light green blank areas with the Excel file shows **the extracted data alignment differs from the original at a glance**.

<div><figure><img src="/files/f46148d0a1c8ca7b9b5a2d23e2c60424a7278113" alt=""><figcaption></figcaption></figure> <figure><img src="/files/8f0b4f86ae344aca3cdb5e6be4140abb3620e385" alt=""><figcaption></figcaption></figure></div>

{% hint style="success" %}
**In this case, turn IS TABLE-LIKE to** <mark style="color:red;">**`ON`**</mark> **and extract again**.
{% endhint %}
{% endstep %}

{% step %}

### TABLE DATA - ON

Let's extract from the same website with TABLE-LIKE option on.

The <mark style="color:red;">**red underlined**</mark> area shows TABLE-LIKE is applied.

<figure><img src="/files/f5fc143a12bb1aff4762e6bebaa004e74f4db313" alt=""><figcaption></figcaption></figure>

**Original page vs. extracted data comparison**

Let's compare the original page with the extracted data from the same area as in section 1.

When extracting data with TABLE-LIKE option enabled, the blank areas marked in <mark style="background-color:green;">light green</mark> on the original page **match exactly with the extracted data's blank areas and there's no duplicated text**.

<div><figure><img src="/files/f46148d0a1c8ca7b9b5a2d23e2c60424a7278113" alt=""><figcaption></figcaption></figure> <figure><img src="/files/48eec297d667a6f562a53ff6d2d217beaee0f2d3" alt=""><figcaption></figcaption></figure></div>

{% hint style="info" %}
Observing Listly users, only about 10% deal with tabular data. So in most cases you don't need the TABLE-LIKE option. Use it in the default OFF state, and only turn it ON when you judge 'it looks like a table but doesn't extract well'.
{% endhint %}
{% endstep %}
{% endstepper %}


# Use Cookie

## What are Cookies?

Cookies are small files containing information about website-user interactions. They can include website domain name, login information, cookie expiration date, internet usage patterns, etc.

{% columns %}
{% column width="58.333333333333336%" %}

<figure><img src="/files/749ce7d29ac338dc541a3124b247f79d9a4e2993" alt=""><figcaption></figcaption></figure>
{% endcolumn %}

{% column width="41.666666666666664%" %}

{% endcolumn %}
{% endcolumns %}

***

## Use Cookie Option

The **Use Cookie** option lets you extract data from private web pages requiring specific access permissions (like login) by utilizing login status or session information stored in your browser during re-extraction, so you can extract data without additional login steps.

Enabling the **\[Use Cookie]** toggle in the Listly extension popup saves the user's temporary information, allowing data re-extraction through Listly without additional login steps during the validity period.

* **Validity Period**: Saved cookies are **valid for about 1 hour** and expire after that time.
* **Usage Timing**: Useful when re-extraction is needed within a short time for pages requiring user permissions like my pages, order history, private forums, etc.
* **When Disabled**: Initial extraction of private pages is possible, but re-extraction may have higher failure probability without saved cookies.

{% hint style="warning" %}
**Important notes when using cookie options**

* Cookie-based login retention status may be limited depending on user's browser environment or site-specific authentication policies.
* Some sites with strict security (e.g., banks, internal systems) may not support cookie authentication or it may expire immediately.
  {% endhint %}


# iFrame

## What is iFrame?

iFrame is an HTML tag used to embed another web page within the current web page. Simply put, it's used to show nested web pages within a web page, requiring verification for accurate data extraction.

{% hint style="success" %}
Listly provides automatic iFrame detection to easily extract iFrame data. The moment you click the extension, iFrame areas are highlighted in black, and clicking the iFrame button opens the original page containing that content in a separate window. **For iFrames, always open the original page first, then use Listly WHOLE or PARTS features** to extract the data you want.
{% endhint %}

![iframe detect gif](/files/ef16702c65e28a7bc6323ab908742f8b12fc4214)

{% hint style="info" %}
**Quick Start**&#x20;

➡️ Click Listly ➡️ Click iFrame area highlighted in black ➡️ Scrape data on a newly opened page using Listly&#x20;
{% endhint %}


# Result Page Features

This is the page you're automatically redirected to when extracting data. On the results page you can set up various data download options, and for upper-tier plans including *Business*, you can access advanced features such as group extraction.

![Result page screenshot](/files/sf6XHioYrpZZ2snPrff0)

<mark style="color:red;">**➊**</mark>**&#x20;+Group** : Based on the current results, you can enter consecutive URLs to perform group extraction.

<mark style="color:red;">**➋**</mark>**&#x20;Re-extract** : Attempts to re-extract data for the selected task.

<mark style="color:red;">**➌**</mark>**&#x20;Logs** : If there are group extraction records, you can view the log list.

<mark style="color:red;">**➍**</mark>**&#x20;Browser Settings** : You can check the settings applied to the extracted page. Click to enter the settings screen.

<mark style="color:red;">**➎**</mark>**&#x20;Folder Download** : When you enable the toggle button, previously created folder groups will appear. Use this when a task shown on the results page is included in a specific folder. If extracted with Tabs, the data from each page will be placed into one folder and activated automatically.

<mark style="color:red;">**➏**</mark>**&#x20;Data Download Options** : You can configure automatic column cleanup, hyperlink download, and column renaming features.

<mark style="color:red;">**➐**</mark>**&#x20;Remove Empty Columns** : Use the slider to automatically remove columns with a high ratio of empty cells.

<mark style="color:red;">**➑**</mark>**&#x20;Excel** : Download the result data as an Excel file.

<mark style="color:red;">**➒**</mark>**&#x20;Google Sheets** : Download the result data to a Google spreadsheet.

<mark style="color:red;">**❿**</mark>**&#x20;API** : Export data as JSON or CSV using the API.

<mark style="color:red;">**⓫**</mark>**&#x20;Hook** : After extraction is complete, notifies wherever the user wants with the results.

<mark style="color:red;">**⓬**</mark>**&#x20;Search Bar** : Quickly find tabs that contain desired data based on keywords.


# Data Download Options

> Download options are unrelated to usage. Feel free to check/uncheck data download options to extract data the way you want.

![image](/files/U5PkqyIutQ5fDcyQlN5e)

{% stepper %}
{% step %}

### Auto-arrange columns

Automatically sorts data by similar patterns. When disabled, extracts in left-aligned state without gaps.

{% hint style="info" %}
For clarity, similar pattern data is shown in the same color.
{% endhint %}

![image](/files/aP3HWDIJD1jdi3ENapT4)
{% endstep %}

{% step %}

### Auto-arrange columns+

Option with enhanced sorting logic over basic auto-arrange. When columns are significantly misaligned, can organize data more reliably.

![image](/files/crTo5waPn1jrp6G4NL29)
{% endstep %}

{% step %}

### Hyperlink

Extracts hyperlink values connected to each element together.

![image](/files/FxJFcJ0XAQ8MU4MHwvHp)
{% endstep %}

{% step %}

### Column names

Creates column names in each Excel column's first row. When disabled, extracts only data without column names.

![image](/files/B8IxeSqTDSilkuHXMunX)
{% endstep %}

{% step %}

### Remove empty columns

Automatically removes columns with high blank ratios. Adjust the slider (0\~100%) to control removal threshold. Note that deletion is based only on blank ratio regardless of importance.

![image](/files/bbc180f59f698283f619495000dc55540c19884a)
{% endstep %}
{% endstepper %}


# Data Arrangeent (1-Card-to-1-Row vs 1-Tab-to-1-Row)

## What is the Data Arrangement Option?

The data arrangement option is **a feature you can set when extracting multiple pages at once (group extraction, tabs extraction, etc.) and exporting them to a single file**. Depending on how you'll use the data, you can choose whether to arrange individual page results by card or by tab.

<figure><img src="/files/LiwNwwRsH9EnTX5Kqf0P" alt=""><figcaption></figcaption></figure>

{% hint style="info" %}
Data arrangement is one of \[Download Options] and **has nothing to do with usage**. Feel free to select both ways and choose the one that gives you the results you want.
{% endhint %}

***

## Understanding Cards vs Tabs

<figure><img src="/files/9a5c34f30cc32d3d5f2bd204036c8246065d1dea" alt=""><figcaption></figcaption></figure>

* **Card**: A data unit area discovered by Listly. One card is saved as **one Excel row**. For a single task, if you download the above result as is, 30 cards means 30 rows in Excel.
* **Tab**: The upper section containing multiple cards.

These concepts apply to each task and are used as data arrangement standards when results from multiple URLs are combined, like group extraction or tabs extraction.

***

## Examples&#x20;

{% stepper %}
{% step %}

#### Card per row

<figure><img src="/files/4baaa54276576aa3615c1f8441a98ce66ab87b33" alt=""><figcaption></figcaption></figure>

If each URL's selected data tab had **2 cards**, extracting 3 URLs creates a total of **6 rows (2×3) of data**.\
In other words, **each card is recorded as an independent row**, making it suitable for cases like shopping mall 'list pages' where **multiple item info is contained** within one tab.
{% endstep %}

{% step %}

#### Tab per row

<figure><img src="/files/d4f278a28d007eb81a743edf5a7501e58feef805" alt=""><figcaption></figcaption></figure>

All cards within each URL's data tab are placed in one row. Therefore, extracting 3 URLs with this option creates only **3 rows** total in the final Excel file, matching the number of URLs.

In other words, **each page is recorded as one Excel row**, making it suitable for cases like shopping mall 'detail pages' where there's only one item's info within one tab.

<figure><img src="/files/TRlIo5m2TAEgZ2wAAM51" alt=""><figcaption></figcaption></figure>
{% endstep %}
{% endstepper %}


# Tab Search

## What is Tab Search?

A keyword-based search feature that helps you quickly find tabs containing the data you want. If your desired data isn't in the first tab, quickly search for and find keywords included in the extracted data.

<figure><img src="/files/aKAyoYi2IgORJQs7pcHr" alt=""><figcaption></figcaption></figure>

{% hint style="info" %}
Reference: [Understanding Card vs. Tab concepts](/getting-started/result-page-features/data-arrangement#understanding-cards-vs-tabs)
{% endhint %}


# Group Extraction

## What is Group Extraction?

Group extraction is a **feature that lets you collect multiple pages at once**.

{% columns %}
{% column width="83.33333333333334%" %}

<figure><img src="/files/054c646062ef5009f8fb34830551537beba7793a" alt=""><figcaption></figcaption></figure>
{% endcolumn %}

{% column width="16.666666666666657%" %}

{% endcolumn %}
{% endcolumns %}

After extracting one representative page first, click the **\[+Group]** button in the result window and add URLs of related pages—Listly will automatically extract the rest.

***

## Preparing URLs before Group Extraction

Group extraction requires entering multiple page URLs at once, so it's good to prepare URLs of pages to extract in advance.

Depending on your situation, refer to these guides to prepare the necessary URLs first:

* [Group Extraction - Generate 1,2,3…Sequential Page URLs](/getting-started/result-page-features/group-extraction-sequential-urls)
* [Group Extraction - Extract Detail Page URLs](/getting-started/result-page-features/group-extraction-detail-page-urls)

***

## Important Notes

{% columns %}
{% column width="83.33333333333334%" %}

<figure><img src="/files/68cc229d75b662c7d22371eb587dbca7165c22bb" alt=""><figcaption></figcaption></figure>
{% endcolumn %}

{% column width="16.666666666666657%" %}

{% endcolumn %}
{% endcolumns %}

**The first page extracted in group extraction serves as a 'template'.**\
Group extraction works by fetching data from the same locations on other pages as the positions selected on this first page.

Therefore, **extraction may fail if the page structure differs between the first extracted page and subsequently entered URLs.**\
Before proceeding with group extraction, make sure page structures are identical.

***

## How to Use&#x20;

{% stepper %}
{% step %}

#### Extract the group extraction source page

First extract the source page that will serve as the group extraction reference. It doesn't have to be the first URL in your list—just select **a page with representative structure among pages you'll group extract**. Both Whole / Parts extraction methods work, but [**Parts Extraction**](/getting-started/extension-features/parts) is recommended as **it lets you specify data locations more precisely**.

<figure><img src="/files/45a4c58021eefda233b77b3f44f5535a6c8c646c" alt=""><figcaption></figcaption></figure>
{% endstep %}

{% step %}

#### Select the extraction tab

**Select a tab containing the information you want** in the result window. Choose a tab that includes all information in the selected area.

<figure><img src="/files/c1edee00330bf0f9b653a8e2ede940ff9900c57b" alt=""><figcaption></figcaption></figure>
{% endstep %}

{% step %}

#### Click the \[+Group] button

Click the **\[+Group]** button.

<figure><img src="/files/d4a357c88ae71bb85dfed190003f8e6e1f9baed7" alt=""><figcaption></figcaption></figure>
{% endstep %}

{% step %}

#### Paste URLs needed for group extraction

Paste the **prepared URLs** at the bottom of the group settings window and click the **\[Done]** button.

<figure><img src="/files/8111d26c1cc9cf18e3ee23de137ea9556aa2bef1" alt=""><figcaption></figcaption></figure>

{% hint style="warning" %}
You must **also include the URL of the source page where you did the initial extraction**.
{% endhint %}
{% endstep %}

{% step %}

#### Check group extraction progress

During group extraction, refresh Databoard to check progress. When extraction completes, click the result field to go to the group result window.

<figure><img src="/files/b9ca6b97719420c1df9e080257c24a00cf53582a" alt=""><figcaption></figcaption></figure>
{% endstep %}

{% step %}

#### Select data arrangement method

Click Excel or Google Sheets button, select data arrangement method, then click download button.

{% hint style="info" %}
Reference: [1 card per row / 1 tab per row](/getting-started/result-page-features/data-arrangement)
{% endhint %}

<figure><img src="/files/bc99923c688250c38bb83a7158fbf1108c8a4be1" alt=""><figcaption></figcaption></figure>

<figure><img src="/files/669a60719b1ce7442f3f47c7d562e6f70848e21e" alt=""><figcaption></figcaption></figure>
{% endstep %}

{% step %}

#### Group extraction complete

Open the downloaded file to check your extracted data. Group extraction is complete!

<figure><img src="/files/893eba27e40c7cb4108595b232332450e3b43fe8" alt=""><figcaption></figcaption></figure>
{% endstep %}
{% endstepper %}


# Group Extraction - Generate 1,2,3…Sequential Page URLs

{% hint style="success" %} <mark style="color:$success;">**Wait!**</mark> **Learn about an easier way to generate sequential page URLs**

If you're trying to group extract pages numbered sequentially, using the [Pagination Template feature](/getting-started/databoard-features/settings-pagination-templates) makes it simpler—you can skip the step of getting 1,2,3...page addresses. Pagination templates automatically click 'next page' buttons to extract sequential pages.
{% endhint %}

***

## How to Use&#x20;

{% stepper %}
{% step %}

#### Check the URL pattern

As you click through page numbers on the web page you want to extract, watch how the URL changes. In most cases, only the number after <mark style="background-color:red;">page=</mark> changes. (Page 1 may have the parameter omitted.)

[<mark style="color:$success;">https://www.example.com/categories/420186/?sort=latest</mark>](https://www.example.com/categories/420186/?sort=latest)

[<mark style="color:$success;">https://www.example.com/categories/420186?page=2\\\&sort=latest</mark>](https://www.example.com/categories/420186?page=2\\\&sort=latest)

[<mark style="color:$success;">https://www.example.com/categories/420186?page=3\\\&sort=latest</mark>](https://www.example.com/categories/420186?page=3\\\&sort=latest)

Using this principle, you can easily create pagination addresses for all pages with a single URL.

<figure><img src="/files/5e840fd3d6580c9265de80be44492eb4f83cb1e2" alt=""><figcaption></figcaption></figure>
{% endstep %}

{% step %}

#### Use an automatic URL generation tool

**A. Use conversational AI service&#x20;**<sup><mark style="color:green;">**recommended**<mark style="color:green;"></sup>

You can easily generate sequential page addresses using LLM-based conversational AI services like ChatGPT. After checking the page URL pattern like the example page below, try saying "Create URL addresses with Page number from 1 to 30".

<figure><img src="/files/nXuVmC41zcTTnmcaNoUt" alt=""><figcaption></figcaption></figure>

{% hint style="info" %}
**Listly test page link:** [**https://test.listly.io/pagination/basic?page=2**](https://test.listly.io/pagination/basic?page=1)

<img src="/files/3b747b44479e3b6bdd8b94afb937ccf5394e42ac" alt="" data-size="original">
{% endhint %}

**B. Use URL builder**

Search "sequential url generator" or "url builder" in Google or other search engines to find various free web tools. This guide uses **Online Sequential Number, URL & Text Generator** as an example.\
(If you understand URL structure, you can easily create them with Excel formulas too.)

{% hint style="info" %}
Service link: [Online Sequential Number, URL & Text Generator](https://reznortech.rf.gd/online-sequential-number-text-url-link-generator.php?utm_source=chatgpt.com\&i=1)
{% endhint %}

When you go to the service link, this screen appears:

<figure><img src="/files/1448586b322f766fc3363863c7d1e4af00cd31b7" alt=""><figcaption></figcaption></figure>

Set options like the example below to generate sequential page URLs:

<mark style="color:$success;">Example URL:</mark> [<mark style="color:$success;">https://www.example.com/categories/420186?page=2\\\&sort=latest</mark>](https://www.example.com/categories/420186?page=2\\\&sort=latest)

<figure><img src="/files/513e33a2304f53fe4b3c5454b478348da084bb01" alt=""><figcaption></figcaption></figure>

Enter the options as follows and click the Generate button:

* Enter the unchanging part before the page number.
* Enter the starting page number. (Page 1 often has parameters omitted, but entering page=1 still works fine.)
* Enter the ending page number.
* Enter the increment step. Usually it's 1,2,3... sequential, so enter 1.
* Enter the unchanging part after the page number. Leave blank if there isn't one.
  {% endstep %}

{% step %}

#### Use the results

Once URLs are generated sequentially based on your input range, copy the generated addresses and paste them into **Group Extraction** to extract multiple pages at once.

<figure><img src="/files/0491291990e00baeff76b9bbea446ff0de636206" alt=""><figcaption></figcaption></figure>
{% endstep %}
{% endstepper %}


# Group Extraction - Extract Detail Page URLs

## How to Use&#x20;

{% hint style="info" %}
**Quick Start**&#x20;

➡️ Prepare URLs of pages to group extract ➡️ Access representative page and click Listly icon ➡️ Select PARTS ➡️ Click \[ + Group ] button in result window ➡️ Enter URLs → Run \[ Re-extract ] ➡️ Download group results as Excel file
{% endhint %}

***

## How to Prepare URLs of Pages for Group Extraction&#x20;

{% stepper %}
{% step %}

#### Extract the area containing links from list page → detail page

Before accessing detail pages, extract page information from the **list page** where those pages are gathered using Listly. You can use either \[Whole] or \[Parts] extraction, but it's important to **select an area containing 'links to detail pages'**.

<figure><img src="/files/9666bc8985aaecced4d9680a4ece3f2cac5c7a05" alt=""><figcaption></figcaption></figure>
{% endstep %}

{% step %}

#### Download detail page hyperlinks

Check the Data tab in the result window, **check the \[Hyperlink] option**, then export to Excel or Google Sheets.

<figure><img src="/files/f457b4fc506b853ff8f038a055bef035a868729f" alt=""><figcaption></figcaption></figure>
{% endstep %}

{% step %}

#### Open the downloaded file to check detail page URLs

You can see detail page URLs in the downloaded Excel file.

<figure><img src="/files/1e12d4c1e1b17cd8b7feaa632601f38df04d08dc" alt=""><figcaption></figcaption></figure>
{% endstep %}
{% endstepper %}


# ActionScript

## What is Action Script?

Action Script is an advanced feature that goes beyond just extracting what's visible on screen—**it lets you write JavaScript code directly to control the extraction process**.

<figure><img src="/files/26d172b3be6509a1e7343d59b3b4e3ef9841cf29" alt=""><figcaption></figcaption></figure>

Examples:

* Extract data from sections that appear after clicking specific buttons
* Extract data from areas that appear on mouseover
* Control other dynamically changing elements within sites before collecting data

You can **customize data extraction for special situations** that are difficult to solve with regular Listly automation settings.

{% hint style="warning" %}
Action Script creation service is an **Enterprise plan exclusive option**. If you're on a lower-tier plan, you can write scripts yourself to use this feature.
{% endhint %}

{% stepper %}
{% step %}

### Whole Extract then open Browser Setting

Perform a Whole Extract of the web page, then click the \[Browser Setting] section on the result page to go to that task's settings screen.

<figure><img src="/files/ed310303e2b9b7bbc11cdba3828bae843f38a59e" alt=""><figcaption></figcaption></figure>
{% endstep %}

{% step %}

### Paste your JS into Action Script and Save

Paste your written JS code into the Action Script field on the settings screen and click **\[Save]**

{% hint style="success" %}
**TIP** These days you can even use AI services like Chat GPT to write simple scripts. The Listly team shared their experience using ChatGPT to generate Action Scripts in a newsletter—check it out:\
👉[ Asked ChatGPT to write Action Script for me and "This actually works?"](https://maily.so/listly.io/posts/knrje7v0zld)
{% endhint %}

<figure><img src="/files/8d8654d1791911d24fb64ec9f4d846c90a7a1289" alt=""><figcaption></figcaption></figure>
{% endstep %}

{% step %}

### Re-extract using Action Script

Click the **\[Re-extract]** button in the result window or Databoard to re-extract the data area using Action Script.

<figure><img src="/files/461d05611e22a1ea12e2d59533c0ddb3cfbbebac" alt=""><figcaption></figcaption></figure>
{% endstep %}

{% step %}

### Verify results

Check the results after re-extraction completes. Make sure to verify that your configured Action Script worked as intended.

<figure><img src="/files/3d4ebc8a0d078d478ccd6809a721061642c0627b" alt=""><figcaption></figcaption></figure>
{% endstep %}
{% endstepper %}

## Important Notes

{% hint style="warning" %}
**Important notes when applying Action Script to Group Extraction tasks**

Action Script must be applied to the source page before group extraction. Group extraction assumes other URLs have the same structure as the representative page (source page) and collects data accordingly. If you don't apply Action Script to the source page, there's no reference for performing the same action on subsequently added URLs, which can cause **tab matching errors** or **data loss**.

* Always write and apply Action Script with the **representative page** open.
* After applying Action Script, you must first **re-extract** to verify the settings work properly.
* Then use the **\[+Group]** button to add URLs, and the same Action Script behavior will be reflected across all group pages.
* If there are significant structural differences between the source page and other pages, the script may not work properly, so it's important to only include **pages with the same structure** in group extraction.
  {% endhint %}


# WebHooks

## What is a Webhook?

A feature that lets you **receive real-time notifications** when tasks are completed or specific events occur in web apps. When you integrate Listly with enterprise messaging apps like Slack, you can receive real-time notifications when data extraction completes.

***

## How to use it

### Integrating Slack Webhook

{% hint style="info" %}
**Quick start**

➡️ Add Incoming Message app to Slack ➡️ Add webhook to Listly task ➡️ Receive notifications in desired Slack channel via data re-extraction or scheduler
{% endhint %}

{% stepper %}
{% step %}
**Log in to Slack, then click on the following link.**

Incoming WebHooks: <https://slack.com/marketplace/A0F7XDUAZ-incoming-webhooks>
{% endstep %}

{% step %}
**Add it to Slack.**

<figure><img src="/files/wHzzdMsgiQKeZ20SDuEO" alt=""><figcaption></figcaption></figure>

After clicking <mark style="color:red;">**`Add to Slack`**</mark> , select which channel to receive notifications in. At this step you can also add a new channel for notifications and set the name of the bot that sends extraction result messages. Copy the <mark style="color:red;">**`Webhook URL`**</mark> needed for Listly service integration, then click save settings.

<figure><img src="/files/b467beee57a0b799ec38046dab7af825f494cfb6" alt=""><figcaption></figcaption></figure>
{% endstep %}

{% step %}
In Listly [Databoard](https://www.listly.io/databoard), find the task you want to receive result notifications for and click the <mark style="color:red;">**`Data`**</mark> button on the right. Then click the <mark style="color:red;">**`Hook`**</mark> button on the right side of the top menu as shown below to open the webhook settings window.

<figure><img src="/files/64f49073bb87c6a54417b458f90c1886257d1afe" alt=""><figcaption></figcaption></figure>

When the webhook settings window appears, enter the Request Method and JSON values as shown below. In the URL input field, enter the <mark style="color:red;">**`Webhook URL`**</mark> you copied in the previous step.

<figure><img src="/files/cf09371b195c067301cb36bb0b4a523683242b48" alt=""><figcaption></figcaption></figure>

| Method | POST              |
| ------ | ----------------- |
| JSON   | See payload below |

{% code title="payload.json" %}

```json
{
  "text": "#taskkey is #status. <[https://www.listly.io/single?key=#taskkey&tab=4&card=30|See](https://www.listly.io/single?key=#taskkey&tab=4&card=30%7CSee) result>\nFrom Listly.",
  "icon_emoji": ":white_check_mark:"
}
```

{% endcode %}
{% endstep %}

{% step %}
Re-extract or use the scheduler to extract data for that task again, and you'll receive data extraction notification messages in Slack as shown below.

<figure><img src="/files/1c9ee3258a54d2f042fbf321000237dd4574464e" alt=""><figcaption></figcaption></figure>
{% endstep %}
{% endstepper %}

### Other Settings

* If you're familiar with JSON format, you can add <mark style="color:red;">**`channel: #channelname`**</mark> or <mark style="color:red;">**`user: @username`**</mark> to the JSON above to change which channel/user receives notifications. Adding <mark style="color:red;">**`username: botname`**</mark> lets you change the name of the bot sending notifications.
* To learn more about Slack Incoming Webhooks, check out Slack's documentation: <https://api.slack.com/legacy/custom-integrations/messaging/webhooks>


# API (Data)

## What is an API?

Short for Application Programming Interface, it's a set of rules or protocols that allow different software programs to exchange data and interact with each other.

Use this in Listly **when you want to store extracted data in your own database or integrate it with Google Sheets**.

{% hint style="success" %}
**TIP** How to integrate with Google Sheets

Reference: [Importing Collected Data in Google Sheets (API Integration)](https://help.listly.io/docs/ko/getting-started/result-page-features/broken-reference)
{% endhint %}

{% hint style="info" %}
**Quick start**

➡️ Select desired data extraction result ➡️ Click API button ➡️ (First time) Generate token ➡️ Get API token and API URL
{% endhint %}

***

## How to check API URL

The LISTLY API can be thought of as a data pipeline for delivering extracted data to wherever you want. As shown below, every data result page has an API button, and clicking it reveals the API URL pointing to that result. Accessing that URL shows the same data you'd get in Excel. **Using this feature, you can integrate with Google Sheets or write additional code to put data into your own DB.**

<figure><img src="/files/859bbfb258665bedbd5bd6385cac12ac44e0ff81" alt=""><figcaption></figcaption></figure>

For first-time API button users, a token generation screen appears as shown below. Generate the token with one click, return to the results page, and click the API button again.

If you've already configured it, you can check your API token in account settings.

<figure><img src="/files/b823bfd74dfcc2d7c6731cc7528dc488daca4c5b" alt=""><figcaption></figcaption></figure>

<figure><img src="/files/e423d56d972e9666923e268725ab3c05fd7383c2" alt=""><figcaption></figcaption></figure>

***

## API URL Types

There are 2 main API URL types:

* Latest API: Shows only the latest successfully extracted data.
* Log API: Shows all data extracted over time.

You can use both latest and log APIs on Single and Group extraction result pages. Use the stepper below to see how to check each.

{% stepper %}
{% step %}

### Single Latest Data

* Single extraction latest data: Select latest in results then check API
  {% endstep %}

{% step %}

### Single Log Data

* Single extraction log data: Select log in results then check API
  {% endstep %}

{% step %}

### Group Latest Data

* Group extraction latest data: Check in Group API

<figure><img src="/files/RvgQlHI8l1lROR9eNpq9" alt=""><figcaption></figcaption></figure>
{% endstep %}

{% step %}

### Group Log Data

* Group extraction log data: Check in log list → select desired log data → check in Group API

<figure><img src="/files/0fd3c9e68c164e3498171a4bdfe60bc091739400" alt=""><figcaption></figcaption></figure>

<figure><img src="/files/RvgQlHI8l1lROR9eNpq9" alt=""><figcaption></figcaption></figure>
{% endstep %}
{% endstepper %}

<details>

<summary><strong>Latest API response message is {"message": "</strong><mark style="color:red;"><code>Warning! Do not use this API endpoint</code></mark>..."<strong>}</strong></summary>

<figure><img src="/files/cf11cb7727cf2bb1e3afb2d1dcb3ed7189b560d9" alt=""><figcaption></figcaption></figure>

This message appears when the web page design has changed. Data extraction still works fine, but it's a warning that the web page has changed. This is likely to occur when using the scheduler feature for automatic collection.

In principle, we recommend extracting fresh from the LISTLY extension. Since the web page design changed, creating a new reference point is better long-term. Extract new data to create a new starting point, reapply scheduler settings, and from then on you can use the latest API stably again.

If you want to ignore the warning and use existing data as is, use the address shown in the "api\_endpoint" area of the message above. At this time, the latest extracted data appears, and the address shown in "api\_endpoint" is the existing API address + an option to ignore warnings (\&ignore\_warning=y).

</details>

### Introducing API Endpoints

All API URLs can be checked on the data extraction result page as shown in the image.

<figure><img src="/files/82823c4f81d541951f4e66586433395cfbf2618e" alt=""><figcaption></figcaption></figure>

<table><thead><tr><th width="140.62">Type</th><th width="521.94">URI</th><th>Method</th></tr></thead><tbody><tr><td>Single (Latest)</td><td>www.listly.io/api/single?key=&#x3C;<mark style="color:red;">singlekey</mark>></td><td>GET</td></tr><tr><td></td><td>Shows latest data. Used to receive latest data auto-extracted by scheduler.</td><td></td></tr><tr><td>Single (Log)</td><td>www.listly.io/api/single/data?key=&#x3C;<mark style="color:red;">datakey</mark>></td><td>GET</td></tr><tr><td></td><td>Shows all log data. Used to import and review all accumulated data at once.</td><td></td></tr><tr><td>Group (Latest)</td><td>www.listly.io/api/group?key=&#x3C;<mark style="color:red;">groupkey</mark>></td><td>GET</td></tr><tr><td></td><td>Shows latest group data.</td><td></td></tr><tr><td>Group (Log)</td><td>www.listly.io/api/group/data?key=&#x3C;<mark style="color:red;">datakey</mark>></td><td>GET</td></tr><tr><td></td><td>Shows all data in the batch group containing the selected data. Batch increases by 1 each time new group data accumulates.</td><td></td></tr></tbody></table>

### Introducing API Parameters

**Single (Latest) Data API**

{% hint style="success" %}
[www.listly.io/api/single?key=](http://www.listly.io/api/single?key=)<mark style="color:red;">\<singlekey></mark>&<mark style="color:red;">**selected**</mark>=1&<mark style="color:red;">**arrange**</mark>=y&<mark style="color:red;">**href**</mark>=n&<mark style="color:red;">**file**</mark>=csv
{% endhint %}

**Single (Log) Data API**

{% hint style="success" %}
[www.listly.io/api/single?key=](http://www.listly.io/api/single?key=)<mark style="color:red;">\<datakey></mark>&<mark style="color:red;">**selected**</mark>=1&<mark style="color:red;">**arrange**</mark>=y&<mark style="color:red;">**href**</mark>=n&<mark style="color:red;">**stack**</mark>=vertical&<mark style="color:red;">**file**</mark>=csv
{% endhint %}

<mark style="color:red;">\<datakey></mark> points to the data result that was open when the user copied the API URL. Based on the tab selected in that data, it fetches the same data from latest or log data.

<table><thead><tr><th width="104.98">Name</th><th width="100.77">Type</th><th width="155.33">Values</th><th width="91.77">Default</th><th>Description</th></tr></thead><tbody><tr><td>selected</td><td>int</td><td>1, 2, 3...</td><td>1</td><td>Position of selected tab.<br>1 means 1st, 2 means 2nd.</td></tr><tr><td>arrange</td><td>string</td><td>y, n</td><td>y</td><td>Data auto-sort option.<br>y auto-sorts.<br>n outputs in order of appearance from left without auto-sorting.</td></tr><tr><td>href</td><td>string</td><td>y, n</td><td>n</td><td>Hyperlink inclusion option.<br>y includes hyperlinks.<br>n doesn't include them.</td></tr><tr><td>stack</td><td>string</td><td>vertical, horizontal</td><td>vertical</td><td>How to stack data.<br>vertical stacks top to bottom vertically.<br>horizontal stacks left to right horizontally.</td></tr><tr><td>file</td><td>string</td><td>csv, json</td><td>json</td><td>Data output format.</td></tr><tr><td>from</td><td>datetime</td><td>2020-11-01T00:00</td><td></td><td>Can limit data range by datetime.<br>from is the starting point.<br>Expressed as <mark style="color:red;background-color:$info;">%Y-%m-%dT%H:%M</mark>.</td></tr><tr><td>to</td><td>datetime</td><td>2020-11-11T23:59</td><td></td><td>Can limit data range by datetime.<br>to is the ending point.<br>Expressed as <mark style="color:red;background-color:$info;">%Y-%m-%dT%H:%M</mark>.</td></tr></tbody></table>

{% hint style="success" %}
**TIP** If the explanation above isn't clear, try changing option values directly in the actual API URL. You can immediately see how it changes.
{% endhint %}

***

## Code Samples

**Python Code Template**

```python
import requests
import csv

API_URL = "API URL"    # Enter 'API URL' of collected data
API_TOKEN = "API Token"     # Enter 'API Token' issued to your account
headers = { "Authorization": API_TOKEN }

# Load collected data
response = requests.get(url=API_URL, headers=headers)
content = response.content

# Save as CSV file
"""
If the file format loaded by API URL is JSON not CSV,
you need to use different code for that
"""
with open('./result.csv', 'wb') as f:
    f.write(content)
```

**Python Code Actual Example**

```python
import requests
import csv

API_URL = "https://www.listly.io/api/single?key=CmKQ625S&selected=1&arrange=y&href=n&file=csv"
API_TOKEN = "BC1Sx370Yows25RxaBMuRxTuMKw3Aq0Ks"
headers = { "Authorization": API_TOKEN }

response = requests.get(url=API_URL, headers=headers)
content = response.content

with open('./result.csv', 'wb') as f:
    f.write(content)
```


# API (Status & Billing Info)

The API Endpoints included in this document are being developed and operated for experimental purposes.

{% hint style="info" %}
**Check** [**API (Extraction Data)**](/getting-started/result-page-features/api-data) **for basic API usage.**
{% endhint %}

## API (Extraction Task Status, Billing Info) Types

* Billing: Shows billing information for subscribed products.
* SingleTask Status: Shows extraction task status (wait, doing, success, fail).
* GroupTask Status: Shows extraction task status (wait, doing, success, fail).

## API Endpoint & Response

### Billing API

| Type    |                                 URI | Method |
| ------- | ----------------------------------: | :----: |
| Billing | **<https://listly.io/api/billing>** |   GET  |

Returns the following information:

* plan: Subscribed plan
* reset: Next month subscription renewal date
* expire: (For annual subscription) Subscription expiration date
* usage: Available URL count
* proxy: Proxy servers to auto-purchase with automatic billing
* url: URLs to auto-purchase with automatic billing
* autopay: Whether automatic billing next month

{% code title="Response example" %}

```json
{
    "plan": "business",
    "reset": "2023-04-17T19:00:00+09:00",
    "expire": "2023-09-05T13:48:39.443+09:00",
    "usage": {
        "available": 8738,
        "total": 9000
    },
    "addon": {
        "proxy": {
            "currency": "KRW",
            "price": 0
        },
        "url": {
            "currency": "KRW",
            "price": 0
        }
    },
    "autopay": false
}
```

{% endcode %}

***

### SingleTask (Single Extraction Status) API

| Type              |                                            URI | Method |
| ----------------- | ---------------------------------------------: | :----: |
| SingleTask Status | **<https://listly.io/api/single/status?key=>** |   GET  |

Returns the following information:

* key: Single extraction task key
* type: whole or part (full or partial extraction)
* status: Extraction status (wait, doing, success, fail)
* updated: Extraction task last modified date
* created: Extraction task initial creation date

{% code title="Response example" %}

```json
{
    "key": "SGzSoRqJ",
    "type": "part",
    "status": "success",
    "updated": "2023-04-11T08:45:01.109+09:00",
    "created": "2022-12-02T17:23:46.108+09:00"
}
```

{% endcode %}

***

### GroupTask (Group Extraction Status) API

| Type                           |                                           URI | Method |
| ------------------------------ | --------------------------------------------: | :----: |
| Group info. & GroupTask Status | **<https://listly.io/api/group/status?key=>** |   GET  |

Returns the following information:

* key: Group extraction task key
* type: whole or part (full or partial extraction)
* name: Group name
* status: Extraction status (wait, doing, success, fail) — may include counts (e.g., success/total)
* updated: Extraction task last modified date
* created: Extraction task initial creation date
* tasks: Registered group extraction task info and extraction status

{% code title="Response example" %}

```json
{
    "key": "vk9q2sJQ",
    "type": "part",
    "name": "www.youtube.com",
    "status": {
        "success": 246,
        "total": 246
    },
    "updated": "2022-09-29T00:19:33.794+09:00",
    "created": "2022-09-28T23:47:16.708+09:00",
    "tasks": [
        {
            "url": "https://www.youtube.com/watch?v=0KnUyy6pH-U",
            "status": "success",
            "updated": "2022-09-29T00:08:13.905059+09:00",
            "created": "2022-09-28T23:47:17.102288+09:00"
        },
        {
            "url": "https://www.youtube.com/watch?v=bGpzWPUbP3s",
            "status": "success",
            "updated": "2022-09-28T23:47:20.634761+09:00",
            "created": "2022-09-28T23:47:17.102359+09:00"
        },
        
        ...,

        {
            "url": "https://www.youtube.com/watch?v=QD0by6q-9Go",
            "status": "success",
            "updated": "2022-09-28T23:58:49.095977+09:00",
            "created": "2022-09-28T23:47:17.116181+09:00"
        }
    ]
}
```

{% endcode %}


# Databoard Features

A user space where you can view and manage all extracted data in one place. From Databoard, you can access settings for data extraction including auto-click, auto-extraction, scheduler and other paid plan features, as well as re-extraction, data logs, and screenshot functions.

![Databoard](/files/S7qfSPSpq6FvNlSvdduV)

***

### Task Types

<mark style="color:green;">**➊**</mark>**&#x20;Single Task (Default):** Basic task extracting individual pages, created when you first extract using [Whole](/getting-started/extension-features/whole) or [Parts+](/getting-started/extension-features/parts) buttons.

<mark style="color:green;">**➋**</mark>**&#x20;Group Task:** Task created through [Group Extraction](/getting-started/result-page-features/group-extraction) feature that bundles multiple pages. Settings, re-extraction, and schedule settings are available per group.

<mark style="color:green;">**➌**</mark>**&#x20;Schedule Task:** Task scheduled to run automatically at specified times (e.g., if set to run daily at 7 AM, extraction proceeds automatically at that time).

<mark style="color:green;">**➍**</mark>**&#x20;Tabs Folder:** Task extracted through [Tabs](/getting-started/extension-features/tabs-parts) feature. Unlike group tasks, settings, re-extraction, and schedule application are not available at the folder level.

<mark style="color:green;">**➎**</mark>**&#x20;Configured Task:** Task with specific settings applied like auto-scroll, auto-click, proxy use. Detailed settings displayed together so you can see which options are applied.

<mark style="color:green;">**➏**</mark>**&#x20;Failed Task:** Task that encountered errors during extraction and didn't complete normally. Screenshot provided to identify failure cause.

### Settings / Schedule / Re-extract

<mark style="color:blue;">**➊**</mark>**&#x20;Settings:** Configure extraction environment in detail for each task (or group). Various settings can be applied for extraction automation. Access by clicking the gear icon; configured tasks show settings instead of the icon.

<mark style="color:blue;">**➋**</mark>**&#x20;Schedule:** Schedule tasks to run automatically at specified times. Set by clicking the clock icon; scheduled tasks show the set time in that field.

<mark style="color:blue;">**➌**</mark>**&#x20;Re-extract:** Re-runs a task to fetch new results. Must re-extract after applying new settings for changes to take effect. Also recommended: verify normal operation with a re-extract before registering a schedule.

### View Results

<mark style="color:yellow;">**➊**</mark>**&#x20;Data:** Check and download extracted result data.

<mark style="color:yellow;">**➋**</mark>**&#x20;Group Results:** Check group task results. Databoard shows success/failure ratio of registered URLs directly; clicking shows result data for each URL included in that group.

<mark style="color:yellow;">**➌**</mark>**&#x20;Log:** Automatically generated when re-extracting tasks. For scheduled tasks, cumulative results can be downloaded as a single Excel file.

{% hint style="info" %}
Learn more about [Log Group Extraction](/getting-started/databoard-features/log-group-extraction)
{% endhint %}

<mark style="color:yellow;">➍</mark> Screenshot: For failed extractions, provides page state at failure time. Error code included to identify failure cause.

{% hint style="info" %}
Learn more about [Troubleshooting Guide](broken://pages/i73g4LZQanoLj7XtSO18)
{% endhint %}

### Task Management Menu

<mark style="color:red;">**➊**</mark>**&#x20;Delete:** Deletes selected tasks. Deleted tasks cannot be recovered, so use carefully.

<mark style="color:red;">**➋**</mark>**&#x20;Move:** Moves selected tasks to a specific folder.

<mark style="color:red;">**➌**</mark>**&#x20;Copy:** Duplicates selected tasks. The duplicated task only copies settings and URL from the original and doesn't start automatically. Useful for modifying/testing settings while preserving the original.

<mark style="color:red;">**➍**</mark>**&#x20;Folder List:** Create, modify, and delete folders. Task folders created during Tabs extraction are automatically added to the list.

<mark style="color:red;">**➎**</mark>**&#x20;Reset:** When work stops due to unexpected errors, resets extraction speed settings to reset all task execution states.

<mark style="color:red;">**➏**</mark>**&#x20;Execution Speed:** Set the number of web pages to run simultaneously (range 1–15).

<mark style="color:red;">**❼**</mark>**&#x20;Filter:** Filter and check existing tasks by folder, work type, progress, settings, schedule, etc.


# Settings - Proxy

## What is a Proxy Server?

A server that users pass through when accessing a website. Proxy servers are typically configured to hide the visitor's IP address.

<figure><img src="/files/789438a228103fa75700ad16a7bbd0c88e8eb36b" alt=""><figcaption></figcaption></figure>

### Why hide IP addresses?

Because the site you're trying to access can impose various restrictions based on IP address. Here are common situations:

* Sites that restrict access to specific countries only
* Sites that limit the number of accesses within a certain time period
* Sites that block specific IP addresses with bad records

### When do you use a proxy server?

When extracting data from websites that are difficult to access domestically, setting the proxy country to a different country makes it easy to get the desired results from previously inaccessible web pages.

{% hint style="success" %}
Listly premium proxies are proxy servers purchased through ethically operated overseas proxy services. They're shared servers used by all users, currently providing servers from multiple countries including the US/Germany/Netherlands, and countries may change.
{% endhint %}

<figure><img src="/files/b3a83fb4248f947511eaf0fc4684042395719330" alt=""><figcaption></figcaption></figure>

***

## How to Use &#x20;

### Example — US site inaccessible from Korea

The URL below is a US online food delivery site that's inaccessible from Korea, but you can access and extract data from it by configuring a proxy server.

{% hint style="info" %}
**Super simple guide**

➡️ Extract data ➡️ Go to DATABOARD ➡️ Click settings icon ➡️ Change proxy country ➡️ Save ➡️ Re-extract
{% endhint %}

{% stepper %}
{% step %}

### Access the example page and click the WHOLE extraction button

US site inaccessible from Korea (example):\
<https://www.grubhub.com/restaurant/uno-chicago-grill-29-e-ohio-st-chicago/322>

<figure><img src="/files/280447b7e1160c327dbdfc75d87c10421cb5b775" alt=""><figcaption></figcaption></figure>

When you extract a page accessed from Korea, only the failed access page content gets extracted.

<figure><img src="/files/a5ad6bae0762b9eba6e52690a605556edb184dd5" alt=""><figcaption></figcaption></figure>
{% endstep %}

{% step %}

### DATABOARD → Click settings icon → Change Listly premium proxy country to another country

<figure><img src="/files/f298565febb184b42031534b99e7c12eccb30f41" alt=""><figcaption></figcaption></figure>
{% endstep %}

{% step %}

### Click the re-extract icon in Databoard to re-extract data

<figure><img src="/files/c7b8b0efe8ca84cd3f30b8d4b9170850a98ffabc" alt=""><figcaption></figcaption></figure>

For those curious about what the original page looks like, here it is. When accessed using a free VPN (US), it shows restaurant menus and recommended nearby menus as shown below.

<figure><img src="/files/3b69b28b7bd11819d70c1a2722d48099c1c05091" alt=""><figcaption></figcaption></figure>
{% endstep %}
{% endstepper %}

***

### Other proxy configuration methods

* My Proxy\
  Upon request to the LISTLY team, we can purchase a private proxy server for your exclusive use (not shared) and configure it like Listly premium proxy. Proxy server country, quantity, etc. can be discussed and determined, with costs billed separately.

<figure><img src="/files/3dbce30a052b6c68bee0a0e2c263d9b8119d8292" alt=""><figcaption></figcaption></figure>


# Settings - Device Type

> Use this feature when you want to repeatedly extract mobile pages.

{% hint style="info" %}
**Quick Start**

**Mobile page extraction**\
Chrome F12 (developer mode) ➡️ Ctrl+Shift+M ➡️ Change Responsive in top left to a mobile device ➡️ Enter mobile URL in address bar and connect ➡️ WHOLE extraction

**Recurring mobile page extraction**\
DATABOARD ➡️ Click settings icon ➡️ Change device type to mobile ➡️ Set Scheduler
{% endhint %}

<figure><img src="/files/6fca821d67cd8dcdbb63dfc838fe574bc88d5dd5" alt=""><figcaption></figcaption></figure>

***

## How to Use&#x20;

### \<Example 1> **Accessing mobile page and extracting with LISTLY**

When you visit the Olive Young mobile page (left below) on a regular PC to extract data, it automatically redirects to the desktop page (right below). Checking the address bar, you'll see the URL has changed automatically too.

{% columns %}
{% column %}
Mobile page: <https://m.oliveyoung.co.kr/m/main/main.do>

<figure><img src="/files/4541116f5b3ba8143bfa0c89c82f21907b5d5750" alt=""><figcaption></figcaption></figure>
{% endcolumn %}

{% column %}
Desktop page: <https://www.oliveyoung.co.kr/store/main/main.do>

<figure><img src="/files/d03b8fbd2e60c9a380c63a9a3435fc8857d6973a" alt=""><figcaption></figcaption></figure>
{% endcolumn %}
{% endcolumns %}

{% stepper %}
{% step %}

#### **On the mobile page in Chrome browser, press** <mark style="color:red;">**`F12`**</mark> **or** <mark style="color:red;">**`Ctrl+Shift+i`**</mark>

For Mac, press <mark style="color:red;">**`option+command+i`**</mark> to open the **developer mode window**.

<figure><img src="/files/912491227b07cd295640d4ed45200b631c3df582" alt=""><figcaption></figcaption></figure>
{% endstep %}

{% step %}

#### **Press shortcut** <mark style="color:red;">**`Ctrl+Shift+M`**</mark>

<figure><img src="/files/072883dd87cf53e036d4135865619a7867c6446c" alt=""><figcaption></figcaption></figure>
{% endstep %}

{% step %}

#### **Click where it says Responsive at the top of the left web page and select the mobile device you want**

<figure><img src="/files/76109316a879d7b4fcaf83199ceab44c56fa5d4d" alt=""><figcaption></figcaption></figure>
{% endstep %}

{% step %}

#### **Re-enter the mobile URL you want in the address bar and access it**

Mobile page: <https://m.oliveyoung.co.kr/m/main/main.do>

<figure><img src="/files/81bc3e577f1c538cff153a895ae99b1a99945d48" alt=""><figcaption></figcaption></figure>
{% endstep %}

{% step %}

#### **Extract with LISTLY** <mark style="color:red;">**`Whole`**</mark> **(Parts doesn't work)**

<figure><img src="/files/c8409a687cfc04b5dcd7e8386094cdfe0225b9cc" alt=""><figcaption></figcaption></figure>
{% endstep %}
{% endstepper %}

### \<Example 2> Setting schedule for mobile page extraction

With the settings above, you can extract mobile pages, but **if you want repeated extraction, you need to change the device type from desktop (default) to mobile first, then set the scheduler.**

{% stepper %}
{% step %}

#### **Databoard → Click settings icon → Click device type**

Change device type to mobile, then save the settings.

<figure><img src="/files/3bf9ca843789f92ed2ac6753ca41b65e9c7eb90d" alt=""><figcaption></figcaption></figure>
{% endstep %}

{% step %}

#### **Click the schedule button in Databoard to set your schedule**

<figure><img src="/files/b67734449112efc59d5d78f15dfca097b01e7a59" alt=""><figcaption></figcaption></figure>

<figure><img src="/files/dce9ad6a02b7fe0b396200f12d716c057684936f" alt=""><figcaption></figcaption></figure>
{% endstep %}
{% endstepper %}


# Settings - Auto Login (Beta)

## What is Auto Login?

An experimental beta feature using advanced encryption to automatically save login credentials. When configured, it stores your login info for any website, letting you extract data requiring authentication without manual login steps.

***

## How to Use&#x20;

{% stepper %}
{% step %}

#### Click the **settings icon** in Databoard

In Databoard, click the gear icon for the task you want to configure auto-login for and head to the settings page.

<figure><img src="/files/4a99578fd1ee62bd3e61bb5ea1783d7440909532" alt=""><figcaption></figcaption></figure>

The auto login input fields are located in the middle of the settings page.

<figure><img src="/files/cf877ebe7a58041502b74d2e01b90b8e5915642e" alt=""><figcaption></figcaption></figure>
{% endstep %}

{% step %}

#### **Enter** your auto login information

Click the dropdown menu, then select **+ Add a login account**.

<figure><img src="/files/ca640fc94d1871acca17252c3eabf69ad73ac439" alt=""><figcaption></figcaption></figure>

Here's what to enter in the popup:

<figure><img src="/files/1b623b086548ca2c3616490df423818a4efba677" alt=""><figcaption></figcaption></figure>

① URL of the login page\
② Your site ID\
③ Selector value for the ID input field\
④ Your site password\
⑤ Selector value for the password input field\
⑥ Selector value for the login (submit) button

{% hint style="success" %}
Reference: [CSS Selector](/getting-started/extension-features/css-selector)
{% endhint %}
{% endstep %}

{% step %}

#### Copy and paste the login page URL

First, copy the URL from the website's login screen.

<figure><img src="/files/2073463cd5cc32a7b22662821928208505d5b456" alt=""><figcaption></figcaption></figure>

Paste the copied URL in the first field, then enter your login credentials in the ID and Password fields.

<figure><img src="/files/618f68d761d9f913c51126e02685d3bbe24c03df" alt=""><figcaption></figcaption></figure>
{% endstep %}

{% step %}

#### How to copy and paste CSS selectors

Right-click on the ID input field and select **Inspect**.

<figure><img src="/files/4745eadef85d528c7387c923451f1d91ae47f6ef" alt=""><figcaption></figcaption></figure>

**A window full of code will appear on the right or bottom of the screen—don't worry! :)** The code for the field you just selected is highlighted in gray, and hovering over it will highlight the corresponding location on the page.

<figure><img src="/files/9cb5cca6ee6806b4a3d07bdb59a08b717733b8a5" alt=""><figcaption></figcaption></figure>

Right-click on the gray-highlighted code and select Copy -> Copy selector to automatically copy that selector's value.

<figure><img src="/files/ba3dbc299816233d98c0fd0d27b321e7d59aecf0" alt=""><figcaption></figcaption></figure>

Return to the login info input window, place your cursor in the appropriate field, and press Ctrl + V to paste.

<figure><img src="/files/fb696b58782e20547e90a94f4588d2c5bf046a5f" alt=""><figcaption></figcaption></figure>
{% endstep %}

{% step %}

#### Fill in the remaining info (repeat step 3's selector paste process)

Once all information is entered, click the **Add** button, then click the **Save** button at the bottom of the settings page to save your login configuration.

<figure><img src="/files/da790ce500fc6ac26520e23274ac4c09f847a2ba" alt=""><figcaption></figcaption></figure>

{% hint style="success" %}
**TIP** Some websites only activate the login button after you enter credentials. When copying the selector value for the **\[Login button]**, make sure the button is **activated** (as shown below) before right-clicking → Inspect to get a more stable selector value.
{% endhint %}

<figure><img src="/files/2709a0d499aaca6be1773b947a4f3d5f8a4b109f" alt=""><figcaption></figcaption></figure>

Return to Databoard and click the **Refresh (re-extract)** icon to verify that the task with login info works correctly.

<figure><img src="/files/83421470ac2be58e13957afc01d64a4c6ed5e600" alt=""><figcaption></figcaption></figure>
{% endstep %}
{% endstepper %}

{% hint style="warning" %}
**Important notes when using auto login**

Auto login is a beta service. **Configuration and application may not be possible depending on each site's security policies and login screen structure.** In these situations, use the **'Folder Download'** feature to extract your desired data or contact [the Listly team](https://www.listly.io/contact):

1. *Websites with strong security (e.g., device authentication only, 2FA required, blocking overseas access—most email services included)*
2. *Sites where ID, password fields, and login button aren't all on one page*
3. *Websites with modal popup login pages (URL verification impossible)*
4. *Login pages with random strings (mixed letters+numbers+special characters) in the URL*
   {% endhint %}


# Settings - ActionScript

## What is Action Script?

{% hint style="danger" %}
**Action Script service has been reorganized as an Enterprise-only premium option.** We're letting you know that Action Script creation service has been discontinued for Business plan (single-user license). **If you're using the Enterprise product, you can still** [**request for Action Script**](https://www.listly.io/contact)**.**

However, only the development team's script writing service has been discontinued—**the Action Script settings field remains available**. If you've already received code that's working properly or are writing your own code, you can continue using it.
{% endhint %}

Action Script is a feature that replays keyboard/mouse actions needed right before extraction to get the web data you want. It's especially useful in situations like these where **you need to click buttons multiple times on a web page to access specific information**:

{% stepper %}
{% step %}
**When you need to click buttons multiple times to get the info you want, and repeat the process**

'Click → wait for input field → enter zip code → click confirm button → wait for new page to load' repeated
{% endstep %}

{% step %}
**When you want to extract daily information that only appears after clicking a specific button**

Select option value → click search button
{% endstep %}
{% endstepper %}

***

## How to Use&#x20;

Save the JavaScript code that defines these actions in the Action Script field. Once the code is configured, the actions will automatically execute each time you re-extract.

{% hint style="info" %}
**Quick Start**&#x20;

➡️ Extract data ➡️ Go to DATABOARD ➡️ Click settings icon ➡️ Enter JavaScript code in Action Script ➡️ Save ➡️ Re-extract
{% endhint %}

<figure><img src="/files/3286829979ddc70f6a97b0935ab4bf1af22f3bd9" alt=""><figcaption></figcaption></figure>

***

## Understanding Action Script through examples

{% stepper %}
{% step %}

#### When you need to click buttons multiple times to get the info you want, and repeat the process

**Example 1**

This is an actual case from a Korean user. It configures shipping address changes in a shopping mall. Multiple actions are needed: **click → wait for input field → enter zip code → click confirm button → wait for new page to load**, etc. Since product details (price, options, etc.) also change depending on the shipping address, these actions need to be applied to all products being collected. LISTLY TEAM wrote the code below and provided it to the user, who just needed to paste it into group settings → action script to apply it all at once.

<figure><img src="/files/6229c1e29e1e5bc24dd2c5bf68c70cdd5f19dc70" alt=""><figcaption></figcaption></figure>

<figure><img src="/files/e2c13eb03649db33b17652e5506991507035fb8b" alt=""><figcaption></figcaption></figure>

**Example 2**

This is an actual case from a Korean user. To monitor real-time exchange rate information, they enter the exchange amount → select country to collect the final amount. The Action Script used here is a bit different. Using a variable called custom\_html, they directly selected and configured the information to extract, setting it up to extract exactly the desired information as shown in the third image.

<figure><img src="/files/68c8947fe90657371695e9bfc315a428bf7865dc" alt=""><figcaption></figcaption></figure>

<figure><img src="/files/a8ceb6cb954077269b0749103b807c385e8529aa" alt=""><figcaption></figcaption></figure>

<figure><img src="/files/4d303494c7fa70abc24ca9194c395050ec18c9bd" alt=""><figcaption></figcaption></figure>
{% endstep %}

{% step %}

#### When you want to extract daily information that only appears after clicking a specific button

**Example 3**

This is an actual case from an international user. To get search results for the last 2 months on a Norwegian court site, they needed to **select an option value (2 mnd. fremover)** and **click the search button (Søk)**. **Once search results appear, extract with LISTLY Whole**, and they're automating this work with LISTLY to collect data daily.

You can define this in Settings → Action Script with JavaScript code. Since it's difficult for general users to set up directly, LISTLY TEAM helps with the configuration.

For developers, you can test your own code by running it in browser developer tools → Console on the extraction target page to visually confirm if it works properly.

<figure><img src="/files/fd06977f60068a44c4d7f7cfee0e930ebfe5e04e" alt=""><figcaption></figcaption></figure>

<figure><img src="/files/7fcd9ef765996ebad9dae52dbfbb0b885b72f2bb" alt=""><figcaption></figcaption></figure>

**Example 4**

This is an actual case from a Korean user. The user wanted to extract content that appears when clicking the "Skincare" category as shown in the right image, but the default view when first accessing the page shows "All" category products as shown in the left image.

<div><figure><img src="/files/7b098779bfdb63921921db4212613adbae7199ea" alt=""><figcaption><p>Initial screen</p></figcaption></figure> <figure><img src="/files/cf438fff94c4c38358d5ca6f466475dc8bbd14f6" alt=""><figcaption><p>Screen user wants to extract</p></figcaption></figure></div>

<figure><img src="/files/349e72e8d0e70875cae226820b3e0379ef2aeb3e" alt=""><figcaption></figcaption></figure>

In this case too, save the JavaScript code defining those actions in the Action Script. Once the code is configured, those actions will automatically execute each time you re-extract.
{% endstep %}
{% endstepper %}


# Settings - Execution Speed

## What is Extraction Speed Adjustment?

Popular websites with global traffic often run systems to block abusive traffic. If your data collection speed with Listly is too fast, the website might flag it as abusive behavior and block your access. In the worst case, your IP address could be permanently banned. To prevent this, **Listly lets you control your collection speed**.

{% hint style="success" %}
**The faster your collection speed, the higher the chance of IP blocking.**

If you run into this issue, Listly Enterprise can help. With `Premium Proxy Purchase` + `Auto Retry` features, you'll use a fresh, high-quality IP address for each request, and if collection fails, the system automatically retries with a different IP.

For more details, reach out to [the Listly team](https://www.listly.io/contact).
{% endhint %}

***

## How to use it

{% stepper %}
{% step %}

### Slowing down collection speed

Data collection speed refers to how many URLs are collected simultaneously. So **speed 15** means collecting up to 15 web pages at once. From the target site's perspective, this can look like a traffic attack. Many sites will ask you to verify you're human or permanently block your IP if you visit too many pages in a short time. This leads to extraction failure.

To prevent and address this, Listly lets you manually adjust extraction speed. We recommend the minimum values of 1 or 2, which mimics the speed of actual human browsing. **The slower your collection speed, the lower the chance of extraction failure.**

Head to your Listly Databoard and check the **Extraction Speed** bar in the top right corner, as shown in the screenshot below.

<figure><img src="/files/e8552bd8124e82754e9dd06fca0b18cec462b959" alt=""><figcaption></figcaption></figure>

Adjust to your desired speed and click the **\[Yes]** button.

Selecting speed 1 means the slowest collection, while selecting 15 means the fastest. It's the difference between collecting 1 URL at a time versus 15 URLs at a time.

<figure><img src="/files/3a486607ad3b444e5a4cc1475abb781d35d09e7b" alt=""><figcaption></figcaption></figure>
{% endstep %}

{% step %}

### Speeding up collection

<figure><img src="/files/8f7a69c9f520093847b85c451f2aa047e2d7961d" alt=""><figcaption></figcaption></figure>

If you want to **complete data collection quickly**, we recommend increasing extraction speed while using `high-quality proxies` to reduce blocking risk. Proxies are available as a separate purchase.
{% endstep %}
{% endstepper %}


# Settings - Auto Scroll

## What is Auto-Scroll?

**Use this when you need to repeatedly scroll down** on the page you're extracting to see more product information.

{% hint style="info" %}
**Quick Start**&#x20;

➡️ Extract data ➡️ Databoard settings ➡️ Select auto-scroll options ➡️ Save ➡️ Re-extract data
{% endhint %}

***

## How to Use

{% stepper %}
{% step %}

#### Extract data from your desired page. (Parts extraction recommended)

<figure><img src="/files/375253a9387df10be275bbe6c169a39fa156cc95" alt=""><figcaption></figcaption></figure>
{% endstep %}

{% step %}

#### Navigate to the Databoard.

<figure><img src="/files/3e3af4e66b8060450dfaf4468761401a3dab90f5" alt=""><figcaption></figcaption></figure>
{% endstep %}

{% step %}

#### Click the <mark style="color:red;">**`Settings`**</mark> icon.

<figure><img src="/files/b60f6b6241b7c904d06fa739faff13146c53ce96" alt=""><figcaption></figcaption></figure>
{% endstep %}

{% step %}

#### Select auto-scroll options and save.

* **Number of times to repeat**: How many times do you want to repeat the scroll down action?
* **Wait after scrolling**: How many seconds do you want to wait after each scroll?

<figure><img src="/files/a1e5bb999ccee29200bd72755e0f534d94257eea" alt=""><figcaption></figcaption></figure>
{% endstep %}

{% step %}

#### Click the <mark style="color:red;">**`Re-extract`**</mark> button to extract data again.

<figure><img src="/files/d4248511da58ca9f0205512ff30a787a7ff83219" alt=""><figcaption></figcaption></figure>
{% endstep %}
{% endstepper %}

***

## Auto-Scroll FAQ

<details>

<summary>Auto-scroll doesn't work well on some pages.</summary>

* **Try setting a longer wait time after scrolling.**\
  Auto-scroll is heavily affected by the speed of the page being collected. For YouTube, it can sometimes take more than 5 seconds per attempt to load additional comments. Setting a longer wait time after scrolling significantly increases the chances of receiving all desired data.

<figure><img src="/files/253799931ef438cd92111f27d6f7f2467764add2" alt=""><figcaption></figcaption></figure>

* **Execution time is limited to a maximum of 10 minutes.**\
  Features where Listly extracts data on your behalf can only run for <mark style="color:red;">**`up to 10 minutes`**</mark>, so setting too many scroll repetitions and excessively long wait times will cause **data extraction to fail due to execution time limits**. When configuring settings, **set the number of repetitions and wait time appropriately** so the warning below doesn't appear. Estimated time may differ from actual time depending on the website's server and network conditions.

<figure><img src="/files/1548a81d34b91c186d6e6a796d12edc071a67f72" alt=""><figcaption></figcaption></figure>

</details>


# Settings - Auto Save

## What is Auto-Save While Scrolling?

Sometimes data disappears **when you scroll** the page you're trying to extract. The auto-save feature helps you **capture all information that automatically disappears during scrolling** without missing anything.

{% hint style="info" %}
**Quick Start**

➡️ Extract data ➡️ Databoard settings ➡️ Auto-scroll + Auto-save
{% endhint %}

***

## How to Use

{% stepper %}
{% step %}

#### Extract data from your desired page.

<figure><img src="/files/653410454503199de9914834551986eee20f018e" alt=""><figcaption></figcaption></figure>
{% endstep %}

{% step %}

#### Go to the Databoard and click the <mark style="color:red;">**`Settings`**</mark> icon.

<figure><img src="/files/cfb32a71de35670d5d4bfa00147b534c3011922e" alt=""><figcaption></figcaption></figure>

<figure><img src="/files/51a6ddec56ea0ac4d3d91cfb0d137996ea9a9ced" alt=""><figcaption></figcaption></figure>
{% endstep %}

{% step %}

#### Scroll down to the <mark style="color:red;">**`Auto-scroll and Auto-save`**</mark> section.

The auto-save while scrolling feature can only be modified after first configuring the auto-scroll feature.

{% hint style="success" %}
If the web page you want to extract doesn't clear data during scrolling:

You only need <mark style="color:red;">**`Auto-scroll`**</mark> without the <mark style="color:red;">**`Auto-save`**</mark> feature.
{% endhint %}

<figure><img src="/files/dd9e82c50bf1b814ea3165822d4ab2ec7f3347bf" alt=""><figcaption></figcaption></figure>
{% endstep %}

{% step %}

#### Change auto-scroll settings.

<mark style="color:red;">**`Auto-scroll`**</mark> can be set up to 300 times maximum.

**Set it to repeat as many times as you want to automate scrolling.** <mark style="color:red;">**`Wait for`**</mark> can wait up to 10 seconds, specifying the interval for automatically saving data.

<figure><img src="/files/8044d8819fa84030b71111ac4154e7369965e0cd" alt=""><figcaption></figcaption></figure>
{% endstep %}

{% step %}

#### If needed, select or enter the <mark style="color:red;">**`CSS Selector value`**</mark> you want to extract.

As you increase the number of <mark style="color:red;">**`Auto-scroll`**</mark> repetitions and <mark style="color:red;">**`Wait for`**</mark> time, the <mark style="color:red;">**`EXECUTION TIME`**</mark> below increases proportionally.

If needed, select or enter the <mark style="color:red;">**`CSS Selector value`**</mark> you want to extract. You can use the <mark style="color:red;">**`CSS Selector value`**</mark> to select the data pattern you want to save.

<figure><img src="/files/fd96ddc53ae60240f42695c8ca06a07a36df146a" alt=""><figcaption></figcaption></figure>
{% endstep %}

{% step %}

#### Save Changed Settings

Once complete, click the **Save** button at the bottom of the page.

Then return to the Databoard and click the <mark style="color:red;">**`Re-extract`**</mark> button.

<figure><img src="/files/64dcf498619719e0a0f079f706a6dba3f9d13242" alt=""><figcaption></figcaption></figure>
{% endstep %}
{% endstepper %}

{% hint style="danger" %}
**If the execution time (EXECUTION TIME) exceeds 10 minutes total, the extraction task will fail.**

Therefore, please note that you cannot automate too many scroll repetitions.
{% endhint %}


# Settings - Auto Click

## What is Auto Click?

<figure><img src="/files/48c15e16fb6e4e1e74ab60bd759602ad1c9642a7" alt=""><figcaption></figcaption></figure>

This feature is used **when you need to keep clicking buttons** to view more product information on the page you want to extract.

{% hint style="info" %}
**Quick Start**&#x20;

➡️ Extract Data ➡️ Settings ➡️ Enter Element to Auto-Click (CSS Selector) ➡️ Select Auto-Click Options ➡️ Save ➡️ Re-extract Data
{% endhint %}

***

## How to Use

{% stepper %}
{% step %}

#### Extract the page you want.

<figure><img src="/files/79ed1c5ad7c41fce745e51678260383ab2e5f2c2" alt=""><figcaption></figcaption></figure>
{% endstep %}

{% step %}

#### In the results window, <mark style="color:red;">➊</mark> select the data area to extract, then <mark style="color:red;">➊</mark> click the browser settings area.

<figure><img src="/files/6753335d10d47f8410a47a8219747f0195b737b7" alt=""><figcaption></figcaption></figure>
{% endstep %}

{% step %}

#### Copy the CSS selector value of the \[Load More] button from the extracted webpage.

<figure><img src="/files/12d56cbb6dd5685fad16ec67c5db2451686dd629" alt=""><figcaption></figcaption></figure>

{% hint style="info" %}
**Reference**: [How to Get CSS Selector Values](/getting-started/extension-features/css-selector)
{% endhint %}
{% endstep %}

{% step %}

#### Paste the CSS Selector value into the Element to Auto-Click field in the settings window, select other options, then **Save**.

<figure><img src="/files/bd26be810f52bd2e7e4cf0ffc024f991bd81974a" alt=""><figcaption></figcaption></figure>

<mark style="color:red;">**➊**</mark> **Element to Auto-Click (CSS Selector)**: Enter the CSS Selector value of the Load More button.

<mark style="color:red;">**➋**</mark> **Number of Repetitions**: Set how many times the button will be clicked. For example, if you set it to '10 times', it will retrieve data equivalent to clicking the 'Load More' button 10 times.

<mark style="color:red;">**➌**</mark> **Wait Time**: Set how many seconds to wait after clicking the button. Set it generously based on the page loading speed.

<mark style="color:red;">**➍**</mark> **Execution Time**: Displays the estimated extraction time based on the above settings. However, the maximum execution time is 10 minutes, and extraction may automatically stop if exceeded, so set the number of repetitions appropriately to finish within 10 minutes.
{% endstep %}

{% step %}

#### Click the **Re-extract** button.

<figure><img src="/files/4dc75bf0689a7e9e4087a443351484f878f933dd" alt=""><figcaption></figcaption></figure>
{% endstep %}
{% endstepper %}


# Settings - Pagination Templates

## What are Pagination Templates?

![pagination gif](/files/15d318cc852cf82951713c55c29ea4eeaae38bec)

* A feature that can replicate mouse and keyboard actions.
* Works on all sites once you configure a few values.
* New templates will be continuously added.

{% hint style="success" %}

### What is Pagination?

The most common way to load next page data. It consists of page buttons displayed as numbers (or characters), and you move to the next page by clicking the number or specific button.

If each page can be accessed directly via an independent URL, you can use the [**Group Extraction**](/getting-started/result-page-features/group-extraction) feature. However,

**1. When the URL doesn't change even when moving between pages**

**2. When accessing a specific page's URL automatically redirects to the first page**

In environments like these, try solving the problem with **Pagination Templates** 🙂
{% endhint %}

{% hint style="warning" %}
Pagination templates are settings that can be applied to individual tasks, and **each individual task has approximately a 10-minute collection time limit**. Due to this limit, if you enter too many pages, extraction may stop partway through. Also, the number of pages that can be extracted within the collection time using pagination varies depending on the amount of data per page.

* For example, on Site A with many images, only up to 24 pages could be extracted within the execution time.
* Conversely, on text-heavy Site B, up to 110 pages were successfully extracted.

In other words, the extractable range varies depending on the data volume and structure per page. Generally, pagination templates are suitable for scales around 100 pages.

[**Q. Why is there a 10-minute collection time limit?**](https://help.listly.io/docs/ko/support/faq/and/10)
{% endhint %}

***

## How to Use

{% stepper %}
{% step %}

#### Check Pagination Type

Refer to the type classification below to identify the pagination characteristics of the web page you want to extract.

Check whether there's a 'next page' button represented by an arrow (▶️) or 'Next' text, and how the page moves when clicking that button. Identify by function, not design!

***

<div align="left"><img src="/files/f350c221812d583eb5169657d4b2a9c381429118" alt=""></div>

TYPE 1. Button that **moves directly to next page (1→2) when clicked** exists

<div align="left"><img src="/files/46195eeec37e9ef6b19405bf782776375576ea23" alt=""></div>

TYPE 2. **No** button to move directly to next page, only button to **move to next group (1→N)** exists

<div align="left"><img src="/files/48f88336a70822bc995cf8a098ada6cf01d86bbc" alt=""></div>

TYPE 3. No buttons to move to next page or group **except page numbers**

<div align="left"><img src="/files/107e410ac61be5a75918d5be496cad5efc9699cb" alt=""></div>

TYPE 4. **Only previous/next page buttons** exist without page numbers

***

**Let's review the steps using Site A as an example.**

![site A pagination](/files/66f01e8436030cdfab375d7feb9776644efa9537)

When clicking the 'Next' button in the pagination at the bottom of the page, it moved from page 1 directly to page 11—in other words, to the next group. We can identify that this page corresponds to **TYPE 2** from the above items.
{% endstep %}

{% step %}

#### Extract the First Page

![extract first page](/files/354823eb24fa9ad216ba4c05aa4dde210a9b9e8c)

Extract page 1 where pagination begins.

{% hint style="success" %}
Here's a tip! You can choose either WHOLE or PARTS, but selecting **'PARTS'** can improve accuracy when extracting multiple pages at once. 🙂
{% endhint %}
{% endstep %}

{% step %}

#### Navigate to Task Settings

![task settings navigation](/files/f8fa87c581ea936f4ecdd5785e0c91d4b008ccd4)

Check the extracted data in the results page. Site A has 80 data items per page. Click Browser Settings at the top to navigate to that task's settings page.
{% endstep %}

{% step %}

#### Configure Template Settings

![action template area](/files/be1b79d07a02e99450ef5f5fc35f5827baf0a5a5)

**A) Add Action Template** At the bottom of settings in **ACTION TEMPLATE**, click the **+ADD** button. The display and design of this setting may change in the future, but the application method remains the same.

![templates selection](/files/0249998c4376aa05e514cbf900004824950d616e)

**B) Select Pagination Type** Refer to step 1 explanation to select the template to apply. Site A's case was **Pagination Type2**.

![variables image](/files/a711936fd859b2dc00600fbfdff7fe858943b65b)

**C) Enter Variables** Fill in items ①, ②, ③ in the image.

* ① How many times to repeat this template's action\
  If you enter 5, it repeats the next page action 5 times, extracting up to page 6. If you want to extract up to page 10, enter 9.
* ② CSS selector value for current page number\
  As shown in the marked area in the image, right-click the 'current page' number in the website's pagination and select it, then refer to [Copy & Paste CSS Selector](/getting-started/extension-features/css-selector) to enter that value.
* ③ CSS selector value for 'Next' button\
  As shown in the marked area in the image, right-click the 'Next' button in the website's pagination and select it, then refer to [Copy & Paste CSS Selector](/getting-started/extension-features/css-selector) to enter that value.

After entering all items, click `Add` → `Save` to save settings.

Other pagination types work the same way. Check the pagination type for each situation, then copy and paste CSS selector values.
{% endstep %}

{% step %}

#### Click Re-extract and Check Data

![re-extract button](/files/a906690a4343f1e567ddacfddb23bcba7e9df50a)

After saving settings, **be sure to click the re-extract button** to extract again with the applied settings.

![result after apply](/files/cbc759dd974822487f1f0ea2f96e56f8099f609e)

A total of 480 data items were extracted—80 from each of 6 pages.

Use templates to efficiently extract information spread across multiple pages 😊
{% endstep %}
{% endstepper %}


# Scheduler

## What is the Scheduler?

Use this feature **when you need to extract at a set time every day**, like daily log tracking or monitoring.

{% hint style="info" %}
**Quick Start**\
➡️ Extract data ➡️ Add schedule ➡️ Save ➡️ Wait for scheduled time or get notified
{% endhint %}

## How to Use

{% stepper %}
{% step %}

#### Extract data from your desired page

<figure><img src="/files/8e567dd9259dc4a3e4d9cf4f6b741b4b249b43ea" alt=""><figcaption></figcaption></figure>
{% endstep %}

{% step %}

#### Go to Databoard

<figure><img src="/files/f3bab1bad6b83283638c02dbe556c15538e4b59e" alt=""><figcaption></figcaption></figure>
{% endstep %}

{% step %}

#### Click the <mark style="color:red;">**`Schedule`**</mark> icon

<figure><img src="/files/ad678d47a06574639dac0c348339521577c7a4b6" alt=""><figcaption></figcaption></figure>
{% endstep %}

{% step %}

#### Set your repeat cycle and time

You need to enable email notifications to receive alerts.

<figure><img src="/files/c04d53fe11c80542b477e7e4f80e84ba9c0ec00d" alt=""><figcaption></figcaption></figure>
{% endstep %}

{% step %}

#### 🎉 Get your data extraction alert at the scheduled time

You can also check data extraction results in the Listly Databoard.

<figure><img src="/files/a52cec5f17a1e5c1f55ece927b455aa2de6fabf4" alt=""><figcaption></figcaption></figure>
{% endstep %}
{% endstepper %}


# Screenshot

## What is Screenshot?

When data extraction fails, **screenshots are automatically generated** so you can identify the cause. The page status at the time of failure and error codes are provided together, which is a huge help in diagnosing the problem.

<figure><img src="/files/9486f99ce9637aaed5d9c4a7cb5d5a285a44e829" alt=""><figcaption></figcaption></figure>

***

## Screenshot Page Layout

{% columns %}
{% column %}

<figure><img src="/files/6665e73244581ce3b7079ce04cafb257898a6387" alt=""><figcaption></figcaption></figure>
{% endcolumn %}

{% column %} <mark style="color:red;">➊</mark> URL: The website address where extraction was attempted.

<mark style="color:red;">➋</mark> Error details: Displays the error code that occurred.

<mark style="color:red;">➌</mark> Date Time: Indicates when the error occurred.

<mark style="color:red;">➍</mark> Screenshot: A capture of the screen at the time of failure—the most important clue for identifying the cause. In the example screen above, you can see that extraction failed because access to the website was blocked and didn't connect to a normal page.
{% endcolumn %}
{% endcolumns %}

***

## Using Screenshots

{% hint style="success" %}
**How to use screenshots**

Screenshots help you quickly diagnose the cause of extraction failures. When data extraction fails, check the screenshot and take appropriate action right away. Common failure causes and solutions can be found in the help documentation below.

**Reference documentation**: [Solutions by Extraction Failure Message](https://help.listly.io/docs/ko/support/troubleshooting)
{% endhint %}


# Folders

## How to Use

{% stepper %}
{% step %}

#### Create a Folder

**A. Tabs Extraction**

When you execute Tabs extraction, a folder is automatically created, and you can view the list of individual extracted pages within the folder.

![folder-group-1](/files/e9592218a08b228b299ed3f0f267275b03a2778d)

**B. Create a Custom Folder**

* Click **\[Folder List]** at the top of the Databoard.

![folder-group-2](/files/8aa7b6de6020ebeda7f60e044975c44040ec70e9)

* Click **\[Add]**.

![folder-group-3](/files/56684e6207dbb0f51308bb82863a7cbc691a17ac)

* Enter a folder name, then click the **\[Add]** button again.

![folder-group-4](/files/811a37bc9973df28aac5866685b2024fe5358b4c)

{% hint style="warning" %}
New folders won't appear in the Databoard until tasks are added to them. You need to add tasks to the folder for it to appear.
{% endhint %}
{% endstep %}

{% step %}

#### Move Tasks

* Select the task you want to move to a folder, then click the **\[Move]** button at the top of the Databoard.

![folder-5](/files/aa3e637786d3c475a2fcfdfbdd77db3cd8c62b25)

* Select the destination folder, then click the **\[Move]** button.

![folder-6](/files/dca7e03324160786b5d90431209a33fdfe2063f2)
{% endstep %}

{% step %}

#### Rename a Folder

* Click **\[Folder List]** at the top of the Databoard.

![folder-7](/files/501242467dadbdd29ad71730a5391c2eec3a0a7a)

* Hover your mouse over the folder you want to rename and the **\[Edit]** button will appear. Click it.

![folder-8](/files/18354796f79f83c16e6580f9c6e5caed2ea729c1)

* Enter the new name and click the **\[Confirm]** button.

![folder-9](/files/9b848bb6d3b41aa64626764d66b307c06d9bef93)
{% endstep %}

{% step %}

#### Delete a Folder

{% hint style="danger" %}
Folders cannot be deleted using the task delete button.
{% endhint %}

* Click **\[Folder List]** at the top of the Databoard.

![folder-10](/files/2fb303d1ce8041c0b6016dabb0fd666674bd5d12)

* Select the folder you want to delete, then click the **\[Delete]** button at the bottom.

![folder-11](/files/9acd5bb52eb8101b57e55686f777fafa320a2ffb)

* Select **\[Yes]** in the confirmation window to delete the folder.

![folder-12](/files/c3a655819519bc86c633626614597c3b1710aa46)

* Even when you delete a folder, the tasks inside are not deleted along with it. All tasks are separated as individual tasks and displayed again in the Databoard.

![folder-13](/files/994ba8729284d8a4fdf18bd3dd73994e3fb69e95)
{% endstep %}
{% endstepper %}


# Folder Group Extraction

## What is Folder Group Extraction?

**A feature that gathers data extracted from individual pages into one folder and exports it as a single Excel file.** You can use this even when group extraction is difficult—such as when pages require login or can't be directly accessed by entering a URL.

For example, while regular public pages can be extracted through group extraction, **private pages that require login or can't be accessed via URL** cannot be extracted using regular group extraction. In these cases, you can extract data using the folder group extraction feature.

{% hint style="success" %}
**Common Use Cases**

* **Private pages ⇒ Folder group extraction**: Unlike public pages that Listly can visit directly (regular group extraction), Listly cannot visit private pages on your behalf. Therefore, you need to visit those pages yourself to extract data, then group them together for extraction.
* [**Tabs Extraction**](/getting-started/extension-features/tabs-parts): Automatically collect and extract data extracted simultaneously from multiple tabs into a folder.
  {% endhint %}

{% hint style="info" %}
**Quick Start**&#x20;

➡️ Extract data manually ➡️ Create folder group ➡️ Move extracted data to folder ➡️ Download folder group
{% endhint %}

{% stepper %}
{% step %}

### Log in and extract the first page.

<figure><img src="/files/21f497b136ee22bf6b98b5d9d31b2fad1b845d68" alt=""><figcaption></figcaption></figure>

<figure><img src="/files/5a122eabe7be08c6d031210097ddb0fd2a686a8f" alt=""><figcaption></figcaption></figure>
{% endstep %}

{% step %}

### Extract the second, third, fourth... pages one at a time until you reach your desired page.

<figure><img src="/files/c72c5f9a1e43018de9ea2dfea27d2031e7ab716c" alt=""><figcaption></figcaption></figure>
{% endstep %}

{% step %}

### Click <mark style="color:red;">Folder List</mark> → <mark style="color:red;">Add</mark> to create a new folder.

<figure><img src="/files/482f219a14694d34d5ed72342ae43a0743180914" alt=""><figcaption></figcaption></figure>

<figure><img src="/files/d3bf6e78514bece486db83292db8f4f499309561" alt=""><figcaption></figcaption></figure>

<figure><img src="/files/d3fffe3743fa5157182e2d65ef02e1b2339c1ce4" alt=""><figcaption></figcaption></figure>
{% endstep %}

{% step %}

### Select the data you just extracted and click <mark style="color:red;">Move</mark> to transfer it to the newly created folder.

<figure><img src="/files/54b123a23ddb43fa72fc0451f2916b419f50470c" alt=""><figcaption></figcaption></figure>

<figure><img src="/files/4a904a40e44d028dc3d12fc66b41fdd8e99f369a" alt=""><figcaption></figcaption></figure>
{% endstep %}

{% step %}

### Open one of the extracted results.

<figure><img src="/files/2e5b04d16ade6926673e1f291b0a8f4a586f600e" alt=""><figcaption></figcaption></figure>
{% endstep %}

{% step %}

### Change the <mark style="color:red;">Current URL</mark> option to <mark style="color:red;">Folder Group</mark>.

<figure><img src="/files/78271e949d0621789de3a847ea994d47e70c66ef" alt=""><figcaption></figcaption></figure>
{% endstep %}

{% step %}

### Select your desired folder, then click the <mark style="color:red;">Excel</mark> button to download.

<figure><img src="/files/693c973f22762c2c4453a7da8d2284eb90d04cfc" alt=""><figcaption></figcaption></figure>

<figure><img src="/files/2a7bdea4488761b2f8ccd6a5810002f9e21c7b60" alt=""><figcaption></figcaption></figure>
{% endstep %}
{% endstepper %}

{% hint style="warning" %}
**Important Notes**

* If tasks with **different structures** are mixed together, **the Excel file will not be generated correctly**. All tasks within a folder must have the **same structure**.
* Folders can be used not only for downloads but also for **organizing your Databoard**.
  {% endhint %}


# Log Group Extraction

***

## What is Log Group Extraction?

**A feature for downloading collected information from multiple extractions (hourly, daily) all at once.** Logs are created when you extract the same page more than twice. Use this feature to compile past data into a single Excel sheet.

{% hint style="success" %}
Works the same as group extraction, but the Excel output varies depending on which data you select as the source. Sometimes when a page's design changes, previous information may appear as blank cells. In this case, refer to [Log Group Extraction - When Blank Cells Appear in Excel](/getting-started/databoard-features/log-group-extraction).
{% endhint %}

{% hint style="info" %}
**Quick Start**&#x20;

{% stepper %}
{% step %}
Select the extraction to repeat (schedule recommended).
{% endstep %}

{% step %}
Select the result log.
{% endstep %}

{% step %}
Choose the data result you want to use as the source from accumulated logs.
{% endstep %}

{% step %}
Download the log Excel.
{% endstep %}
{% endstepper %}
{% endhint %}

***

## How to Use

<figure><img src="/files/db364192d85042a9a1a13c231cd3098341043ac6" alt=""><figcaption></figcaption></figure>

<figure><img src="/files/26ee84a4bc03bdb6dee2c5dda7e8c2dd11c35e65" alt=""><figcaption></figcaption></figure>

<figure><img src="/files/88de8d0875599d520471119d5bec216e8b975229" alt=""><figcaption></figcaption></figure>

<figure><img src="/files/a835c30123ffade3426f0faa1850d92e2577d5b9" alt=""><figcaption></figcaption></figure>

<details>

<summary><strong>Why do I need to select a representative data for the Log API?</strong></summary>

The Log API needs a source data as a reference for organizing data. This is because you haven't explicitly specified which data to extract. When you select one log data, it becomes the source and is compared with other log data.

</details>


# Log Group Extraction - When a Cell is Blank

{% hint style="success" %}
**What is Log Group Extraction?**

A feature for downloading collected information from multiple extractions (hourly, daily) all at once. Logs are created when you extract the same page more than twice. Use this feature to compile past data into a single Excel sheet.

**If blank cells appear during log group extraction, try changing the source and extracting again.**
{% endhint %}

{% hint style="info" %}
**Quick Start**

➡️ Select result log in DATABOARD ➡️ Extract with latest data as source ➡️ If blank cells appear\
select oldest data as source and extract
{% endhint %}

***

### How to Use

[https://search.naver.com/search.naver?where=realtime\&sm=tab\_jum\&query=코로나](https://search.naver.com/search.naver?where=realtime\&sm=tab_jum\&query=%EC%BD%94%EB%A1%9C%EB%82%98https://search.naver.com/search.naver?where=realtime\&sm=tab_jum\&query=%EC%BD%94%EB%A1%9C%EB%82%98)

![Screenshot](/files/19cf35e41f02611a8a96e093b02069bd2882841c)

I've been collecting data from this page for about 7 months.

* Collection period: August 19, 2020 \~ March 8, 2021
* Automatic collection every day at 4 PM
* Total of 204 log entries (all successfully extracted from the start until now, 7 months later)

The web page design suddenly changed on November 1, 2020. Please remember this date as it becomes a reference point for extracting log data below.

As of March 8, 2021, I want to compile all past data together. I'll organize everything into a single Excel sheet. This works the same way as group extraction. The Excel output varies depending on which data you select as the source.

Select the data result you want to use as the source from the 204 entries → Download log Excel

![Log selection 1](/files/134e1742ab3eab0df6ffa0a36b6bf3f7a9d8ae92)

![Log selection 2](/files/25673e2d69a9ea2486026ea78f9d284bfba75d2c)

![Log list screenshot](/files/fe17e8e239915f1a76941411120941732fa9a317)

{% stepper %}
{% step %}

### Select the Most Recent (204th) Data as Source

I'll use the most recently collected 204th data as the source and extract. The 204th data appears at the top of the Excel, with the rest appearing in ascending order by collection time. Having the 204th data at the top means I used it as the reference to find and organize data with the same pattern.

The first image clearly shows many blank cells. The dates with blank cells and dates with data are as follows:

* Collection date range with blank cells: August 19, 2020 \~ October 31, 2020
* Collection date range with data: November 1, 2020 \~ March 7, 2021

Why? Because as the log group extraction source, the March 8, 2021 data result was selected. This data has the same format as all data collected from November 1, 2020 \~ March 7, 2021 — the web page design was identical throughout this period, so the data formats were also identical.

![Result when using recent data as source 1](/files/e5aa4be4ae62b090c1a7221d8b237c36e981c437)

![Result when using recent data as source 2](/files/d90f2346a727829cd3d57020a99f700799b3ef0d)
{% endstep %}

{% step %}

### Select the Oldest (1st) Data as Source

To get the data that appeared as blank cells (August 19, 2020 \~ October 31, 2020), select a data result from that period as the source and download the log Excel. In this example, using the 1st data (collected August 19, 2020) as the source produces the opposite results:

* Collection date range with data: August 19, 2020 \~ October 31, 2020
* Collection date range with blank cells: November 1, 2020 \~ March 7, 2021

![Result when using oldest data as source 1](/files/87e1fe7c034de1761799ac01987131071f56a064)

![Result when using oldest data as source 2](/files/b7ee6fc8fe0a94b790fb166c1469c9c18a3099d4)
{% endstep %}
{% endstepper %}


# Enterprise Solutions

{% columns %}
{% column width="75%" %}

<figure><img src="/files/8c49d27baf79673304a39046f852978c2bb53dc0" alt="Listly Enterprise"><figcaption></figcaption></figure>
{% endcolumn %}

{% column width="25%" %}

{% endcolumn %}
{% endcolumns %}

## Customized Data Solution for Enterprises

Listly Enterprise is a customized B2B plan that supports an independent extraction environment for companies requiring large-scale data extraction and collection.

* ✅ Unlimited extraction
* ✅ Dedicated servers per company
* ✅ Dedicated domain, dedicated extension

<p align="center"><a href="https://www.listly.io/contact?about=enterprise" class="button primary">Enterprise Inquiry</a> <a href="https://www.listly.io/static/web/file/pdf/Listly_for_Enterprise.a777a2a6c890.pdf" class="button secondary">Download Brochure</a></p>


# Enterprise - Install Listly Extension

The Enterprise plan provides **a dedicated independent environment for each company**, which requires **installing an Enterprise-specific extension that integrates with your dedicated domain**.

{% hint style="success" %}
Example) Company name: ABC company → Dedicated domain: **abccompany.listly.io**
{% endhint %}

***

## How to Install

After logging into your dedicated domain, you can access the installation screen through **\[My Account]** → **\[Enterprise Features]** → **\[Extension Installation]**. The page provides detailed step-by-step installation instructions for the enterprise-specific extension—follow the guide there.
<figure><img src="/files/u2Hyfk7EwzKAXSCKjDCc" alt=""><figcaption></figcaption></figure>

{% hint style="info" %}
For individual users (Free–Business plans), you can install the extension from browser web stores like [Chrome](https://chrome.google.com/webstore/detail/listly-data-scraper/ihljmnfgkkmoikgkdkjejbkpdpbmcgeh)·[Whale](https://store.whale.naver.com/detail/jncnopbobhhjeeomceandjdllninkcfa)·[Edge](https://microsoftedge.microsoft.com/addons/detail/listly-data-scraper/hfocokadknpfdlnoepicoagndjhdoeno) and use it in conjunction with **Listly's official website (listly.io)**.
{% endhint %}


# Enterprise - Auto-Scrape Sub Pages

## What is Automatic Subpage Collection?

<figure><img src="/files/0ef28d3f1011068a91398ff4a804c23b7d3cb74d" alt=""><figcaption></figcaption></figure>

When new posts or products appear on a list page, the subpage URLs are automatically added to the group and extraction proceeds. With automatic subpage collection, you don't need to manually gather or update addresses one by one—you can **automatically detect updated lists and collect new data**.

This feature is especially useful when extracting **continuously updated pages like posts or product pages**. For example, if you connect a shopping mall list page where new products are registered daily, new product detail pages will be automatically collected, **maintaining the latest data state**.

{% hint style="success" %}
**What is a Subpage?**

Subpages refer to all subordinate pages excluding the website's main page (homepage).
{% endhint %}

***

## How to Use

{% stepper %}
{% step %}

### Create Parent Task

* Run Listly on the list page and click the **\[Parts]** button.

<figure><img src="/files/8d73a09ffe4852a2e485e81095d4b1a2ee84eeaf" alt=""><figcaption></figcaption></figure>

* After selecting the extraction area, choose **'Hyperlink'** in the extraction options to collect only links to each detail page.

<figure><img src="/files/bbe43d77c0c3d6686ebed9ca29e3c0fbe0686969" alt=""><figcaption></figcaption></figure>

* **This task that collected only detail page hyperlinks is the parent task needed for 'automatic subpage collection'.** The URL of this task will be used later when connecting the child task, so copying it in advance will be convenient.

<figure><img src="/files/43dd3fc308c3896760b8589e6c58fdae0dfeb139" alt=""><figcaption></figcaption></figure>
{% endstep %}

{% step %}

### Create Child Task and Connect to Parent Task

* On the detail page, select the area that will serve as the reference for group extraction and extract data.\
  (This process is the same as regular [Group Extraction](/getting-started/result-page-features/group-extraction).)

<figure><img src="/files/acf9dfa2128feb7bceea352c39621170443e95b1" alt=""><figcaption></figcaption></figure>

* On the results page, check the tab where the selected data is located, then click the **\[+Group]** button.

<figure><img src="/files/b9d1ceb0f3c0004f0fa33410900e62f26bd0d0e3" alt=""><figcaption></figcaption></figure>

* In the URL input field at the bottom of the group extraction settings window, select **\[Choose URL from existing task]** and paste the URL of the parent task you created earlier.

<figure><img src="/files/2a628494fe5e8554ce05b31ccda3d0383ae10b53" alt=""><figcaption></figcaption></figure>

* Click the **\[Preview]** button and select the column containing detail page URLs. If 5 URLs appear in the bottom preview window, it's working correctly. After confirming, click the **\[Done]** button.

<figure><img src="/files/b25dc928fec6968230e4741aba06bfc4136f3577" alt=""><figcaption></figcaption></figure>

![](/files/b5e144002f0d4b6c96b51f411f4afe3ad61ec912)

* When you register a group this way, the child task (detail page group extraction task) is connected under the parent task (hyperlink collection task). Whenever the parent task discovers new links, those URLs are automatically added to the child task and collection proceeds. Therefore, set the schedule on the **parent task**.

<figure><img src="/files/ee45ef74c546d574931f598754863d462f061239" alt=""><figcaption></figcaption></figure>

* Set the schedule according to your desired frequency and time period.

<figure><img src="/files/ffd63cb49cee225867e2ea646998516ad86ff740" alt=""><figcaption></figcaption></figure>

* When the parent task runs according to the set schedule, if new items are registered on the list page, those URLs will be automatically updated in the child group.

<figure><img src="/files/0481f7c3bf0c20cb3a4494fe75e119aeba09ec89" alt=""><figcaption></figcaption></figure>

<figure><img src="/files/d6d98bca58d0eda496deb9b2d4e557be5c577f06" alt=""><figcaption></figcaption></figure>
{% endstep %}
{% endstepper %}

{% hint style="warning" %}
**Important Notice**

The automatic subpage extraction feature is not a new post detection feature, but operates based on **automatic extraction method that runs according to schedules**. When the parent task runs according to the user-registered schedule, if new content is found on the list page, those links are automatically added to the child task and collection proceeds.
{% endhint %}


# Enterprise - Fail Fast

## What is the Fail-Fast Strategy?

In large-scale data collection, collection tasks can stall for extended periods or wait inefficiently due to network delays, blocking, abnormal responses, and more.

Listly Enterprise applies the **'Fail-Fast Strategy'** to data collection features to minimize these issues.

The 'Fail-Fast' feature lets you configure the system to stop all remaining tasks in a group and move to the next task when a certain percentage or number of failures is detected during group extraction.

{% hint style="info" %}
The Fail-Fast feature is configurable when creating a [group extraction](/getting-started/result-page-features/group-extraction) task.
{% endhint %}

{% stepper %}
{% step %}

#### After extracting the source page, click the \[+Group] button

<figure><img src="/files/3ad680eaf9553413b1c0c21762fd71a419296431" alt=""><figcaption></figcaption></figure>

**This feature can be configured during the process of creating a** [**group extraction**](/getting-started/result-page-features/group-extraction) **task.** After extracting the source page, click the **\[+Group]** button at the top of the results page.
{% endstep %}

{% step %}

#### After entering URLs in the new group, configure the Fail-Fast option

<figure><img src="/files/c79e82996516af4d6f25c0f82d6792b3c0bc17a0" alt=""><figcaption></figcaption></figure>

**After entering URLs in the new group, configure the Fail-Fast option**.

<mark style="color:red;">➊</mark> Percentage setting: When tasks fail at the selected percentage, remaining tasks are marked as failed.

<mark style="color:yellow;">➋</mark> Count setting: When tasks fail at the entered count, remaining tasks are marked as failed.<br>

For testing, we set the percentage to 30% and entered 10 URLs to create the group. To simulate a failure scenario, we intentionally entered incorrect URLs.

<figure><img src="/files/f007c1cf09309b6177cdbee33836fa13e718a7bd" alt=""><figcaption></figcaption></figure>
{% endstep %}

{% step %}

#### Check task progress

Below is the example result screen. When extraction failed for 30% (3 out of 10 URLs), you can see that the remaining 7 tasks were automatically Fail-Fast processed.

<figure><img src="/files/d194696107fa915511ead6f91ddd657d1f5c66a4" alt=""><figcaption></figcaption></figure>

By utilizing the Fail-Fast feature like this, you can reduce unnecessary wait times in certain situations and **significantly shorten overall process time**.
{% endstep %}
{% endstepper %}


# Enterprise - Proxy Auto Retry

## What is Proxy Auto-Retry?

When collecting large amounts of data, some requests may fail due to network blocking, timeouts, or IP restrictions.

**Proxy Auto-Retry** is an Enterprise-exclusive feature that improves success rates in these failure situations. This feature automatically switches to a different proxy IP whenever a request fails, **maintaining connection stability while continuing collection**.

{% hint style="warning" %}
**Important Notice**

The proxy feature in the Enterprise plan is provided as a separate option. To use this feature, you must have a separately purchased proxy. For inquiries about proxy setup or purchase, use the \[Purchase Proxy] button in the settings page or contact <hello@listly.io>.
{% endhint %}

***

## How to Use

{% stepper %}
{% step %}

#### Identify Extraction Failure Causes Using Screenshots

**For server-executed extraction tasks** like group extraction, auto-click, auto-scroll, templates, and scheduled tasks, if collection fails due to website blocking, you can improve task success rates using the proxy auto-retry feature.

<figure><img src="/files/o3YqVGZZ5CA2092yY9k6" alt=""><figcaption></figcaption></figure>

{% hint style="success" %}
Reference: Using auto-generated [screenshots](https://help.listly.io/docs/ko/getting-started/databoard-features/screenshot) when data extraction fails, you can check the page state and error codes at the time of failure.
{% endhint %}
{% endstep %}

{% step %}

#### Navigate to the Task's Settings Page

Enter the task's **settings page**.

<figure><img src="/files/0191af4328b98d8635dbc9afef30508abc18325e" alt=""><figcaption></figcaption></figure>
{% endstep %}

{% step %}

#### Click the Retry (Proxy) Button in the Private Proxy Section

In the **\[Private Proxy]** section of the settings page, check the **\[Retry (Proxy)]** option to enable the feature.

<figure><img src="/files/jelZC7Wdi8BfQM1qZMNs" alt=""><figcaption></figcaption></figure>
{% endstep %}

{% step %}

#### Configure Detailed Options

Each proxy auto-retry option is described as follows:

**A. Select Proxy Pool**

➊ All Private proxies: Sequentially retry using available IPs from all registered private proxies.

➋ All Private proxies in same country: Use only proxies from the same country as the selected proxy.

➌ All Private proxies in same providers: Use only proxies from the same provider as the selected proxy.

**B. Select Request Interval**

You can freely set the request interval. However, if the interval is too short, the next request may overlap before the previously attempted proxy server's work is complete, so we recommend maintaining an appropriate work interval based on the web page's data volume.

<figure><img src="/files/GDy5v6WYvyB8zyWr5emH" alt=""><figcaption></figcaption></figure>
{% endstep %}

{% step %}

#### Save Selected Settings

Once you've finished configuring, click the **\[Save]** button at the bottom of the settings page.

<figure><img src="/files/e61cc168629e8fd849b260e2caf7bec08ef4a6ce" alt=""><figcaption></figcaption></figure>
{% endstep %}

{% step %}

#### Re-extract the Task

After saving settings, click the **\[Re-extract]** icon in the task list to restart collection with the configured proxy auto-retry rules applied.

<figure><img src="/files/18e2c1af1b47e0a99fc368cc82e0d006b8f8c84f" alt=""><figcaption></figcaption></figure>
{% endstep %}

{% step %}

#### Check Re-extraction Processing Results

After extraction completes, you can verify each request's processing results in the group results page. The number displayed in the **retry** column of the table records the proxy auto-retry process.

The display format is **Success attempt / Number of proxies in pool**. For example, if displayed as **6 / 15**, it means extraction succeeded on the 6th proxy out of 15 proxy servers selected in the settings.

This value allows you to intuitively understand how many proxy switches were attempted and how sensitive specific requests were to blocking.

<figure><img src="/files/1015ca003fe324bae2bf319f2e85026cfbf31932" alt=""><figcaption></figcaption></figure>
{% endstep %}
{% endstepper %}


# Enterprise - Auto Name Columns

## What is Column Naming?

In the Enterprise plan's extraction results page, you can directly edit the names displayed for each column to set what will appear in the header row of your final data.

{% stepper %}
{% step %}

### Click the \[Edit Headers] button in the results page

<div align="left"><figure><img src="/files/5e5c901d3fb38e4f8f57dfd863f7f6a39fa2ccd7" alt=""><figcaption></figcaption></figure></div>

In the completed extraction results page, select the tab you want to extract and click the **\[Edit Headers]** button.
{% endstep %}

{% step %}

### Edit the column names (headers) as you want&#x20;

<figure><img src="/files/Cdi7oF5D99AcWjJLG6xX" alt=""><figcaption></figcaption></figure>

Once column name editing is enabled, modify each data column with appropriate content.
{% endstep %}

{% step %}

### Save your changes

<figure><img src="/files/OyBdSi48bPNzKktPQqhw" alt=""><figcaption></figcaption></figure>

When editing is complete, click the **\[Confirm header changes]** button to save.
{% endstep %}

{% step %}

### Download the file and check your updated column names

<figure><img src="/files/IURPIHBPAleuhMwbLctL" alt=""><figcaption></figcaption></figure>

Your changed names will be reflected in the header row of Excel and Google Sheets files.
{% endstep %}
{% endstepper %}


# Enterprise - Generate Bulk Group & Download

## What is Bulk Group Generation and Download?

In group extraction, **you can register up to 500 URLs per group**.\
This is a limit designed to optimize system stability and processing speed—including too many URLs in one group can lead to excessively long processing times or some requests failing due to bottlenecks.

However, when you need to register thousands or tens of thousands of URLs at once, manually creating multiple groups of 500 can be quite tedious.

To simplify this, Enterprise plans offer **bulk group generation**.\
Regardless of how many URLs you input, the system automatically splits them into 500-URL chunks and creates multiple groups at once. After extraction completes, you can also download multiple group tasks at once.

***

## How to Use&#x20;

### Register bulk groups

{% stepper %}
{% step %}

### Step 1

Follow the same process as creating a [group extraction](https://help.listly.io/docs/ko/getting-started/result-page-features/group-extraction) task. First extract the page that will be your group source, then click the **\[+Group]** button at the top of the results page.

<figure><img src="/files/72f1d125efe034cba4ec3d00973c8fcff7b58775" alt=""><figcaption></figcaption></figure>
{% endstep %}

{% step %}

### Step 2

Paste your list of URLs to extract in the group URL input field, then select how many URLs to include per group in the Task per Group option at the top right of the input area.

Example:

* Total **1,592 URLs** entered
* Set to **500 per group** → 4 group tasks automatically created
* Set to **100 per group** → 16 group tasks automatically created

<figure><img src="/files/a4e200802f20e5ccc5e5fb9bfde5027e4dc2dce2" alt=""><figcaption></figcaption></figure>
{% endstep %}

{% step %}

### Step 3

After completing your settings, click the **\[Done]** button at the bottom.

<figure><img src="/files/a400626f384726182676d4b0326c3fa6528d4eb4" alt=""><figcaption></figcaption></figure>
{% endstep %}

{% step %}

### Step 4

You can see that the URLs you entered were automatically split according to your chosen criteria and registered as multiple group tasks.

<figure><img src="/files/8ff600d6c8375b62e8e1b9f60df5f871457c56c2" alt=""><figcaption></figcaption></figure>
{% endstep %}
{% endstepper %}

### Download bulk groups

{% stepper %}
{% step %}

### Step 1&#x20;

Select the completed group tasks and click the **\[Download beta]** button at the top of the Databoard.

<figure><img src="/files/2b1aeb4d40986c7b24686142685f77eaba6c4984" alt=""><figcaption></figcaption></figure>
{% endstep %}

{% step %}

### Step 2

Select your [**data arrangement method**](/getting-started/result-page-features/data-arrangement) and click the **\[Download]** button.

<figure><img src="/files/YTgFfFqa7TzjuqICik5G" alt=""><figcaption></figcaption></figure>
{% endstep %}

{% step %}

### Step 3

Your selected group tasks will download as a single compressed file.

<figure><img src="/files/f0f51d095df57901258e09d333187ad71e009dce" alt=""><figcaption></figcaption></figure>
{% endstep %}
{% endstepper %}


# Frequently Asked Questions

## Go to frequently asked questions by topic&#x20;

{% columns %}
{% column %}
{% content-ref url="/pages/CwfC53mgDrGXLEGFBYdN" %}
[Payment and Refund Information](/support/faq/payment-and-refund-information)
{% endcontent-ref %}

{% content-ref url="/pages/XHfm29kl1tNyUJFb3hL3" %}
[Subscription Plans](/support/faq/subscription-plans)
{% endcontent-ref %}

{% content-ref url="/pages/wAOABCFI9ECy7mUExlpd" %}
[Proxy](/support/faq/proxy)
{% endcontent-ref %}

{% content-ref url="/pages/0Nzd7e570SNE5Q3jAcpM" %}
[Data Extraction Errors ​](/support/faq/data-extraction-errors)
{% endcontent-ref %}

{% endcolumn %}

{% column %}
{% content-ref url="/pages/2MmDCVY8wynzhGUvtnzT" %}
[Account/Sign-up/Withdrawal](/support/faq/account-sign-up-withdrawal)
{% endcontent-ref %}

{% content-ref url="/pages/5wlyajOK08PHgT0hvw8a" %}
[Credits](/support/faq/credits)
{% endcontent-ref %}

{% content-ref url="/pages/jJ2u88muNJJcnMw6Eh2X" %}
[Services & Features](/support/faq/services-and-features)
{% endcontent-ref %}

{% content-ref url="/pages/cd1bR7AZ8t8iE8EZcthG" %}
[Listly Image Downloader](/support/faq/listly-image-downloader)
{% endcontent-ref %}

{% endcolumn %}
{% endcolumns %}


# Payment and Refund Information


# What should I do if a payment failed?

Please check again as a subscription or first payment may fail in the following cases.

* Insufficient balance
* Card reported lost
* Expired
* CVC number error
* Invalid account
* Limit exceeded

\
However, if your payment failed for any other reason, <hello@listly.io> please let us know with a screenshot to.


# Can I pay for only one month?

You can subscribe for as long as you want and cancel at any time. After subscribing to the Listly service for one month, [Payment information](https://www.listly.io/billing) on the page, you can cancel automatic payments. If you cancel subscription renewal before the subscription expiration date, the subscription will not renew and no additional charges will be made.


# Can I receive a receipt or invoice after payment?

If you have completed payment after subscribing to a Listly plan, you can view the receipt and payment history in the payment information.

1. Please log in to your Listly account.
2. After moving to the dashboard, please click the payment information at the top right.
3. If you click the subscription history tab located in the center, you can view all payment information from the date the subscription started to the receipt.


# How do I delete my saved credit card?

If you'd like to remove all your saved cards, head over to the [Billing](https://www.listly.io/billing#card) page. Once you're there, click on the card management section in the center. Then click the X icon on the far right to delete each card.


# I'm getting an unknown error when trying to pay with PayPal from abroad.

Running into payment issues while using an international card or trying to subscribe from outside your home country?&#x20;

Please try the [alternative payment method](https://www.listly.io/pricing?highlight=paypal-alternative). Note that tax is automatically applied based on your location when using DoDo Payments. This is a one-time payment and does not recur.

{% hint style="info" %}
**TIP**

We recommend switching browsers first. If you're using Safari, try Chrome instead. If you're on Chrome, give Firefox a shot. If the error persists after switching browsers, send us an email at <hello@listly.io> with your Listly account ID and request a payment link. We'll review your subscription plan and send you a custom invoice.
{% endhint %}


# If I pay annually, will I be automatically charged when my subscription ends?

Did you sign up for the Light or Business plan with annual billing? When your yearly subscription period ends, you won't be automatically charged for the next year. You'll need to manually renew your subscription if you'd like to continue using Listly.


# How do I request a refund?

Cancellations and refunds are only available if you haven't used Listly services during the billing period. Before requesting a refund, please review these conditions:

* We cannot refund amounts for expired subscription periods.&#x20;
* We cannot process refunds for cancellations resulting from user actions or violations. Refunds exclude any transaction fees incurred at the time of payment.&#x20;
* If you've used the service even once during a billing period, that month's payment is considered used. If you have remaining months in your subscription, we can refund those unused months. Even if you haven't used the service, if 30 days of your monthly subscription period have passed, that month's payment is considered used.&#x20;
* Regardless of promotional pricing, all users who subscribed through promotions follow the same standard deduction rates when refunding. For example, whether you subscribed at the regular price of 90,000 won per month or at a promotional rate of 50,000 won per month, the deduction for used periods will be calculated based on the standard 90,000 won rate.&#x20;
* Payments made through the K-Voucher platform (k-voucher.kr) must be refunded through that platform. If you request a refund after the service suspension period available on that platform (8 months as of November 2020), we'll apply the refund criteria above and return only the remaining portion of your actual payment.&#x20;
* Government subsidies cannot be refunded to the customer per subsidy laws and management guidelines. We don't process partial cancellations or partial refunds.

{% hint style="info" %}
If you haven't used any Listly credits and would like to request a refund, contact us at <hello@listly.io> with your Listly account information. Processing times vary by card company, but refunds typically take up to 3 business days.
{% endhint %}


# Can I request a refund during an annual subscription?

Partial refunds are possible. However, the amount corresponding to the period you've already used will be deducted, and only the remaining balance will be refunded. According to our terms of service, if more than 30 days have passed since your payment date, refunds may not be possible even if you haven't actually used the service that month. If you have questions or requests regarding annual subscription refunds, feel free to email us at <hello@listly.io>.

{% hint style="info" %}
**Note** \
If you started an annual subscription on January 1st, your fourth payment (month 4) will process on April 1st. If you have no service usage history through April 15th, months through March are considered used. If there's no usage history in April, that month's amount would be included in the refundable period.
{% endhint %}


# Account/Sign-up/Withdrawal


# My account is blocked. What is the reason?

Listly automatically detects abusive activity to prevent misuse of the Listly service by automatically creating multiple email accounts.\
It also continuously conducts security checks on user accounts, and if suspicious account activity is detected, it blocks the account without prior warning.<br>

If an account has been blocked, it means the Listly system detected abnormal activity or suspended the account due to security concerns.\
If you want to find out the reason for the block and recover your account, <hello@listly.io>please leave an inquiry at.


# How do I delete my account?

If you wish to delete your membership, please log in to your Listly account.\
After logging in, click Account Settings, then enter your password in the account deletion field to verify your identity.\
The final withdrawal will proceed after you review and agree to the withdrawal information.

After membership withdrawal, all information such as extracted data, schedulers, proxy settings, purchase history, and usage history will be deleted,\
and please note that the withdrawn ID cannot be re-registered for 30 days.


# I want to change the Google Spreadsheet account that will be downloaded.

Do you want to save data extracted to Google Sheets but have multiple accounts? If you want to change the account that will be used for saving, first go to the Data Board.

<figure><img src="https://images.gitbook.com/__img/dpr=2,width=760,onerror=redirect,format=auto,signature=1403632455/https%3A%2F%2Fcontent.gitbook.com%2Fcontent%2FiKxoYELFf9WS8XCvYe6S%2Fblobs%2FhbnZuSmKpwGYiaN86OPt%2Fgoogle-sheets-account-1.png" alt=""><figcaption></figcaption></figure>

Then click the Google Sheets button in the center of the screen, and press Change Account below to set it.

<figure><img src="/files/RaCGIdxuaOpZXf65oObA" alt=""><figcaption></figcaption></figure>


# How many devices can I use simultaneously with one Listly account?

With the Listly Enterprise plan, you can add unlimited user accounts with administrator approval. For all other plans, based on our internal policy to prevent international traffic abuse, one Listly account can only be accessed and used on one device at a time. If you try to access your account from two or more devices simultaneously, you may experience usage restrictions.


# I forgot my password. What should I do?

If you've forgotten your password, you can reset it. Go to the login page and click "Forgot your password?" Enter the email address associated with your Listly account, and you'll receive an email to reset your password. If you don't receive the email after a few minutes, check your spam folder. If you still don't receive it, send us an email at <hello@listly.io> with the email address you're trying to use.


# Can I use Listly without creating an account?

Once you've installed the Listly extension, anyone can preview extraction results on web pages. However, you'll need to create an account to download the extracted data as a file. When you sign up, you'll start with the free plan, which gives you 10 data extractions per month (your quota resets after 30 days).&#x20;

If you upgrade to the paid Light plan, you'll get unlimited basic extractions with no wait time, and you can use the Tabs feature in the extension to extract data from multiple tabs at once.


# Subscription Plans

#### \[Monthly Subscription]

First, log in to your Listly account, then go to My Account → Payment Information page, select the Modify/Cancel Auto-Pay button, and choose Cancel Auto-Pay. Payments will not be processed from the next subscription renewal date. You will be switched to the free plan from the next monthly renewal, and daily extraction limits and access to the data board will be restricted.<br>

#### \[Annual Subscription]

Please send an email at <hello@listly.io> about requesting subscription cancellation and refund along with your Listly account you are currently using. According to the service refund policy, we will assist with a refund after deducting the months already used, and you will be switched to the free plan from the next monthly renewal. For inquiries related to refunds, please refer to the following article - [How do I request a refund?](https://www.listly.io/help/ko/faq/%ED%99%98%EB%B6%88-%EC%9A%94%EC%B2%AD%EC%9D%80-%EC%96%B4%EB%96%BB%EA%B2%8C-%ED%95%98%EB%82%98%EC%9A%94/)

{% hint style="warning" %}
**Note**

Account deletion is not subscription cancellation. If you delete your account without cancelling your subscription, your member information will be deleted and the refundable amount cannot be checked, so please make sure to confirm your current subscription plan before deleting your account.
{% endhint %}


# I subscribed for one year. How do I cancel?

If you have been subscribed for a year but want to cancel your Listly subscription, please delete the card you registered for payments.

After logging in, go to Payment Information.

Then click the Auto-Pay Edit button at the top left, and delete the card you registered.

This applies to both the Lite plan and the standard Business plan.<br>

<figure><img src="/files/cace11249b93f33c324a972a2b7887f52e246030" alt=""><figcaption></figcaption></figure>


# I’m unsure which plan to choose.

Listly offers four subscription products starting May 2024: Free Plan, Light Plan, Business Plan, and Enterprise Plan. Among these, the Light Plan and Business Plan can be chosen on a monthly or yearly basis.<br>

#### \* Free Plan

* Basic extraction available 10 times per month (used basic URLs are replenished after 30 days)
* Result data viewable for 5 minutes, Data Board not available
* When the 10 basic extraction allowances are exhausted, limited data downloads are available until the next replenishment
* 'Tabs' feature within the extension not available
* Advanced URL top-ups and usage not available

#### \* Light Plan

* Unlimited basic extractions (single-page extraction)
* 100 advanced URLs provided monthly (deducted when using multi-tab extraction (Tabs) feature)
* Data Board provided, folder edit permissions
* Advanced URL top-up available: 10,000 KRW per 100 URLs

#### \* Business Plan

* All features of the Light Plan
* 9,000 advanced URLs provided (deducted when using Tabs and other advanced extraction features)
* Use advanced features for automating bulk data extraction such as group extraction, auto-click, auto-scroll, scheduling, and action templates
* Add public proxies and private proxy servers to prevent IP blocking
* Advanced URL top-up available: 10,000 KRW per 1,000 URLs

#### \* Enterprise Plan

* Separate contractual plan for enterprises
* Stable data extraction environment with dedicated servers and dedicated domains
* Available to all employees with no feature restrictions
* Admin features and job reporting functionality
* For more details, [please visit the Enterprise page](https://www.listly.io/enterprise) for inquiries.


# What’s the difference between the free plan and paid plans?

The free plan supports single-page extraction 10 times per month (used credits are replenished after 30 days).\
Upgrading to the Lite plan or higher enables unlimited single-page extractions and allows tab extraction from the extension (100 advanced URLs provided for tab extraction).\
The Business plan grants 9,000 URLs/month for using advanced extraction features and gives you full access to core features that automate more data extraction, such as group extraction, proxy servers to prevent IP blocking, auto-scroll and auto-click functions, and schedule settings.


# What's included in the Free plan?

Listly's Free Plan is a free service that allows anyone to easily extract data and can be used without a subscription period or registration of payment methods.

{% hint style="info" %}
**Read more**: [Listly Data Extraction Units: Basic URL vs Advanced URL](https://www.listly.io/help/ko/faq/%EB%A6%AC%EC%8A%A4%ED%8B%80%EB%A6%AC-%EB%8D%B0%EC%9D%B4%ED%84%B0-%EC%B6%94%EC%B6%9C-%EB%8B%A8%EC%9C%84-%EA%B8%B0%EB%B3%B8-url-vs-%EA%B3%A0%EA%B8%89-url/)
{% endhint %}

#### Number of Extractions Available

* Free Plan users are provided with 10 basic URLs per month, and used basic URLs are replenished after 30 days.
* The remaining available count is displayed in the extension, and the time remaining until the next recharge after use can be checked in the upper right corner of the results page.

<figure><img src="/files/dd4a8d510f763d0f671514f6b48eeb6e56ce3cd6" alt=""><figcaption></figcaption></figure>

* Even after using all basic URLs, extraction and preview of web pages are still possible. However, if you exceed the usage count, data downloads to Excel or Google Sheets are limited to a maximum of 5 rows.
* By [upgrading to a higher plan](https://www.listly.io/pricing), you can extract unlimited single-page data without waiting for recharge.

#### Data Storage

* The Free Plan does not include the 'Data Board', which is Listly's data storage space.
* Each extraction result is accessible for only 5 minutes, and is automatically deleted after this time expires.
* Deleted data cannot be recovered or accessed, so please download and use your data immediately within the retention time shown on the results page.

#### Separate Purchase of URLs Not Available &#x20;

Separate purchase of basic/advanced URLs is not available in the Free Plan. If you need more extractions, please upgrade to a higher plan.


# Credits

A unit that can extract a single web page URL is called a Listly credit. Credits can be recharged and used as needed. However, because Listly offers subscription plans on a monthly basis, even if you paid for an annual plan, each user still has a credit expiration date set to match the monthly plan renewal date. In other words, there is a credit expiration date when the credits that allow you to extract data are reset once a month.For that reason, after recharging additional credits, your credits may suddenly disappear. At Listly, if you want to recharge and purchase additional credits, **we recommend that you check the credit expiration date and only recharge as many credits as necessary** to do so.

My credit expiration date is **\[My Account]** > **\[Payment Information]** available at the top left.<br>

<figure><img src="/files/9ZTDgoh1jzf8SxWsJTB9" alt=""><figcaption></figcaption></figure>


# Can I get a refund for unused credits (URLs)?

Payment cancellations and refunds are only possible if you have not used the Listly service at all and have not spent any credits.\
Therefore, if you collect web pages through Listly, any remaining URLs (credits) cannot be refunded.\
Even if you paid an additional amount to top up credits, remaining credits cannot be refunded.


# I used up all my credits (advanced URLs). How do I recharge?

If you have exhausted all advanced URLs required to use Tabs extraction and other advanced extraction features, you can recharge as many as you need.

1. Click My Account at the top right of the Data Board and homepage → then go to the Payment Information menu
2. Click the "+ Recharge URL" button in the center of the URL usage section to top up credits as much as you want.

You can also recharge via the URL add-on option at the bottom of the Pricing page in the top menu of the homepage.

* Business Plan: 10,000 KRW per 1,000 URLs
* Light Plan: 10,000 KRW per 100 URLs
* Free Plan: URL recharges not available

{% hint style="warning" %}
Recharge credits expire on the subscription expiration date for that month according to the monthly renewal cycle, so we recommend recharging only as much as you need according to your extraction plan.
{% endhint %}

<figure><img src="/files/SXhub0O936nEakoRSOhL" alt=""><figcaption></figcaption></figure>


# Listly Data Extraction Units: Basic URL vs Advanced URL

## What are Basic and Advanced URLs?

URLs are Listly's data extraction units. They're divided into Basic URLs and Advanced URLs based on their usage and deduction method. Here are the differences:

### <mark style="color:red;">➊</mark> Basic URL

#### Where it's used?&#x20;

Single-page extraction through the extension's Basic tab.

#### How it's deducted?

1 Basic URL is deducted each time you extract a page.

#### Usage conditions

* Unlimited when you subscribe to higher plans like Light Plan or Business Plan.
* Free Plan users get 10 URLs that recharge after 30 days once fully used.
* Basic URLs cannot be purchased separately.

{% hint style="info" %}
Free Plan: 10 Basic URLs that recharge 30 days after being fully used.
{% endhint %}

### <mark style="color:red;">➋</mark> Advanced URL

#### Where it's used?

Listly's advanced features like Tabs, group extraction, auto-click, auto-scroll, scheduling, and action templates.

#### How it's deducted?

1 Advanced URL is deducted for processing one page worth of data through advanced features. No deduction occurs if extraction fails.

#### Usage conditions

* Renewed monthly after your first payment on the subscribed plan.
* Used Advanced URLs can be repurchased on the pricing page. To purchase additional URLs, you must first subscribe to a higher plan.

{% hint style="info" %}
Advanced URL deductions only apply when advanced features successfully process a page.
{% endhint %}


# How do the Light Plan's 100 URL credits work?

Listly's single-page to Excel extraction (basic extraction) is unlimited starting with the Light Plan, so no separate credits are required. However, the 100 Advanced URLs provided monthly are deducted based on the number of pages when you extract multiple pages with the same structure at once using Listly's 'Tabs' feature.

For example, if you extract 10 pages at once with Tabs, 10 URL credits are deducted. If extraction fails, no credits are deducted. If you use up all your credits and want to recharge, you can purchase additional URLs at 10,000 KRW per 100 URLs on the Light Plan.

{% hint style="info" %}
[Read more: I used up all my credits. How do I recharge?](https://help.listly.io/~/revisions/cNdAx5fcGvT0vDDMMvcF/support/faq/credits/i-used-up-all-my-credits-advanced-urls-.-how-do-i-recharge)
{% endhint %}


# Proxy

You may be subscribed to datacenter, ISP proxy, residential IP, or mobile IP services but want to cancel them.\
If you do not want the proxy subscription fee to be automatically charged next month according to the billing cycle, please let us know which proxy servers and Listly account you are subscribed to at [hello@listly.io](mailto:undefined) and we will promptly check and assist with the cancellation.

Even if there is no usage, refunds are difficult after 24 hours have passed since the proxy subscription fee was charged.\
This is because Listly purchases and configures the proxy servers on your behalf.\
Therefore, please request subscription cancellation by email at least 24 hours before the billing cycle elapses.


# Do I necessarily need a private proxy server?

When using a shared proxy server, traffic may increase on certain proxy country servers, causing extraction speeds to slow down or making data extraction difficult. Because they are public resources, if many users are using them at a particular time and a lot of data extraction is taking place, this kind of problem can occur. If you use a private proxy in this case, you can use the server exclusively and extract data without these issues.​[Listly Team](https://app.gitbook.com/o/Uu6AM3fgpZza0EpsJM4N/s/YGc5sjVBgcKnZgEEEkus/~/edit/~/changes/2/support/frequently-asked-questions/proxy/do-i-necessarily-need-a-private-proxy-server)If you request it from the Listly Team, we will purchase a proxy server on your behalf that can be used exclusively by that user account and set it up as a premium proxy for you. The proxy server's country, quantity, and so on can be determined after consulting with the Listly Team, and the cost will be charged separately.​

#### How to request a private proxy <a href="#how-to-request-a-private-proxy" id="how-to-request-a-private-proxy"></a>

1. Payment Info > Modify/Cancel Auto-Pay > My Proxy List > Request Private Proxy
2. Click this [link](https://www.listly.io/pricing) or contact the Listly Team about proxy servers via <hello@listly.io>.

<figure><img src="https://images.gitbook.com/__img/dpr=2,width=1168,onerror=redirect,format=auto,signature=-1862750207/https%3A%2F%2Fcontent.gitbook.com%2Fcontent%2FiKxoYELFf9WS8XCvYe6S%2Fblobs%2FWsVhBaNx6GxrXdSEU5b6%2Fproxy-update.scale-100.png" alt=""><figcaption></figcaption></figure>


# Is it possible to purchase a proxy server for a specific country?

Currently, unless the user makes a special request, the private proxy is set to a US proxy server at 60,000 KRW per month. This is because most countries generally do not impose special restrictions on connections from the United States.However, you can request the purchase of a proxy server for a specific country. For example, if you want to reliably extract data from a website in a specific country using a dedicated proxy, inform the Listly team ([hello@listly.io](https://app.gitbook.com/o/Uu6AM3fgpZza0EpsJM4N/s/YGc5sjVBgcKnZgEEEkus/~/edit/~/changes/2/support/frequently-asked-questions/proxy/is-it-possible-to-purchase-a-proxy-server-for-a-specific-country)) by email of the specific country proxy and the expected volume to collect.

* Additional charges may apply depending on usage or country characteristics.
* Proxy setup will be completed within 12 hours after payment confirmation.

​​

<figure><img src="https://images.gitbook.com/__img/dpr=2,width=1168,onerror=redirect,format=auto,signature=-1862750207/https%3A%2F%2Fcontent.gitbook.com%2Fcontent%2FiKxoYELFf9WS8XCvYe6S%2Fblobs%2FWsVhBaNx6GxrXdSEU5b6%2Fproxy-update.scale-100.png" alt=""><figcaption></figcaption></figure>


# What kind of proxy should I use?

If you're unsure which proxy works best for you and want to learn more about our proxy service, you're in the right place!

#### Types of proxies and prices

* Datacenter proxy - assigns a client a random IP address from its pool that belongs to a specific target country.
* ISP proxy - is similar to a residential proxy which is bought or leased from Internet service providers (ISPs).
* Residential proxy - is an intermediary proxy that assigns a genuine residential IP address to a client, allowing for fast access and anonymity.
* Mobile proxy - sources an IP address from cellular networks operated by mobile carriers, featuring faster connection speeds.

To sum up, shared datacenter proxies are free to use in Listly, but they are randomly assigned with higher chances of getting blocked. In comparison, premium proxies (e.g. residential and mobile proxies) are more expensive and less likely to be banned from websites.

There may also be some cases where your web scraping is blocked with a premium proxy due to restrictions on the number of concurrent connections on some websites (e.g. Meta/Facebook, Instagram, etc) - you can adjust your scraping speed to avoid this. For more details, please contact the Listly team at {<hello@listly.io>}.


# Services & Features

When extracting data, Listly's algorithm by default prioritizes and shows the data the user is most likely to extract. If the data you wanted to extract does not appear in the results window, **\[Select the tab to extract]** choose a different tab in the area to find the data you need.<br>

<figure><img src="/files/nyvPU7YDjf9h9uiSSqZc" alt=""><figcaption></figcaption></figure>


# How do I install the extension?

Listly is [Chrome](https://chrome.google.com/webstore/detail/listly-web-scraping/ihljmnfgkkmoikgkdkjejbkpdpbmcgeh), [Whale](https://store.whale.naver.com/detail/jncnopbobhhjeeomceandjdllninkcfa), [Edge](https://microsoftedge.microsoft.com/addons/detail/listly-web-scraping/hfocokadknpfdlnoepicoagndjhdoeno) an extension available for all browsers. Go to the link for the browser you use most often and install the Listly extension to start using it immediately. We recommend signing up to access the extracted data logs.1

#### 1. Please download the Listly extension. <a href="#please-download-the-listly-extension" id="please-download-the-listly-extension"></a>

<figure><img src="https://images.gitbook.com/__img/dpr=2,width=1168,onerror=redirect,format=auto,signature=1180267802/https%3A%2F%2Fcontent.gitbook.com%2Fcontent%2FiKxoYELFf9WS8XCvYe6S%2Fblobs%2FIPHJoxNRW2L5CT57GIfK%2Finstall-1.png" alt=""><figcaption></figcaption></figure>

#### 2. Click the pin button to pin the Listly extension. <a href="#click-the-pin-button-to-pin-the-listly-extension" id="click-the-pin-button-to-pin-the-listly-extension"></a>

<figure><img src="https://images.gitbook.com/__img/dpr=2,width=1168,onerror=redirect,format=auto,signature=1481054887/https%3A%2F%2Fcontent.gitbook.com%2Fcontent%2FiKxoYELFf9WS8XCvYe6S%2Fblobs%2FKhE1jOwkkBn7Uruv4jSC%2Finstall-2.png" alt=""><figcaption></figcaption></figure>

#### 3. Sign up for Listly to download your data. <a href="#sign-up-for-listly-to-download-your-data" id="sign-up-for-listly-to-download-your-data"></a>

<figure><img src="https://images.gitbook.com/__img/dpr=2,width=1168,onerror=redirect,format=auto,signature=-2004581913/https%3A%2F%2Fcontent.gitbook.com%2Fcontent%2FiKxoYELFf9WS8XCvYe6S%2Fblobs%2F7llqdAVlTjW0fgF0saVf%2Finstall-3.png" alt=""><figcaption></figcaption></figure>


# Can I collect real-time data?

Unfortunately, Listly cannot collect data that changes every minute or every second in real time.\
However, if you use the scheduler feature provided in the Listly Business plan, you can collect data on specific days and at specific times to apply to tasks such as product pricing and competitor product monitoring.\
In Listly, when scheduling data extraction jobs, you can extract data at 5-minute intervals.\
If you want to collect data that changes in real time every minute—such as Bitcoin or NFT or stock charts—we recommend developing a separate data extraction program.


# Data Extraction Errors ​

#### 0. Understanding Error Messages and Screenshots

A ConnectionError message appears when accessing a page fails. This can occur if the server you visited is down or too slow. It can also happen if the Listly server's IP address is blocked and the website you're trying to extract data from returns an error.

A NoMatchingtabError appears when tab matching fails or, similarly, when page access fails. In many cases this is due to the Listly server's IP address being blocked and the site returning an error.

PartSelectionError is another error message that can occur when the Listly IP address is blocked and the specified part cannot be extracted.

First, don't panic. Check the error message and then review the screenshot.

If the screenshot image looks like the example below, there is a high probability that the IP address has been blocked.

[![스크린샷 2025-02-13 오후 8.31.35](https://listly-spongebob.s3.amazonaws.com/media/images/SeuKeuLinSyas_2025-02-13_OHu_8.31.35.scale-100.png)](https://listly-spongebob.s3.amazonaws.com/media/images/SeuKeuLinSyas_2025-02-13_OHu_8.31.35.scale-100.png)[![스크린샷 2025-02-13 오후 8.33.17](https://listly-spongebob.s3.amazonaws.com/media/images/SeuKeuLinSyas_2025-02-13_OHu_8.33.17.scale-100.png)](https://listly-spongebob.s3.amazonaws.com/media/images/SeuKeuLinSyas_2025-02-13_OHu_8.33.17.scale-100.png)

#### 1. Slow down the execution speed as much as possible

There are popular websites that attract users from around the world. These sites receive a lot of abusive traffic from across the globe. When collecting data with Listly, if the collection speed is too fast, the site may interpret the attempt as abuse and the data extraction will fail. In the worst case, the user's IP address could be blocked. To prevent this, the Listly team has added a blue bar at the top right of the dashboard so users can adjust the execution speed.

[![스크린샷 2025-02-13 오후 6.37.19](https://listly-spongebob.s3.amazonaws.com/media/images/SeuKeuLinSyas_2025-02-13_OHu_6.37.52.scale-100.png)](https://listly-spongebob.s3.amazonaws.com/media/images/SeuKeuLinSyas_2025-02-13_OHu_6.37.52.scale-100.png)[![스크린샷 2025-02-13 오후 6.38.37](https://listly-spongebob.s3.amazonaws.com/media/images/SeuKeuLinSyas_2025-02-13_OHu_6.38.37.scale-100.png)](https://listly-spongebob.s3.amazonaws.com/media/images/SeuKeuLinSyas_2025-02-13_OHu_6.38.37.scale-100.png)

#### 2. Set up a proxy server

A proxy server is a server you route through in the middle when accessing a site. The reason for setting up a proxy server is to hide the visitor's IP address.

Why hide the address? Because sites you access can impose various restrictions based on IP addresses. The following situations are typical.

1. When a site is restricted to access only from certain countries
2. When the number of accesses to a site is limited within a certain time period
3. When specific IP addresses with bad records are restricted

Listly Premium Proxies are proxy servers Listly purchased from overseas providers. They are shared servers used by all users.

Currently we provide servers in the US/Germany/Netherlands, and the countries may change over time.

[![스크린샷 2025-02-13 오후 8.18.37](https://listly-spongebob.s3.amazonaws.com/media/images/SeuKeuLinSyas_2025-02-13_OHu_8.18.37_a5bqbqF.scale-100.png)](https://listly-spongebob.s3.amazonaws.com/media/images/SeuKeuLinSyas_2025-02-13_OHu_8.18.37_a5bqbqF.scale-100.png)[![스크린샷 2025-02-13 오후 8.14.43](https://listly-spongebob.s3.amazonaws.com/media/images/SeuKeuLinSyas_2025-02-13_OHu_8.14.43_tPKzWnp.scale-100.png)](https://listly-spongebob.s3.amazonaws.com/media/images/SeuKeuLinSyas_2025-02-13_OHu_8.14.43_tPKzWnp.scale-100.png)

#### 2-1 When blocked even with a shared proxy: set up a dedicated proxy server

If you used a shared proxy but still see a Connection Error/Empty Data Error message and a screenshot indicating you've been blocked, what then?

Even if you set up a shared proxy server, you have still been blocked.

The default proxy servers are shared proxies used not only by you but also by many other paid users.

Even if you did not use a particular shared proxy, another user could have used that proxy server to extract the same website and gotten blocked, causing issues for you.

Therefore, to eliminate the risk of sharing a proxy server with others, it is better to use a dedicated proxy server.

A dedicated proxy can be used exclusively by the single user who requests it, allowing stable server configuration without worry of blocks caused by other users.

Also, if you need a proxy from a country other than the ones Listly provides by default, it is better to use a dedicated proxy (e.g., Eastern Europe/Middle East/Latin America/Oceania countries).

Of course, even with a dedicated proxy, if you continuously collect very large amounts of data very quickly, there is still a chance of being blocked.

In that case, we can switch you to a third-party proxy once at no additional cost or purchase and set up another proxy server for you.

At that time, you can subscribe to a dedicated proxy server solely for you.

Please email <hello@listly.io> with the desired country's proxy server and the estimated monthly data extraction volume.

Example) Japan proxy server / expected 7,000 extractions per month

Example) South Korea proxy server / expected 500 extractions per month

Monthly subscription fees start from 60,000 KRW.

However, while higher-quality proxy servers are less likely to be blocked, their price increases proportionally with quality.

[![스크린샷 2025-02-13 오후 8.18.37](https://listly-spongebob.s3.amazonaws.com/media/images/SeuKeuLinSyas_2025-02-13_OHu_8.18.37.scale-100.png)](https://listly-spongebob.s3.amazonaws.com/media/images/SeuKeuLinSyas_2025-02-13_OHu_8.18.37.scale-100.png)[![스크린샷 2025-02-13 오후 8.14.43](https://listly-spongebob.s3.amazonaws.com/media/images/SeuKeuLinSyas_2025-02-13_OHu_8.14.43.scale-100.png)](https://listly-spongebob.s3.amazonaws.com/media/images/SeuKeuLinSyas_2025-02-13_OHu_8.14.43.scale-100.png)

#### 3. Reduce the number of URLs for group extraction

Assume you want to perform a group extraction by inputting 1,000 URLs.

But if the platform you are accessing already defends against numerous access and data extraction attempts, the more URLs you include in a group extraction, the more it may be considered an attack.

Therefore, when adding URLs for group extraction, rather than extracting them all at once, we recommend splitting the URLs into smaller batches and extracting them gradually.

For example, if you tried group extraction with 1,000 URLs and it failed?

We recommend splitting them into 100 or 200 and performing multiple group extractions to prevent being blocked.


# NoListlyContent error

{% hint style="warning" %}
**NoListlyContent error message** is <mark style="color:red;">When the extracted data does not contain list-form content</mark> appears. It mainly means that the extracted content is a single item or nothing at all. This message can commonly occur when an entire web page is composed only of iframes and you extract with LISTLY Whole. If the page you want to extract is built with iframes, press the iFrame button and try extracting from the iframe's original page.
{% endhint %}


# ConnectionError message

{% hint style="warning" %}
**ConnectionError message** is <mark style="color:red;">When page access fails</mark> It appears. It can occur when the visited server is down or too slow. It can also happen when the IP address of the Listly server is blocked and the website you want to extract data from returns an error.
{% endhint %}

{% hint style="success" %}
**👉 Solutions**\
If the server is down, wait until it is restored and then try the data extraction task again.\
If the IP address of the Listly server is blocked, try bypassing the IP address ([Settings - Proxy](/getting-started/databoard-features/settings-proxy)) and extract the data again!

If the same error continues to appear, you will need to purchase and use a private proxy. This is because the Listly public proxy you were using has been blocked by the website you want to extract data from. By using a private proxy, you can increase access IPs and build a smoother extraction environment. To request purchase of a private proxy server, [hello@listly.io](mailto:undefined) please send an email to.
{% endhint %}


# JavascriptException error

{% hint style="warning" %}
**JavascriptException error** <mark style="color:red;">occurs when there is an error in the action script</mark>. Action scripts written in JavaScript may not properly handle changes in web page structure or may be incorrectly written from the start, which can cause this kind of error.
{% endhint %}

{% hint style="success" %}
If you purchased the action script from Listly, please contact us at [hello@listly.io](mailto:undefined) with your Listly account you used to sign up and the URL you want to extract.
{% endhint %}


# Listly Image Downloader

## **What is Listly Image Downloader?**&#x20;

Image Downloader is a new feature that allows users to input image URLs extracted with Listly and directly download image files based on those URLs. It also supports labeling images according to the order of data entries arranged in Excel, enabling users to download image data sequentially.

{% embed url="<https://youtu.be/_MJkfphW5-k?si=Y1n0nqSNPCkExxCm>" %}

{% hint style="success" %}
Note: [**Listly Image Downloader**](https://www.imagedownloader.io/en/) is currently **available on MS Edge and Naver Whale**.
{% endhint %}

***

## How to Use

{% stepper %}
{% step %}

### Import an Excel file into Listly Image Downloader

By clicking on the **\[Load URLs from Excel]** button, import the *Excel* file that contains image URLs.

*You can simply copy and paste URLs without using an Excel spreadsheet, but it is recommended to use Excel to easily match images with file names and sort them. For more details about how to import an Excel spreadsheet, check out* [How do I use an Excel spreadsheet to download images?](https://www.listly.io/help/en/faq/how-do-i-use-an-excel-spreadsheet-to-download-images/)

<figure><img src="https://listly-spongebob.s3.amazonaws.com/media/images/4.-imiji-daunlodeoeseo-hwagin.scale-100.png" alt=""><figcaption></figcaption></figure>

{% endstep %}

{% step %}

### Select image URL and file name options

If the file was successfully imported, a dropdown menu would be automatically activated, allowing you to select the image URL and file name options. Select the options you want.

<figure><img src="https://listly-spongebob.s3.amazonaws.com/media/images/5.yeolseontaeghagi.scale-100.png" alt=""><figcaption></figcaption></figure>

{% hint style="info" %}
Note : On the Free plan, a maximum of 50 URLs can be downloaded. For unlimited downloads, please upgrade to [Listly Light](https://www.listly.io/pricing).
{% endhint %}

{% endstep %}

{% step %}

### Preview images before downloading

If the options were selected without any issues, you'll be able to preview up to 3 images along with their matching file names. Review the images before downloading.

<figure><img src="https://listly-spongebob.s3.amazonaws.com/media/images/6.milibogiimijihwagin.scale-100.png" alt=""><figcaption></figcaption></figure>

{% endstep %}

{% step %}

### Download images

Click **\[Download]** to download your images as a single zip file. Once the download is complete, a folder named after the website domain will be created.

<figure><img src="https://listly-spongebob.s3.amazonaws.com/media/images/10.daunlodeupoldeohwagin.scale-100.png" alt=""><figcaption></figcaption></figure>

{% endstep %}

{% step %}

### Find and open your downloads

Find your downloaded file in 'Downloads' and unzip it if necessary. Open the folder and check out the images sorted by file name.

<figure><img src="https://listly-spongebob.s3.amazonaws.com/media/images/09-pailpoldeo-hwagin.scale-100.png" alt=""><figcaption></figcaption></figure>
{% endstep %}
{% endstepper %}

***

## **FAQ**

* [What's different about Listly Image Downloader?](https://help.listly.io/~/revisions/g18PriCA5my8tVHIv5Mt/support/faq/listly-image-downloader/what-is-different-about-listly-image-downloader)
* [How should I prepare the Excel file to upload to the Image Downloader?](https://help.listly.io/~/revisions/g18PriCA5my8tVHIv5Mt/support/faq/listly-image-downloader/how-should-i-prepare-the-excel-file-to-upload-to-the-image-downloader)
* [Do I have to upload an Excel file when using the Image Downloader?](https://help.listly.io/~/revisions/g18PriCA5my8tVHIv5Mt/support/faq/listly-image-downloader/do-i-have-to-upload-an-excel-file-when-using-the-image-downloader)
* [What are the differences between the Image Downloader filename options?](https://help.listly.io/~/revisions/g18PriCA5my8tVHIv5Mt/support/faq/listly-image-downloader/what-are-the-differences-between-the-image-downloader-filename-options)
* [I entered a URL but the image did not download.](https://help.listly.io/~/revisions/g18PriCA5my8tVHIv5Mt/support/faq/listly-image-downloader/i-entered-a-url-but-the-image-did-not-download.)
* [Fewer images were downloaded than URLs entered.](https://help.listly.io/~/revisions/g18PriCA5my8tVHIv5Mt/support/faq/listly-image-downloader/fewer-image-files-were-downloaded-than-the-urls-entered.)


# What's different about Listly Image Downloader?

<figure><img src="/files/ijhzYB3RQivDwGnwtBpo" alt=""><figcaption></figcaption></figure>

Listly Image Downloader uses image URLs easily extracted through Listly to download images in the same order they appear on the website, or to bulk download images with desired filenames.For example, assume product images are displayed on a website in the order shown above. To help understanding, a sequence number has been added to each image.

{% columns %}
{% column %}

#### Other I**mage Downloaders**&#x20;

<figure><img src="/files/TOw0J82C75Ztk0LEqMaX" alt=""><figcaption></figcaption></figure>

Most image downloaders use the filenames specified by the website as-is. These filenames are often composed of hard-to-understand numbers or combinations of letters, and when sorted by name the image order becomes jumbled.
{% endcolumn %}

{% column %}
**Listly Image Downloader**

<figure><img src="/files/qt9Myl4m990Yrk7Cpvqw" alt=""><figcaption></figcaption></figure>

Listly Image Downloader can set filenames based on an Excel file or assign numbers according to the order of the input URLs. This makes matching with data easy and allows clean downloads with organized filenames. For user convenience, it also offers options commonly found in image downloaders: using the original filename from the site or assigning only numbers.
{% endcolumn %}
{% endcolumns %}

<br>


# How should I prepare the Excel file to upload to the Image Downloader?

### 1. Extract the webpage that contains the images you want to download with Listly.

<figure><img src="/files/cf54c43d89fa05b1140019e17d7aa4dbe7614a3d" alt=""><figcaption></figcaption></figure>

You can extract web pages containing images through Listly and download an Excel file to easily prepare URLs for download.\
Through Listly, you can collect image URLs with just a few simple clicks.

### 2. Check the column position where the image URLs are located in the Excel file.

<figure><img src="/files/210edd1602a3512e4e8b8fef23060974b96d8421" alt=""><figcaption></figcaption></figure>

Check URLs: Verify the data that appears as links in the Excel file. In the example file, column A is the webpage address itself, and column B contains the image URLs.\
Because column arrangements may differ by file, label or record the location of the column that contains the image URLs.

### 3. Check or create the column in the Excel file to use as the filename.

<figure><img src="/files/6085e84aaf26a3351cb8bdc1350a84c44b61e59a" alt=""><figcaption></figcaption></figure>

Mark the data column to use as the filename, or edit and organize the necessary data.\
In the example, a new FILE NAME column was created in column F by combining the brand name + item name.\
Using the Listly image downloader, you can download image files in the freely edited name order.

{% hint style="success" %}
**Notes**&#x20;

Listly Image Downloader treats the first row of the Excel file as the title. It’s convenient to give separate headings to the Image URL and filename columns for easy identification.
{% endhint %}


# Do I have to upload an Excel file when using the Image Downloader?

No. Even without uploading an Excel file, **copy/paste method**can be used to download images.\
**Image URL field**can be entered directly in all plans, so it can be used easily.

However, **the ability to directly enter/edit filenames is supported starting from Listly Light plan**.

<figure><img src="/files/957a35259535641347c640954cb26f3f6fe05efa" alt=""><figcaption></figcaption></figure>

**Light plan**and up allow you to freely enter and modify filenames in all filename options.

***

#### For free users,

On the free plan you cannot directly enter/edit filenames, but you can perform basic download tasks using the '**original filename**', '**sequence number only**options can be used to perform basic download tasks.**If you want to download images with your desired filenames, upload an Excel file and select the column to use as the filename.**


# What are the differences between the Image Downloader filename options?

Listly Image Downloader offers various filename options so you can choose the method that suits your task:

<figure><img src="/files/8814ca99568d3511493fe44be653e98fdd3d1fd9" alt=""><figcaption></figcaption></figure>

1. **Original file name (Original name)** : Use the original name extracted from the image URL as is.
2. **Import from Excel (From Excel)** : Use the data taken from the specified column of the Excel file as the file name.
3. **Number only (Number Only)** : Create file names using only sequential numbers in the order of the entered URLs.
4. **Number + Original (Number+Original name)** : Create file names by adding a sequence number in front of the original name extracted from the image URL.
5. **Number + Excel (Number+Excel)** : Create file names by adding a sequence number in front of the data imported from Excel.


# I entered a URL but the image did not download.

Check that the URL you entered is not a webpage address. Image URLs are different from webpage addresses and should be a URL that displays only the image.

#### How to resolve

<figure><img src="/files/f1395f64312d36319abaeb765677f60e6aada4b4" alt=""><figcaption></figcaption></figure>

{% stepper %}
{% step %}

### Make sure the URL is correct.

* You must enter a URL that directly displays only the image instead of a webpage.
* Example: <https://example.com/image.jpg>
  {% endstep %}

{% step %}

### Use the preview feature.

* If the image URL is entered correctly, the image will be displayed in the preview area below.
* When the preview displays correctly, proceed with the download.
  {% endstep %}
  {% endstepper %}


# Fewer image files were downloaded than URLs entered.

This post is a help guide related to the Listly image downloader.

<figure><img src="https://images.gitbook.com/__img/dpr=2,width=760,onerror=redirect,format=auto,signature=-2050563593/https%3A%2F%2Fcontent.gitbook.com%2Fcontent%2FiKxoYELFf9WS8XCvYe6S%2Fblobs%2FkRb5x8ZOd8VjSQx9zuu5%2Fimage-downloader-10.png" alt=""><figcaption></figcaption></figure>

If you entered dozens of image URLs as shown above and started the download, but only a significantly smaller number of files were downloaded than the number of URLs entered, **duplicate file names might have been the cause**.&#x20;

<figure><img src="https://images.gitbook.com/__img/dpr=2,width=760,onerror=redirect,format=auto,signature=1313460990/https%3A%2F%2Fcontent.gitbook.com%2Fcontent%2FiKxoYELFf9WS8XCvYe6S%2Fblobs%2FBxEZRTUrqWPmu9PYP3M9%2Fimage-downloader-11.png" alt=""><figcaption></figcaption></figure>

This situation occurs because the image downloader treats images with the same file name as a single file.There are the following solutions to fix this problem.

1. **Use a filename option that includes sequence numbers**Try using (ex. sequence only, sequence + original, sequence + Excel).
2. **Or select a different column in Excel**to specify the file name. If you choose data that does not cause duplicates, you can resolve the issue.​

<figure><img src="https://images.gitbook.com/__img/dpr=2,width=760,onerror=redirect,format=auto,signature=128879992/https%3A%2F%2Fcontent.gitbook.com%2Fcontent%2FiKxoYELFf9WS8XCvYe6S%2Fblobs%2FuSw8aDkzioz2kVyp2tuO%2Fimage-downloader-13.png" alt=""><figcaption></figcaption></figure>


# Troubleshooting by Error Message

If extraction fails, you can determine the cause based on what is shown in the screenshot and get guidance on appropriate solutions. Follow the steps below to resolve the issue.

### **✅ Step 1. Immediately after extraction fails, first check the items below.**

**1. Wait a short time and try extracting again.**

* It may have been a one-time issue due to temporary loading failure of the target site, server error, etc.

  ```
   → Try again after an interval of several minutes or more. If the same problem repeats after retrying, refer to 
  the screen-type guide in Step 2 below. 
  ```

**2. Are you running many tasks simultaneously?**

* Running many tasks at once can cause errors due to processing bottlenecks.

  → If you are doing group extraction, try reducing the number of URLs per group.

  → If it is a single task (such as a scheduled job), it is recommended to stagger them to distribute the workload.

**3. If failures repeat, check whether the error code or screenshot has changed**

* The error code or the screenshot shown when you retry may reveal a more specific cause than before.

  ```
  → If the code or on-screen message has changed, check the guide for that situation in Step 2.
  ```

### **✅** Step 2. Please select the screen type shown in the error screenshot

<figure><img src="/files/b2c95ad0075fca9431084fc20e4338cda350afd0" alt=""><figcaption></figcaption></figure>

When extraction fails, a “screenshot” is generated instead of a result. Here, the error type and **the screen the collector encountered when accessing the target URL**are displayed, and you can infer the cause of the failure from this.

**The same error code can have different causes depending on the screenshot, so** first check which of the situations below the appearance on the screen most closely matches, then follow the guide for that situation.

#### <mark style="background-color:$success;">**Quick links to screen types in error screenshots**</mark>&#x20;

<table data-view="cards"><thead><tr><th></th><th data-hidden data-card-target data-type="content-ref"></th></tr></thead><tbody><tr><td><strong>An access blocked message is shown. (CAPTCHA, bot detection, permission check, inaccessible, etc.)</strong></td><td><a href="https://help.listly.io/~/revisions/Of8Y5h9E9j4cBxLH0fux/support/solutions-by-extraction-error-message/captcha">https://help.listly.io/~/revisions/Of8Y5h9E9j4cBxLH0fux/support/solutions-by-extraction-error-message/captcha</a></td></tr><tr><td><strong>An access blocked message is shown</strong></td><td><a href="https://help.listly.io/~/revisions/5WUPnKehlmZKHpmIsk08/support/solutions-by-extraction-error-message/access-block">https://help.listly.io/~/revisions/5WUPnKehlmZKHpmIsk08/support/solutions-by-extraction-error-message/access-block</a></td></tr><tr><td><strong>Only a connection failure message is shown.</strong></td><td><a href="https://app.gitbook.com/o/Uu6AM3fgpZza0EpsJM4N/s/goHfMCeMlqJPW61OR5d1/~/edit/~/changes/76/support/solutions-by-extraction-error-message/connection-failure">https://app.gitbook.com/o/Uu6AM3fgpZza0EpsJM4N/s/goHfMCeMlqJPW61OR5d1/~/edit/~/changes/76/support/solutions-by-extraction-error-message/connection-failure</a></td></tr><tr><td><strong>A popup window is covering the extraction area.</strong></td><td><a href="https://app.gitbook.com/o/Uu6AM3fgpZza0EpsJM4N/s/goHfMCeMlqJPW61OR5d1/~/edit/~/changes/76/support/solutions-by-extraction-error-message/popup-window">https://app.gitbook.com/o/Uu6AM3fgpZza0EpsJM4N/s/goHfMCeMlqJPW61OR5d1/~/edit/~/changes/76/support/solutions-by-extraction-error-message/popup-window</a></td></tr><tr><td><strong>A login screen is displayed.</strong></td><td><a href="https://app.gitbook.com/o/Uu6AM3fgpZza0EpsJM4N/s/goHfMCeMlqJPW61OR5d1/~/edit/~/changes/76/support/solutions-by-extraction-error-message/login-screen">https://app.gitbook.com/o/Uu6AM3fgpZza0EpsJM4N/s/goHfMCeMlqJPW61OR5d1/~/edit/~/changes/76/support/solutions-by-extraction-error-message/login-screen</a></td></tr><tr><td><strong>Only a blank screen with nothing is visible.</strong></td><td><a href="https://app.gitbook.com/o/Uu6AM3fgpZza0EpsJM4N/s/goHfMCeMlqJPW61OR5d1/~/edit/~/changes/76/support/solutions-by-extraction-error-message/blank-empty-screen">https://app.gitbook.com/o/Uu6AM3fgpZza0EpsJM4N/s/goHfMCeMlqJPW61OR5d1/~/edit/~/changes/76/support/solutions-by-extraction-error-message/blank-empty-screen</a></td></tr><tr><td><strong>Only the main content is not visible.</strong></td><td><a href="https://help.listly.io/~/revisions/qSlWzjkSGWSbwiQWG3BZ/support/solutions-by-extraction-error-message/main-content-not-visible">https://help.listly.io/~/revisions/qSlWzjkSGWSbwiQWG3BZ/support/solutions-by-extraction-error-message/main-content-not-visible</a></td></tr><tr><td><strong>[Group extraction] A normal screen with no issues is displayed.</strong></td><td><a href="https://help.listly.io/~/revisions/qSlWzjkSGWSbwiQWG3BZ/support/solutions-by-extraction-error-message/group-extraction-normal-screen">https://help.listly.io/~/revisions/qSlWzjkSGWSbwiQWG3BZ/support/solutions-by-extraction-error-message/group-extraction-normal-screen</a></td></tr><tr><td><strong>[Scheduled extraction] A normal screen with no issues is displayed.</strong></td><td><a href="https://help.listly.io/~/revisions/qSlWzjkSGWSbwiQWG3BZ/support/solutions-by-extraction-error-message/scheduler-normal-screen">https://help.listly.io/~/revisions/qSlWzjkSGWSbwiQWG3BZ/support/solutions-by-extraction-error-message/scheduler-normal-screen</a></td></tr><tr><td><strong>Error code - TimeOutException, TimeLimitExceeded</strong></td><td><a href="https://help.listly.io/~/revisions/qSlWzjkSGWSbwiQWG3BZ/support/solutions-by-extraction-error-message/scheduler-normal-screen">https://help.listly.io/~/revisions/qSlWzjkSGWSbwiQWG3BZ/support/solutions-by-extraction-error-message/scheduler-normal-screen</a></td></tr><tr><td><strong>Error code - AutoClickError</strong></td><td><a href="https://help.listly.io/~/revisions/qSlWzjkSGWSbwiQWG3BZ/support/solutions-by-extraction-error-message/error-code-2">https://help.listly.io/~/revisions/qSlWzjkSGWSbwiQWG3BZ/support/solutions-by-extraction-error-message/error-code-2</a></td></tr><tr><td><strong>Error code - ActionScriptError, ScriptError</strong></td><td><a href="https://help.listly.io/~/revisions/qSlWzjkSGWSbwiQWG3BZ/support/solutions-by-extraction-error-message/error-code-3">https://help.listly.io/~/revisions/qSlWzjkSGWSbwiQWG3BZ/support/solutions-by-extraction-error-message/error-code-3</a></td></tr></tbody></table>

### **✅** Step 3. If none of the above items apply?

Among the examples above, **if none of the items apply or** if it is difficult to accurately determine the cause from the error screenshot alone, [**hello@listly.io**](mailto:hello@listly.io)please contact us at.

**Including the following information when contacting us will allow for faster and smoother support.**

1. **Please provide the URL of the data board failure screen.** If it is group extraction, you may instead provide the URL of the group extraction result screen.
2. **Please capture and send the screen that appears when you directly access the target webpage.** Because the user’s access environment (country settings, login status, etc.) may differ from ours, please mark on the captured image (box, arrow, annotation, etc.) which location’s data you were trying to collect (element/area) so we can check more accurately.


# An access blocked message is shown (CAPTCHA, bot detection, permission check, inaccessible, etc.)

<figure><img src="https://images.gitbook.com/__img/dpr=2,width=760,onerror=redirect,format=auto,signature=-1594922604/https%3A%2F%2Fcontent.gitbook.com%2Fcontent%2FiKxoYELFf9WS8XCvYe6S%2Fblobs%2FDhc7RTbwDPVKqlQLtQ01%2FUntitled.png" alt=""><figcaption></figcaption></figure>

If data extraction fails, a screenshot is automatically generated to analyze the cause of the failure.To see what kinds of errors occur overall, we organized the failure messages.​

<mark style="color:red;">**ConnectionError**</mark>

Appears when a page fails to load. This can occur if the server you visited is down or too slow. It may also be that the LISTLY server's IP address is blocked and the target site returns an error.

**Solution**

If the server is down, you have to wait until it is restored. If it seems the LISTLY server IP address is blocked, you can hide and bypass the IP address using proxy settings.​

<mark style="color:red;">**PartSelectionError**</mark>

Occurs only when extracting with LISTLY PART. There are mainly two causes.

1. The web page design changed and the Part area originally selected at the first extraction disappeared.
2. The IP address of the LISTLY server visiting the web page is blocked, causing a different page to appear.

**Solution**

For case 1, re-extract using LISTLY Whole or Part on the newly designed web page. For case 2, hide and bypass the IP address using proxy settings.​

<mark style="color:red;">**NoListlyContent**</mark>

Appears when the extracted data does not contain list-form content. It usually means there is one item or nothing extracted. When an entire web page is composed only of an iFrame, you may encounter this message if you extract with LISTLY Whole.

**Solution**

Extract from a page with sufficient data. For pages composed of iFrames, press the iFrame button and extract from the iFrame source page to resolve this.​

<mark style="color:red;">**JavascriptException**</mark>

Appears when there is an error in the action script, because action scripts are written as JavaScript code.

**Solution**

LISTLY Team can help modify the action script. [Reach out to us](https://www.listly.io/contact) about ActionScripts.&#x20;

<mark style="color:red;">**SoftTimeLimitExceeded**</mark><mark style="color:red;">,</mark> <mark style="color:red;"></mark><mark style="color:red;">**TimeoutException**</mark>

LISTLY extraction jobs are limited to run for a maximum of 10 minutes. If the 10-minute limit is exceeded, these messages appear. Reasons why a job may take a long time include the following.

1. There is too much data on a single page (e.g., more than 10,000 items).
2. The automatic scroll count is set too high (e.g., 300 auto-scrolls).
3. The automatic click count is set too high (e.g., 300 auto-clicks).

**Solution**

When setting auto-scroll or auto-click, if a warning message like the one below appears, the chance of failure is high, so set it to a value that does not trigger the warning message.​​

<figure><img src="/files/56c24c91e746a1bbb616ab21bb5e04a7284cef0a" alt=""><figcaption></figcaption></figure>

{% hint style="warning" %}
Other error messages are not general/common errors. For more details, [contact LISTLY](https://www.listly.io/contact). We will review carefully and get back to you.
{% endhint %}


# An access blocked message is shown

<figure><img src="https://images.gitbook.com/__img/dpr=2,width=760,onerror=redirect,format=auto,signature=1182902392/https%3A%2F%2Fcontent.gitbook.com%2Fcontent%2FiKxoYELFf9WS8XCvYe6S%2Fblobs%2F2zr5Lc73szGSNiPilBcY%2Fcapcha-1.png" alt=""><figcaption></figcaption></figure>

In the screenshot **CAPTCHA**, **robot detection**, **permission check**, or other **messages suggesting blocking** are displayed,and if the same screen repeats even after retrying later, the collector is **being blocked by the target site.** Regardless of the error code, in this case **proxy settings**are required.​

#### **✅ How to resolve** <a href="#how-to-resolve" id="how-to-resolve"></a>

* **Lower the \[Execution Speed] at the top right of the dashboard or \[Settings → Group Extraction Speed]**&#x74;o '1'. Increasing the interval between requests can help avoid **robot detection** caused by excessive requests.
* **\[Settings → Listly Premium Proxy]** Try selecting an IP from another country in \[Settings → Listly Premium Proxy]. You can bypass the IP address to reaccess blocked pages. Note that this proxy is a shared resource used by all users of the Listly servers, so speed degradation or temporary connection instability may occur.​​<br>

  <figure><img src="/files/b23b0e4293203996876b4a4ed425c096cf976947" alt=""><figcaption></figcaption></figure>

  * If a public proxy does not resolve the issue, consider using a [**private proxy**](https://app.gitbook.com/o/Uu6AM3fgpZza0EpsJM4N/s/goHfMCeMlqJPW61OR5d1/~/edit/~/changes/78/support/faq/proxy/do-i-necessarily-need-a-private-proxy-server) that provides a dedicated IP. This allows for a more stable connection. To apply for a private proxy, contact us via \[[**this link**](https://www.listly.io/contact?about=proxy)] or at <hello@listly.io>.


# Only a connection failure message is shown

<br>

<figure><img src="https://images.gitbook.com/__img/dpr=2,width=760,onerror=redirect,format=auto,signature=555085318/https%3A%2F%2Fcontent.gitbook.com%2Fcontent%2FiKxoYELFf9WS8XCvYe6S%2Fblobs%2FwhLbw0x3dj969yNlqqKB%2Fconnection-1.png" alt=""><figcaption></figcaption></figure>

If only the phrase '**Failed to connect to the page**' is displayed in the error screenshot as above, **it means the page connection failed**.The main causes are as follows, and the screenshot may be shown for various other reasons as well.

1. **Temporary access failure due to the site's own traffic overload**
2. **The collector server's IP address is blocked and the target website refuses the connection**
3. **Proxy connection error of a personal proxy user** (<mark style="color:red;">ProxyConnectionError</mark>)

How to resolve

* First, try accessing the target site directly. If it is not accessible in a regular browser either, this may have something to do with **a temporary problem with the site**. Wait until it is restored and then try the data extraction again.
* If it is not a problem with the target site, **\[Settings → Listly Premium Proxy]** try selecting an IP from another country. You can bypass the IP to access the blocked page again. *(However, this proxy is a shared resource used by all users of Listly servers, so speed degradation or temporary connection instability may occur.)*

<figure><img src="/files/x6bUjT9HXMbCpttyPpLl" alt=""><figcaption></figcaption></figure>

* **If it cannot be resolved with a public proxy,** consider using a dedicated IP provided by [**personal proxy**](https://app.gitbook.com/o/Uu6AM3fgpZza0EpsJM4N/s/goHfMCeMlqJPW61OR5d1/~/edit/~/changes/78/support/faq/proxy/do-i-necessarily-need-a-private-proxy-server). A more stable connection will be possible. To apply for a personal proxy, contact us via \[[**this link**](https://www.listly.io/contact?about=proxy)] or at <hello@listly.io>.
* **If the error code shows '**<mark style="color:red;">**ProxyConnectionError**</mark>**'**, this means **an error that occurs while already using a personal proxy**. It may be that the proxy validity period has expired or there is an error in the registered proxy information. If you want to check or renew the personal proxy status, contact us at <hello@listly.io>.


# A popup window is covering the extraction area

<figure><img src="/files/7q3kNslXHhFShg3Vdrp5" alt=""><figcaption></figcaption></figure>

On the error screenshot, over the data area of the target page **pop-ups, advertisements, notification windows** or other elements that cover the screen are visible, this may cause the system to not recognize the specified **data area** and an error is likely to have occurred.

#### **✅ How to fix** <a href="#how-to-fix" id="how-to-fix"></a>

* **\[Settings → Action Script]** Add a click command that closes the popup in the feature. *(e.g., enter a click command based on text or class names like ‘Close’, ‘×’, ‘OK’)*

<figure><img src="/files/fSDSWYXRBIvKpQq5JCh3" alt=""><figcaption></figcaption></figure>

*→ The above code is an example and may need to be modified for actual application depending on the site structure.However, for relatively simple actions like ‘**Click a specific element once**’, you can* [*check the CSS Selector value of that button*](https://help.listly.io/~/revisions/0fNj2nxt1SI8ayplcZXm/getting-started/extension-features/css-selector) *and then, ‘**Tell me the JavaScript code to click this element**’ — by entering a question like this into an AI tool (e.g., GPT, Claude, Perplexity, etc.), you can easily generate the necessary script.*&#x200B;

{% hint style="success" %}
**If you have tried the suggested method and still cannot resolve the issue, please contact us at** [**hello@listly.io**](mailto:hello@listly.io)**. We will help diagnose the exact cause and assist with a solution.**
{% endhint %}


# A login screen is displayed

<figure><img src="https://images.gitbook.com/__img/dpr=2,width=760,onerror=redirect,format=auto,signature=-409256116/https%3A%2F%2Fcontent.gitbook.com%2Fcontent%2FiKxoYELFf9WS8XCvYe6S%2Fblobs%2Fy7Hf6QcycHgMIDqSe5f5%2Flogin-1.png" alt=""><figcaption></figcaption></figure>

In the error screenshot **Login** If the screen is visible, before the system can access the target page to collect data, **the login authentication may not have been completed properly,** resulting in an inability to load data.In this case, because it remains on the login request screen before recognizing the specified data area or tab, various errors such as PartSelectionError or NoMatchingTab may occur.

#### **✅ How to resolve** <a href="#how-to-resolve" id="how-to-resolve"></a>

* ​[**\[Related help\]** How to set up the Login (beta) feature](https://app.gitbook.com/o/Uu6AM3fgpZza0EpsJM4N/s/goHfMCeMlqJPW61OR5d1/~/edit/~/changes/78/getting-started/databoard-features/settings-auto-login). Please refer to it and try configuring automatic login.
* ※ However, recently procedures and security have been strengthened with measures like two-factor authentication and social login, so automatic login functionality is often restricted. If you want to extract a private page, **we recommend using the '**[**Tabs**](https://help.listly.io/~/revisions/0fNj2nxt1SI8ayplcZXm/getting-started/extension-features/tabs-parts)**' feature that allows extraction while you are directly logged into the page in your browser.**

**Additional options**

* On some sites, temporarily storing cookies from a logged-in session to maintain authentication can also be effective. Within the extension popup **\[Use cookies]** If you enable the toggle button and extract data, **authentication cookies will be automatically saved and the logged-in state will be maintained for about one hour.**

<figure><img src="/files/nfIM8rQ8YpsDdrj10GDF" alt=""><figcaption></figcaption></figure>

* If the amount of work to extract can be completed within the time that login is maintained via cookies, you can try this relatively easily. However, stability may vary depending on the user's connection environment or the site's authentication policies, and extraction may fail again after the cookies expire, so please keep this in mind.

{% hint style="success" %}
**If it remains difficult to resolve after trying the suggested methods, please contact us at** [**hello@listly.io**](mailto:hello@listly.io)**. We will help you resolve the issue after accurately diagnosing the cause.**
{% endhint %}


# Only a blank empty screen is visible

\
**Path change**, **Intentional loading delay**, **Redirection**, **Permission restriction** For reasons such as the above, when the collector accesses that URL **if the content does not load and it first reaches an empty page with no content** there is. In this case, the error screenshot will also show only a white background with no content.

<figure><img src="/files/hBLb3bbGthPfQA1NYO4e" alt=""><figcaption></figcaption></figure>

#### **✅ Solution** <a href="#solution" id="solution"></a>

* First, click the \[shortcut icon] next to the URL to directly access the page. For more accurate diagnosis, **browser incognito mode** we recommend opening (browser logged out) and pasting the URL to check. *(Chrome incognito mode shortcut: Ctrl+Shift+N or Command+Shift+N)*

<figure><img src="/files/gAECe42lRCHKiiiYzUlH" alt=""><figcaption></figcaption></figure>

When accessing in incognito mode, **if the intended page appears after a certain time, increase the \[Settings → Wait briefly] time** and try adjusting so extraction proceeds after the page has loaded.

<figure><img src="https://images.gitbook.com/__img/dpr=2,width=760,onerror=redirect,format=auto,signature=1998143704/https%3A%2F%2Fcontent.gitbook.com%2Fcontent%2FiKxoYELFf9WS8XCvYe6S%2Fblobs%2F1WcrcvvzqQASjGWsT7o0%2Fblank-3.png" alt=""><figcaption></figcaption></figure>

If when accessing the URL **the URL in the address bar automatically changes** and **it becomes a different page such as the main screen or a login screen instead of the intended page, Redirection then**it may be difficult to extract with basic system automation settings.

<figure><img src="/files/ZIuUsc2puzk1bOR4pHqQ" alt=""><figcaption></figcaption></figure>

{% hint style="success" %}
**If it is still difficult to resolve even after trying the suggested methods, please contact us at** [**hello@listly.io**](mailto:hello@listly.io)**. We will help you resolve the issue after an accurate diagnosis of the cause.**
{% endhint %}


---

[Next Page](/llms-full.txt/1)